
As quilters we all want a flock of orderly and uniform flying-geese on any of our quilts, right? Then you definitely need to try this technique. It’s so quick, so accurate and so magic! And, indeed, you don’t need a specialty ruler to cut geese from the master blocks. Ready to follow me?

We all want orderly flying-geese!
Anatomy: A Flying-Goose unit is made up with a center triangle and 2 side triangles. This method, through the assembly of 2 master blocks, yields 4 Flying-Geese units at a time.

1. Prepare a 7” square for the center triangle, and a 5½” square for the side triangles. These sizes will give you 4-2”x4” Flying-Geese units.
2. Draw corner-to-corner diagonals lines on the right side of the 7” square, and on the wrong side of the 5 ½” square.
3. Using the diagonal lines as a reference, center the squares with right sides together. Pin baste.
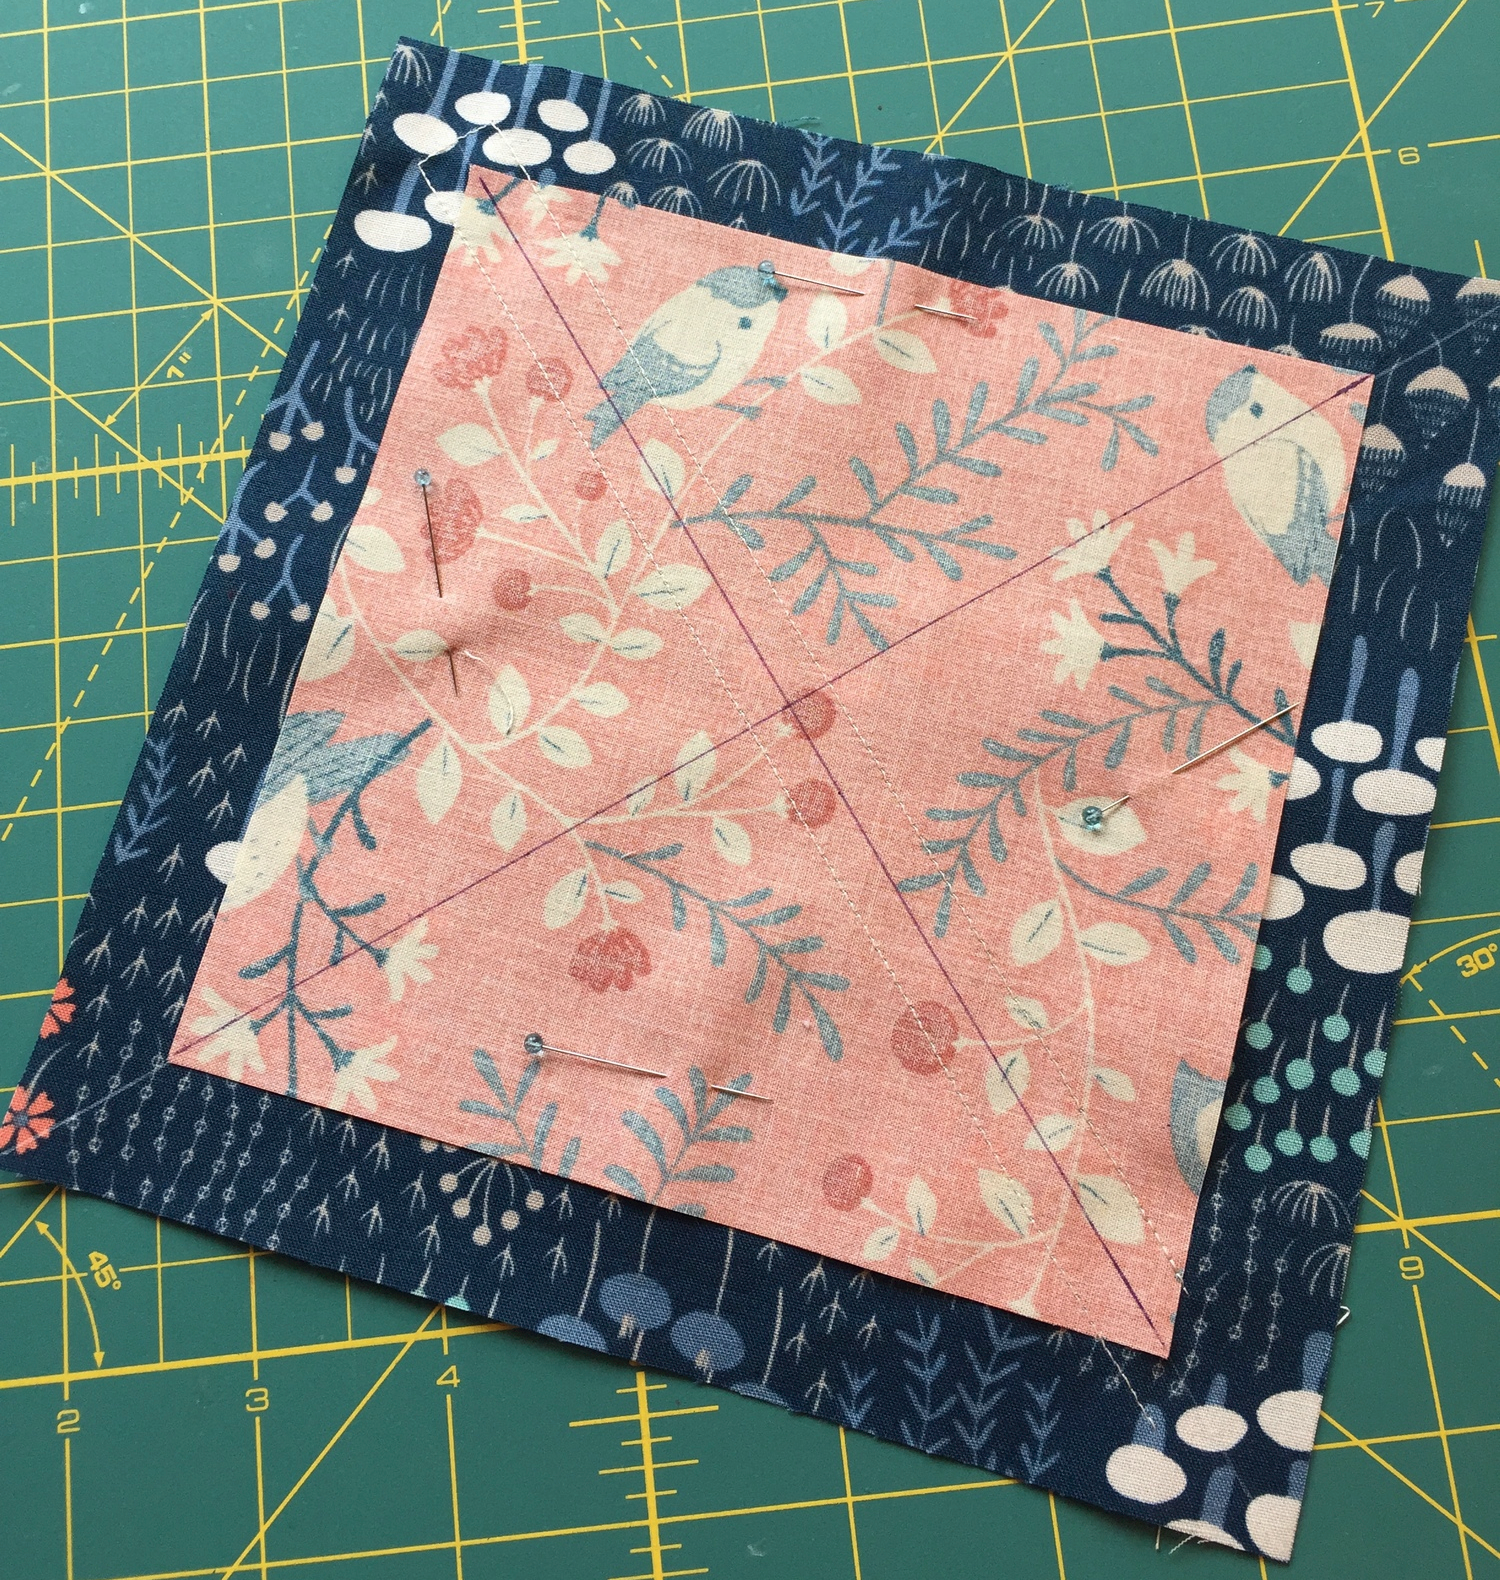
4. Stitch on each side along one diagonal line with a ¼” seam.

5. Cut on the diagonal line with seams to yield two uneven half triangle squares.

6. Press each block open. (Note: I prefer to press seam allowances open for Flying-Geese units to reduce bulkiness).
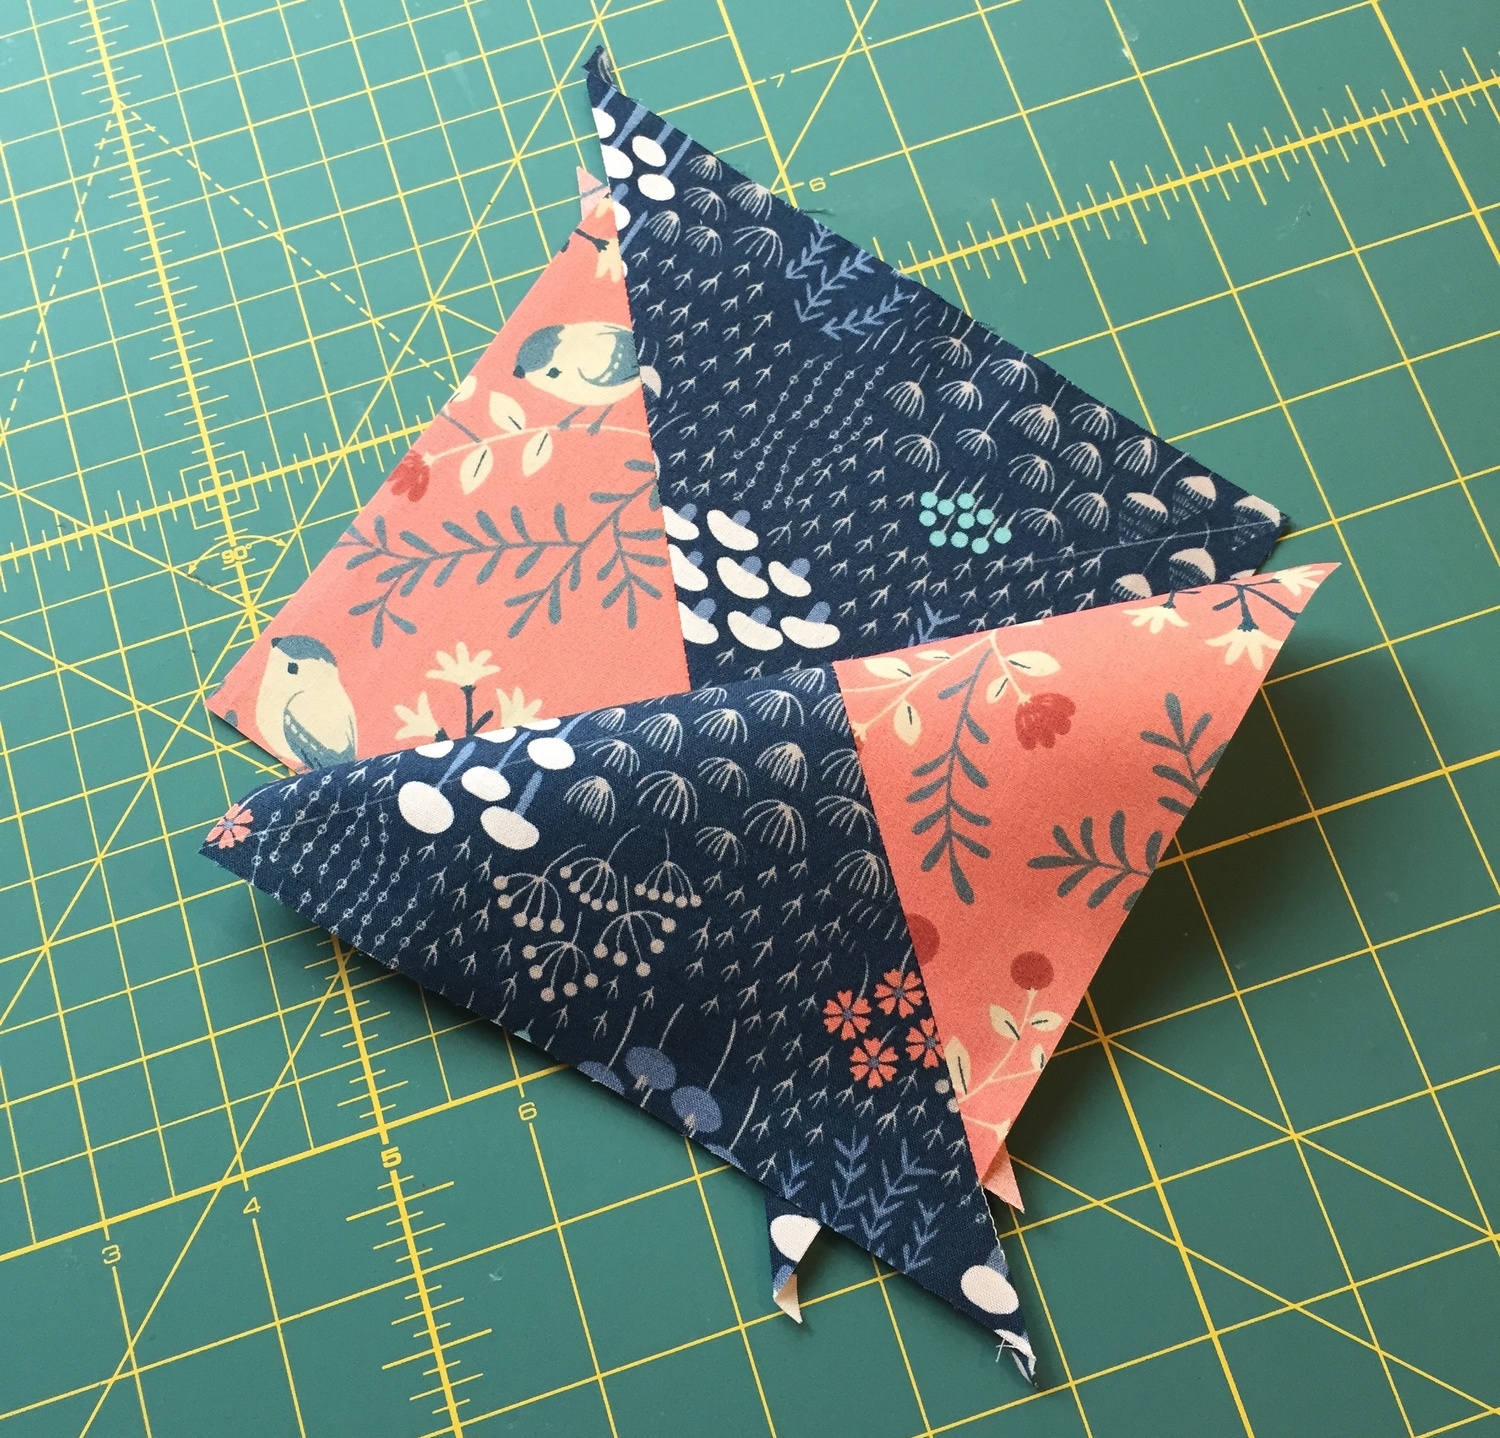
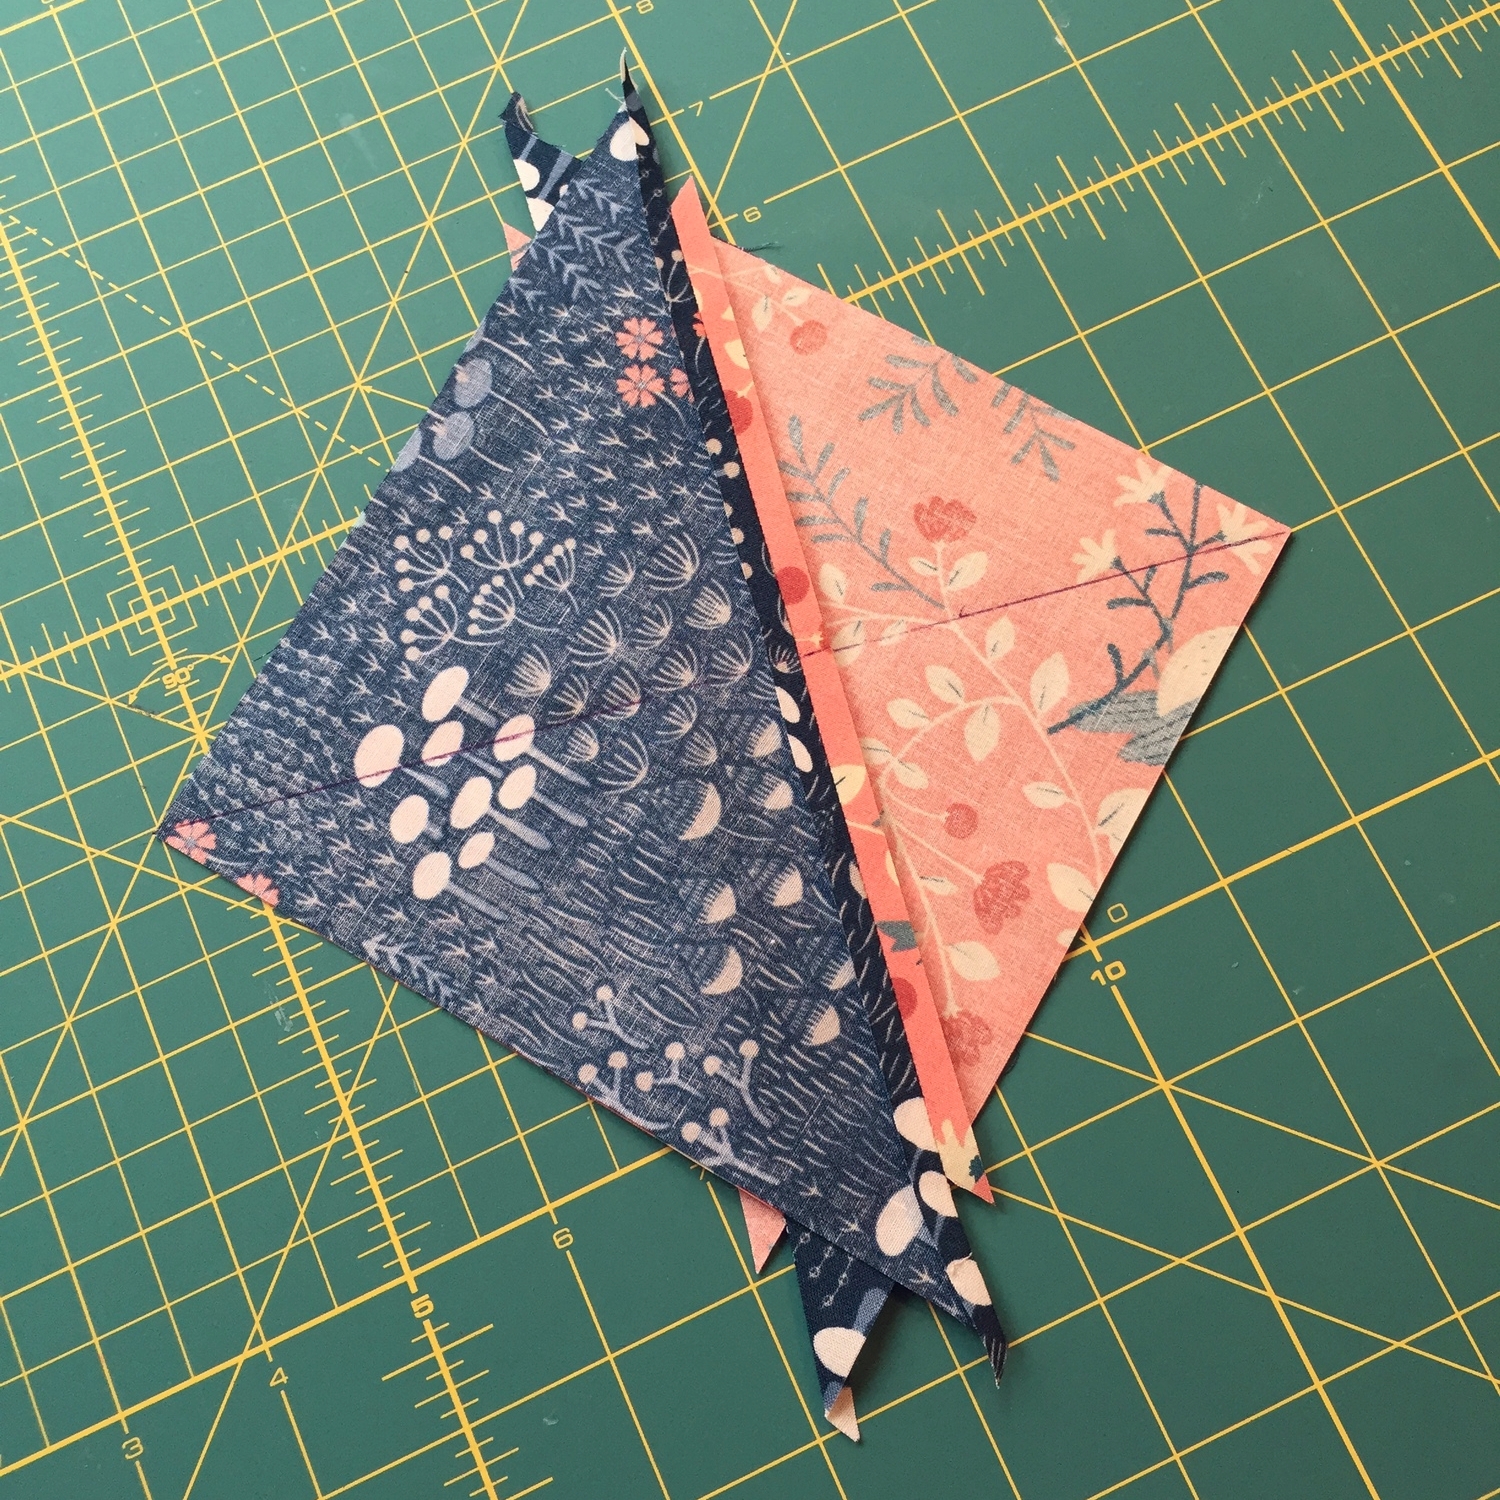
7. Overlap the two blocks with right sides together and opposite prints facing each other.
8. Finish marking the diagonal line on the top block (we didn’t draw any diagonal lines on the wrong side of the 7” square previously so now it’s time to do it).
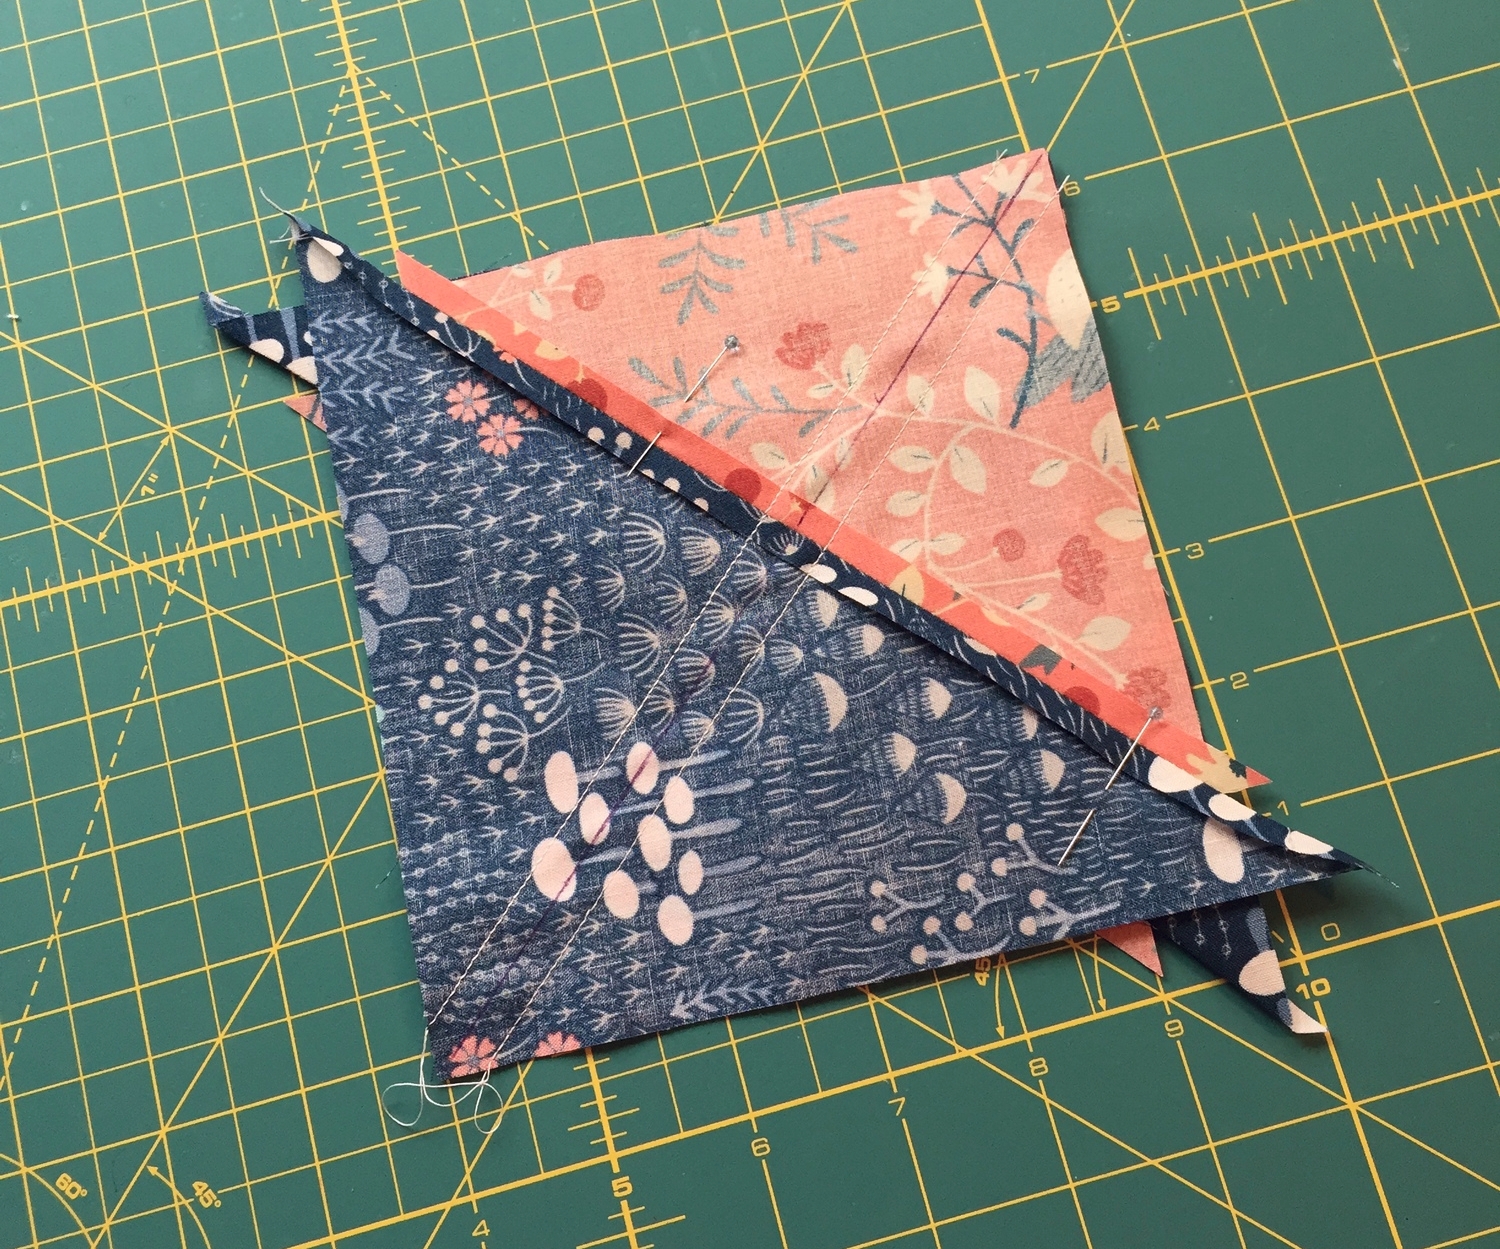

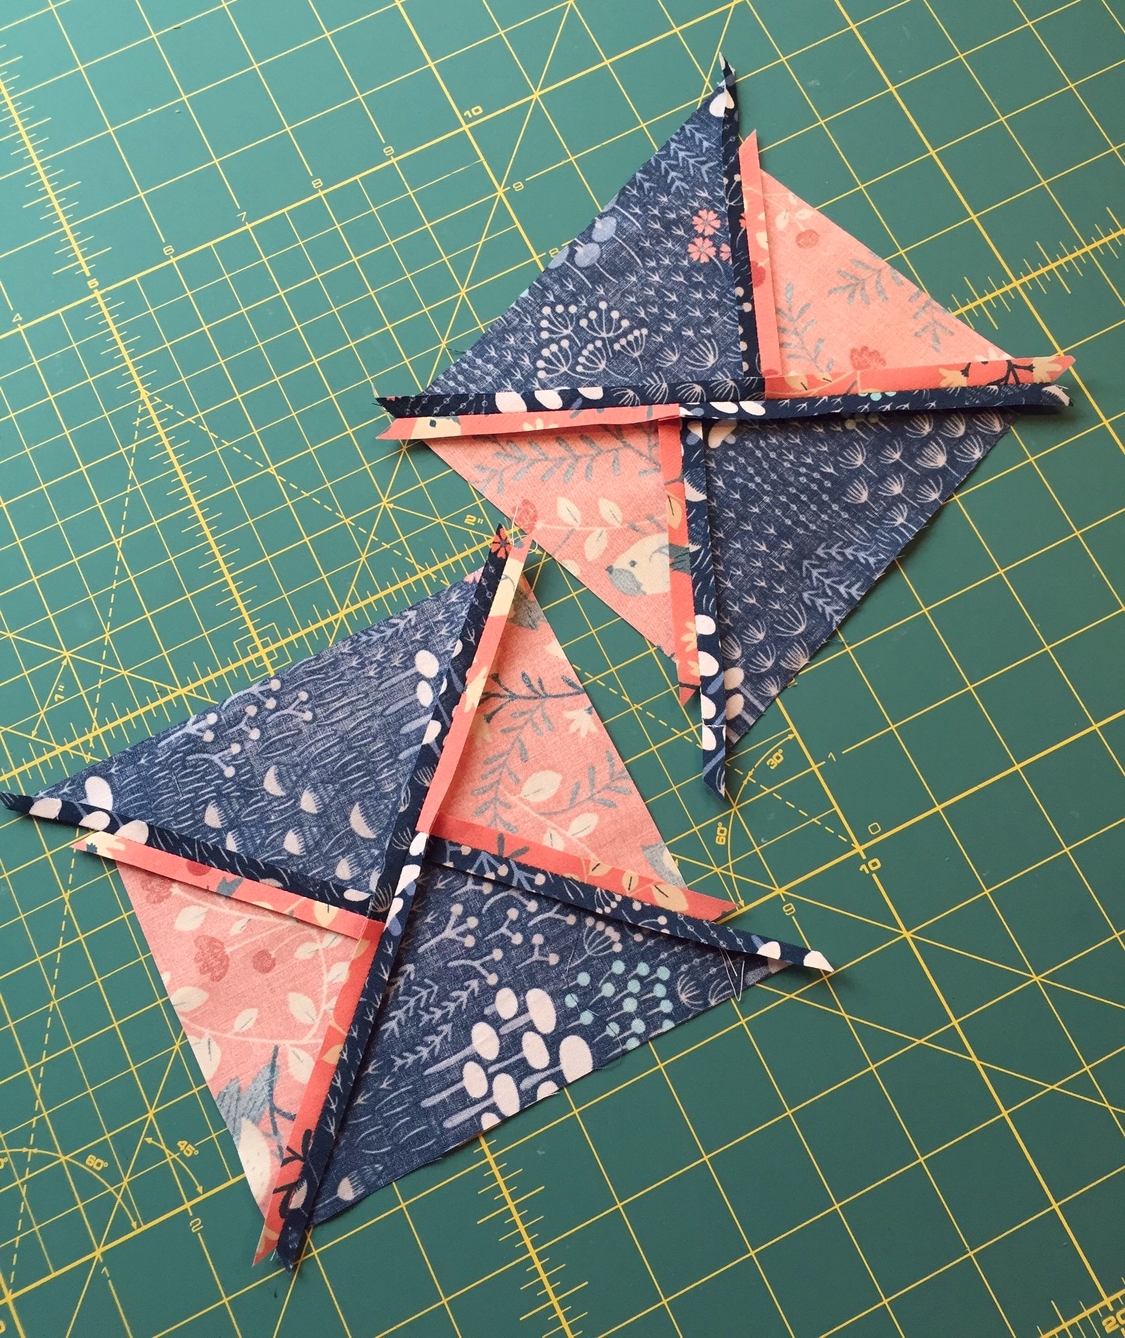
9. Stitch on each side of the diagonal line you just marked with ¼” a seam.
10. Cut on diagonal line to yield 2 uneven quarter triangle squares.
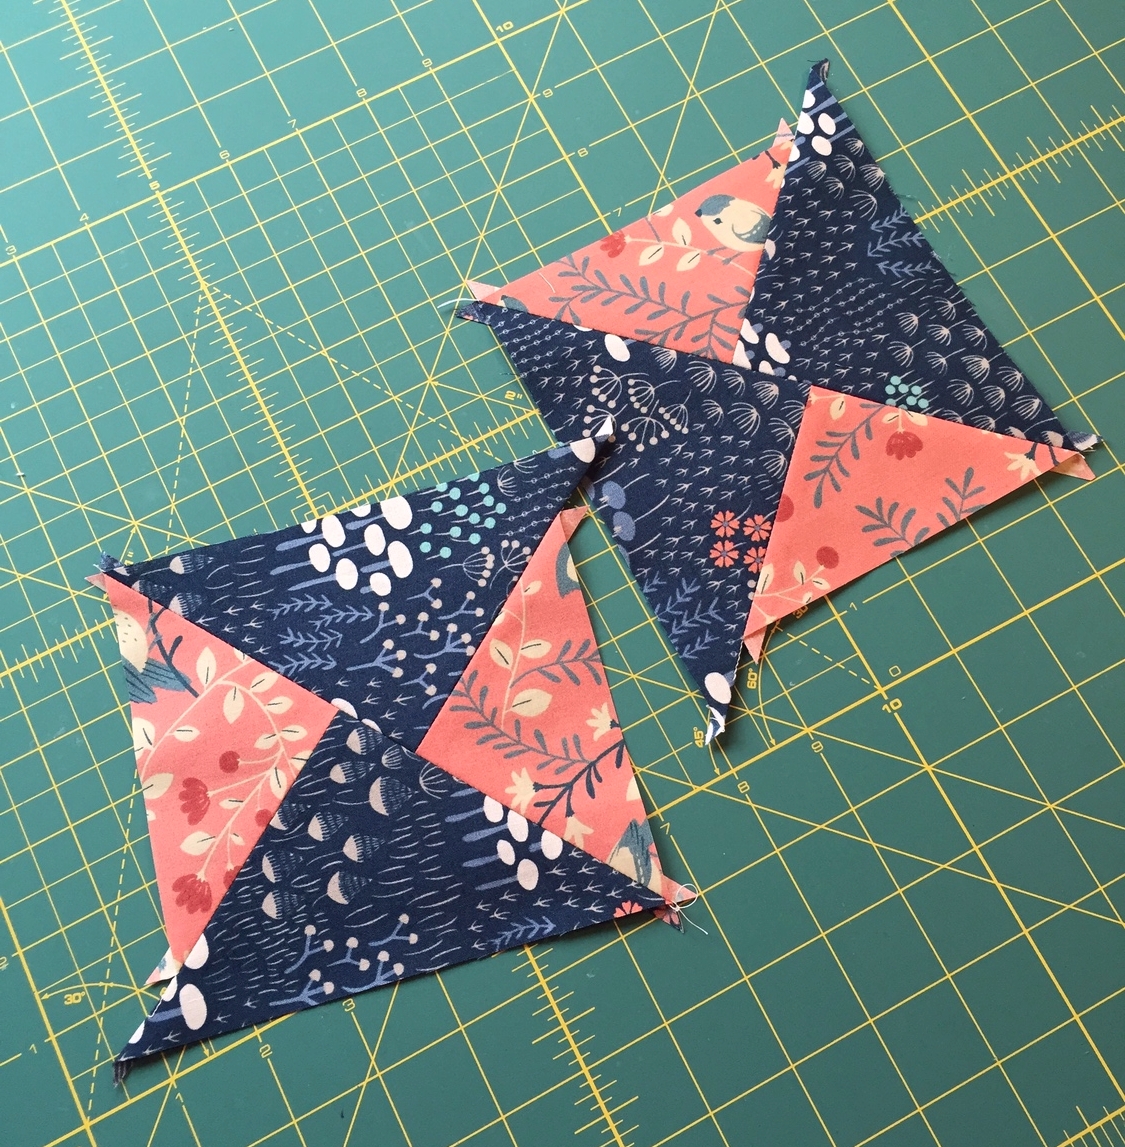
11. Press each unit open. Now you have two master blocks. What we need to do next is to obtain two Flying-Geese units from each master block. Each unit should measure 4½”x2½” (including seam allowances).
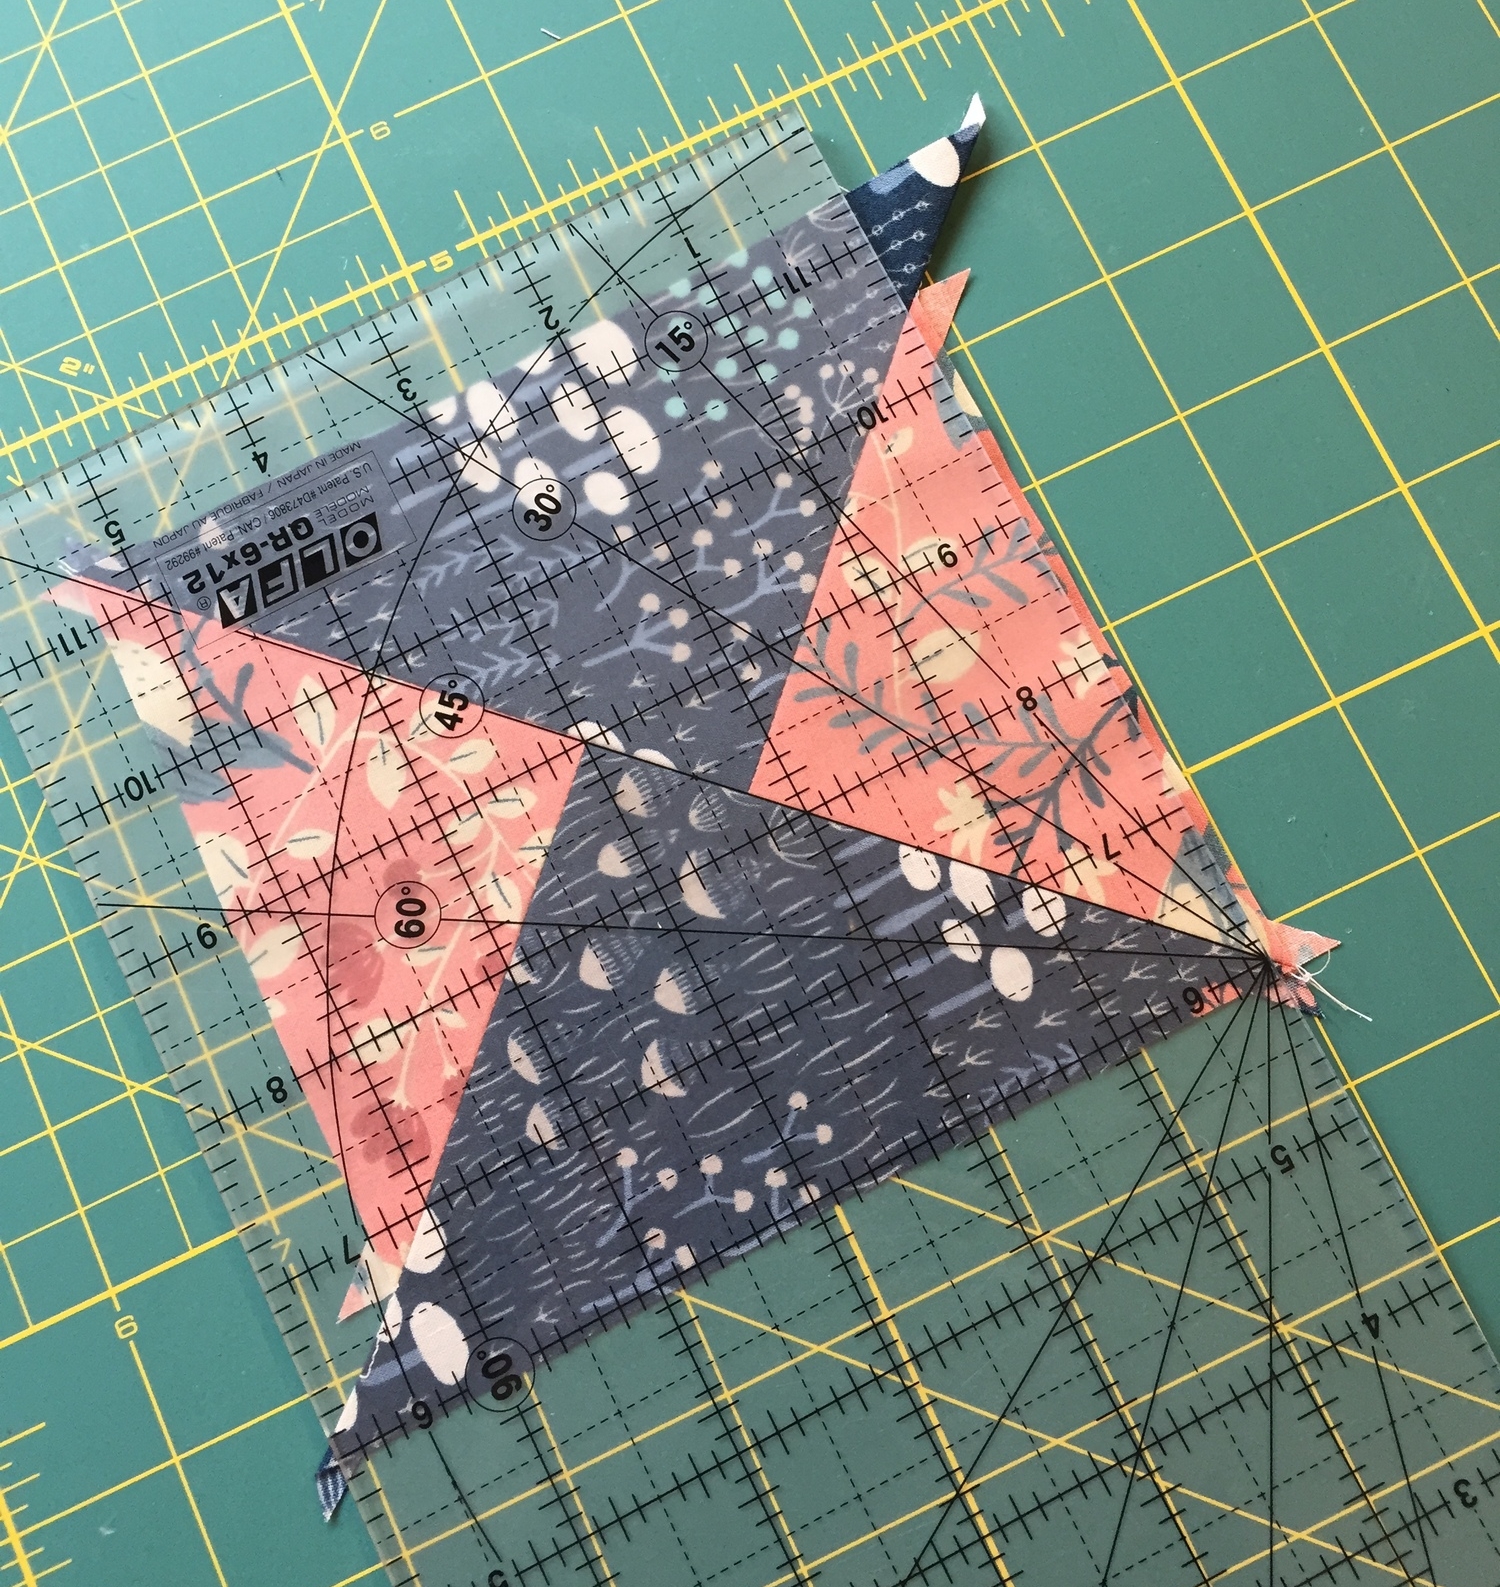
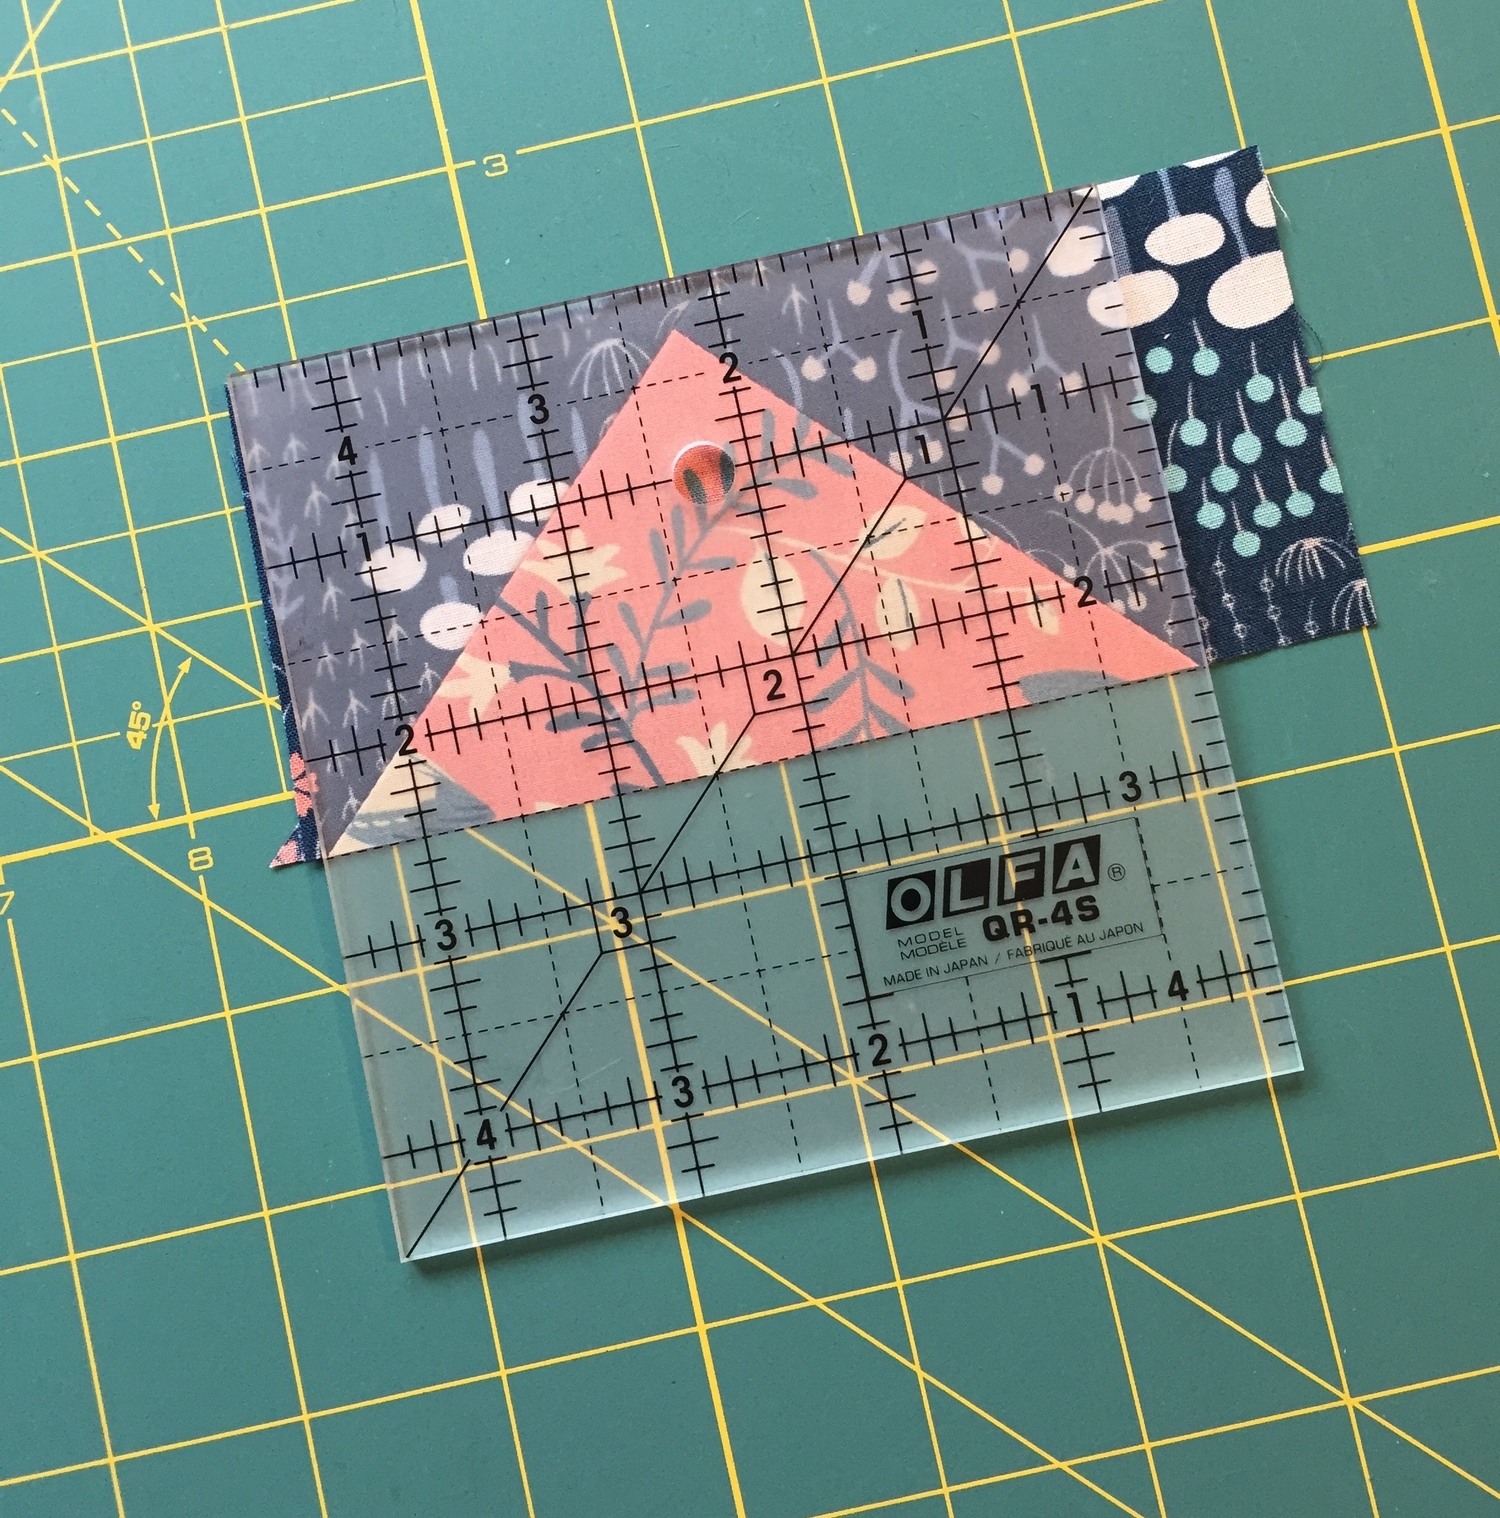
12. Grab a rectangular rotary cutting ruler that has 45° markings. Position ruler as shown. Note how I align a 45° marking to a diagonal seam of the master block.
13. Slightly adjust the position of the ruler so that you can get an exact 4½” edge for the base of the center triangle of a Frying-Goose unit. In the photo, I have one end of the base positioned at the 6” tick and the other end at the 10½” tick. 10½” – 6” = 4½”, all right? Once you get the position of the ruler right, trim to get the first clean edge.
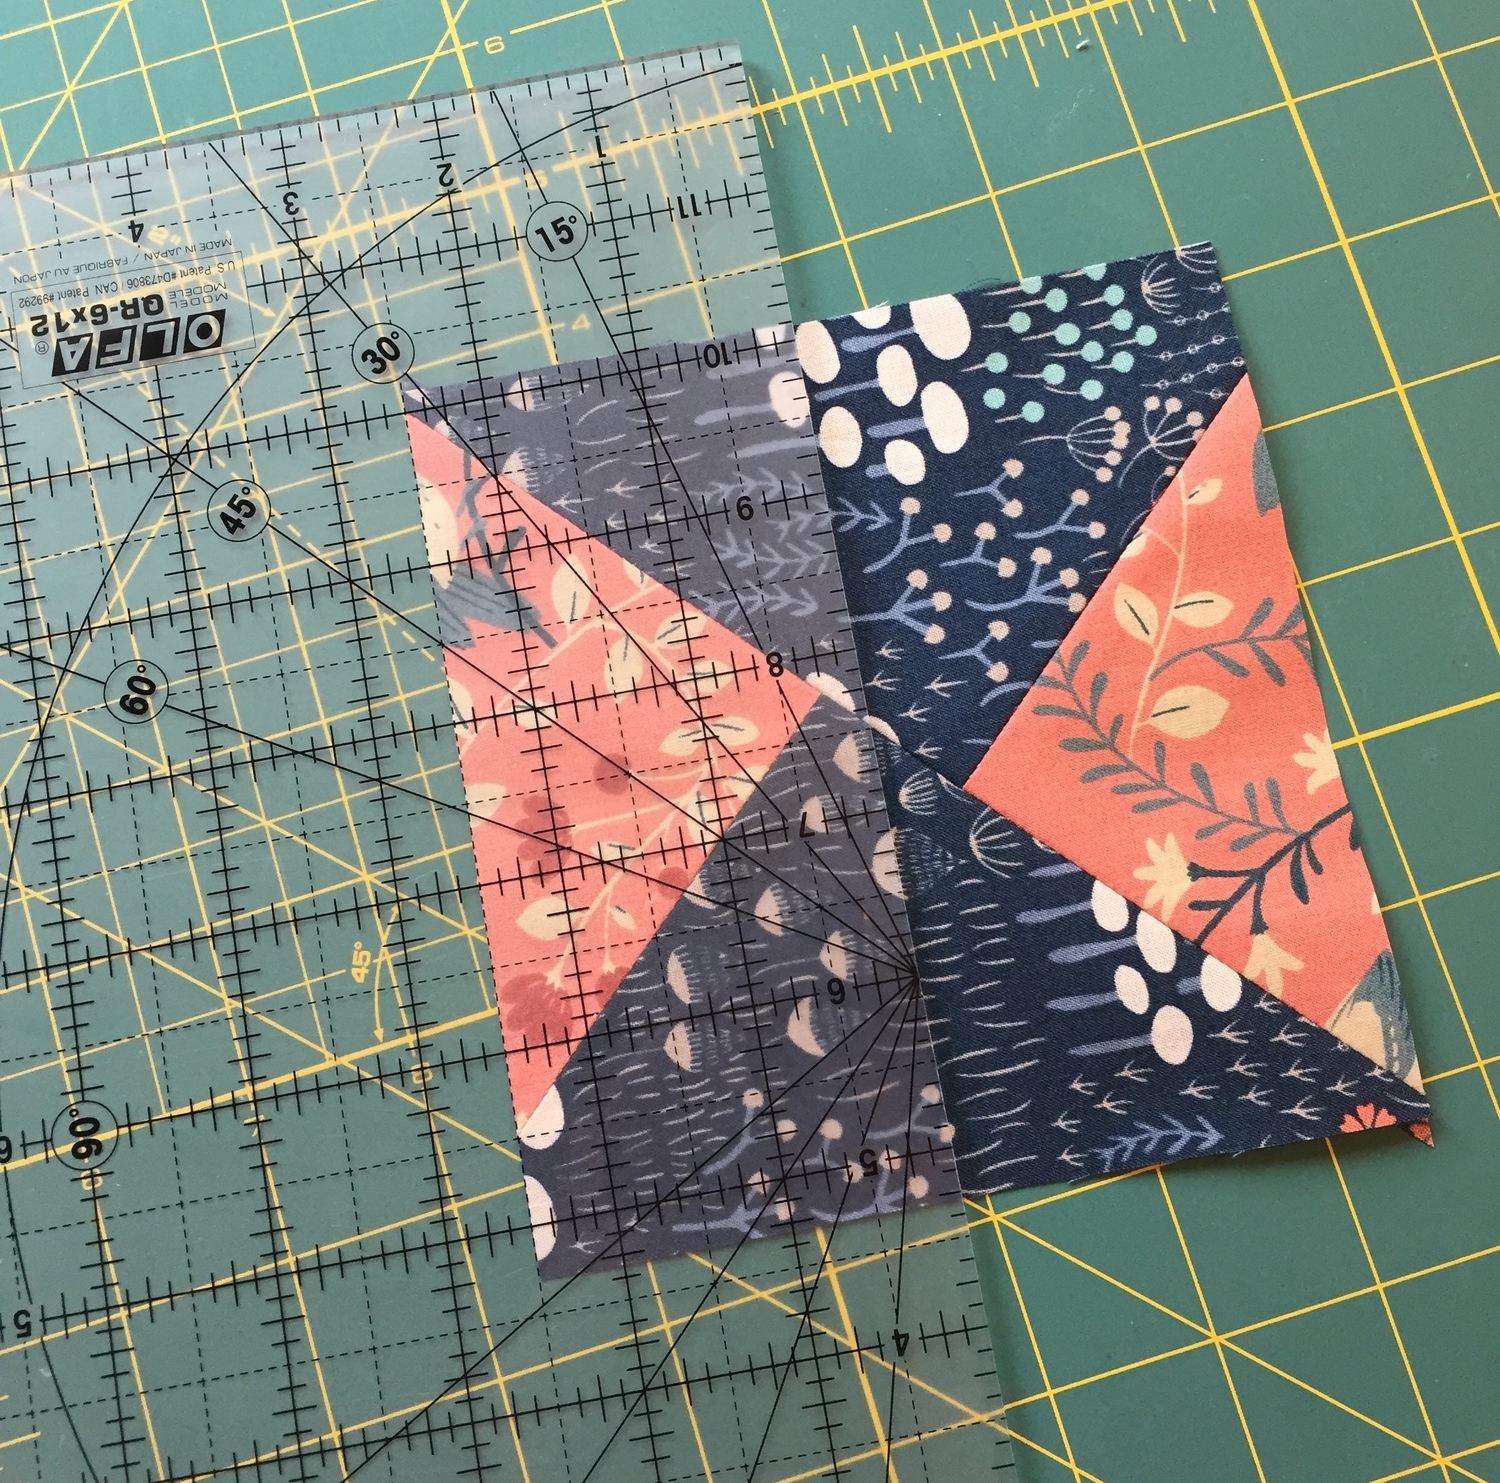
14. Repeat step 13 to clean up the raw edge on the opposite side.
15. Measure 2½” from a cleaned edge, cut.
16. Measure 2½” from the other cleaned edge, cut. Now you should have two almost done Flying-Geese units that measure exactly 2½” wide. Next we need to clean up the short edges.
17. It’s much easier to clean the short edges. Simply align the base line of the center triangle to one of the horizontal markings on your ruler, have the edge of the ruler intersecting the lower right corner of the center triangle, and cut.
18. Repeat step 17 for the other short edge.

19. Do the same thing for the other master block to get a total of four extremely accurate Flying-Geese units.
Wonder how to determine the size of squares to cut? Here is the bonus. Instead of giving you a table, I will give you the formulas that work for any size. Let's say you want a Flying-Geese unit of x inches long and y inches wide (without seam allowances), then:
- For the center triangle, you need to cut an (x+1.5") square.
- For the side triangles, you need to cut a (2y+3") square.
In this tutorial, I wanted my Flying-Geese units measured 4" long by 2" wide. So I cut a 4"+1.5" = 5.5" square for the center triangle, and a 2x2"+3" = 7" square for the side triangles. Easy math, right?
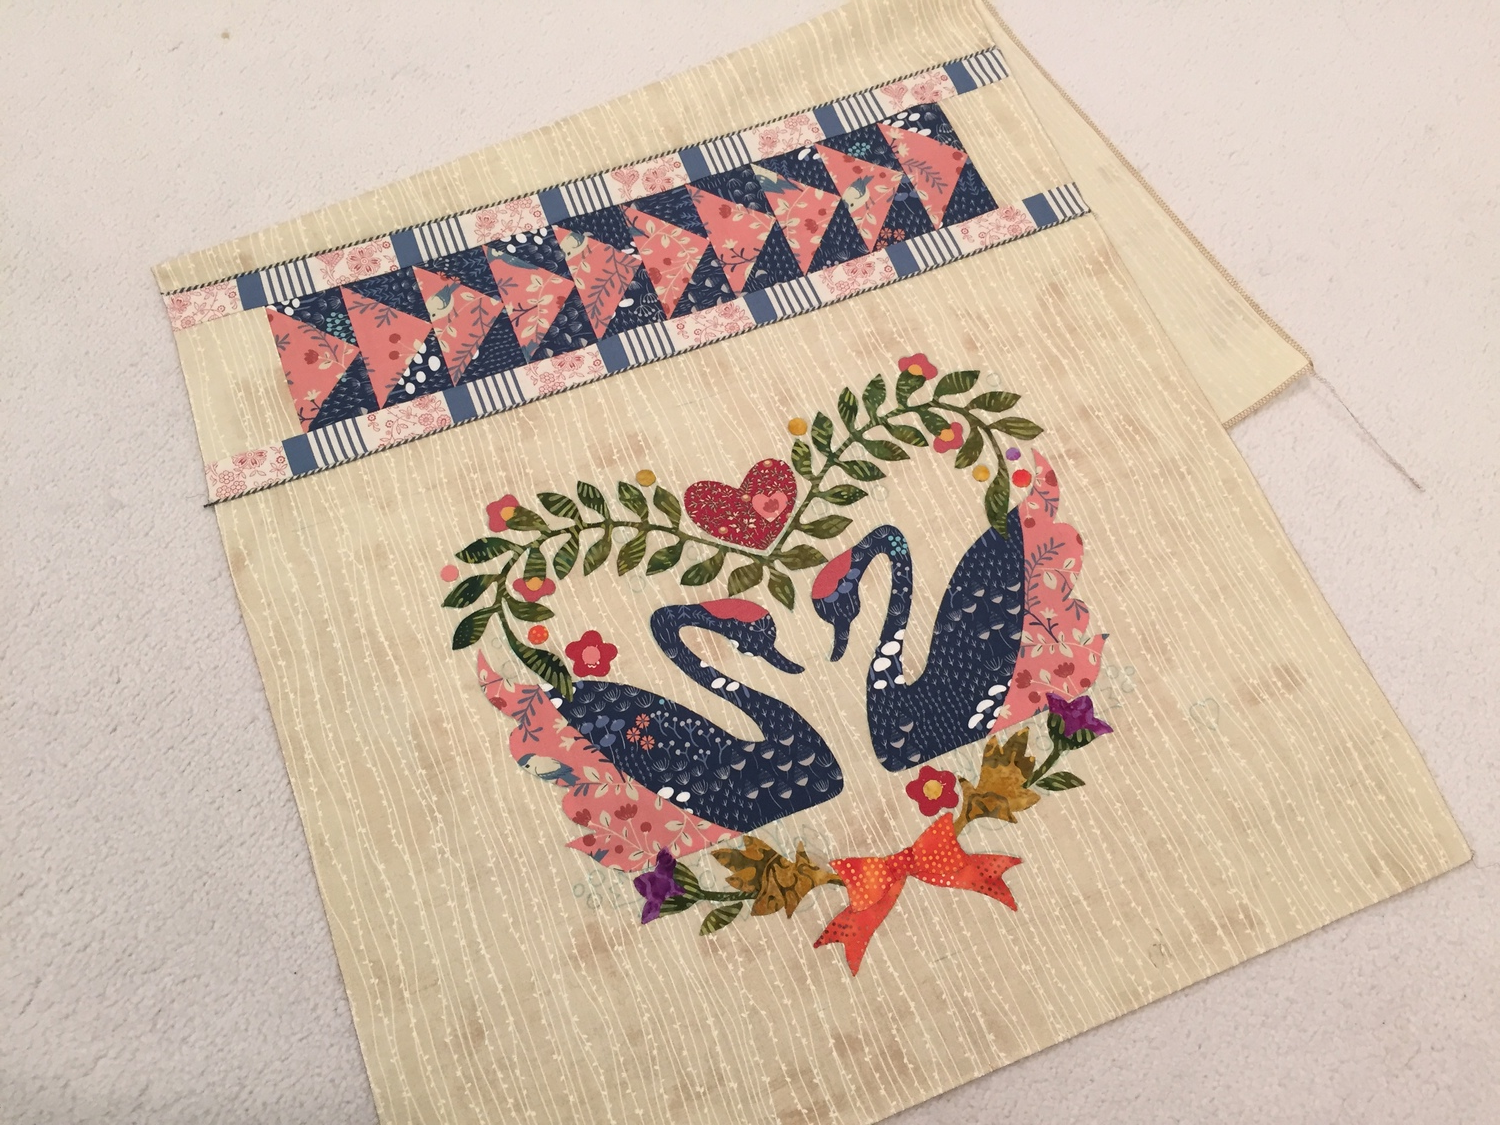
Here is how I used the Flying-Geese units just made for my next project!