The Triangle Quilt

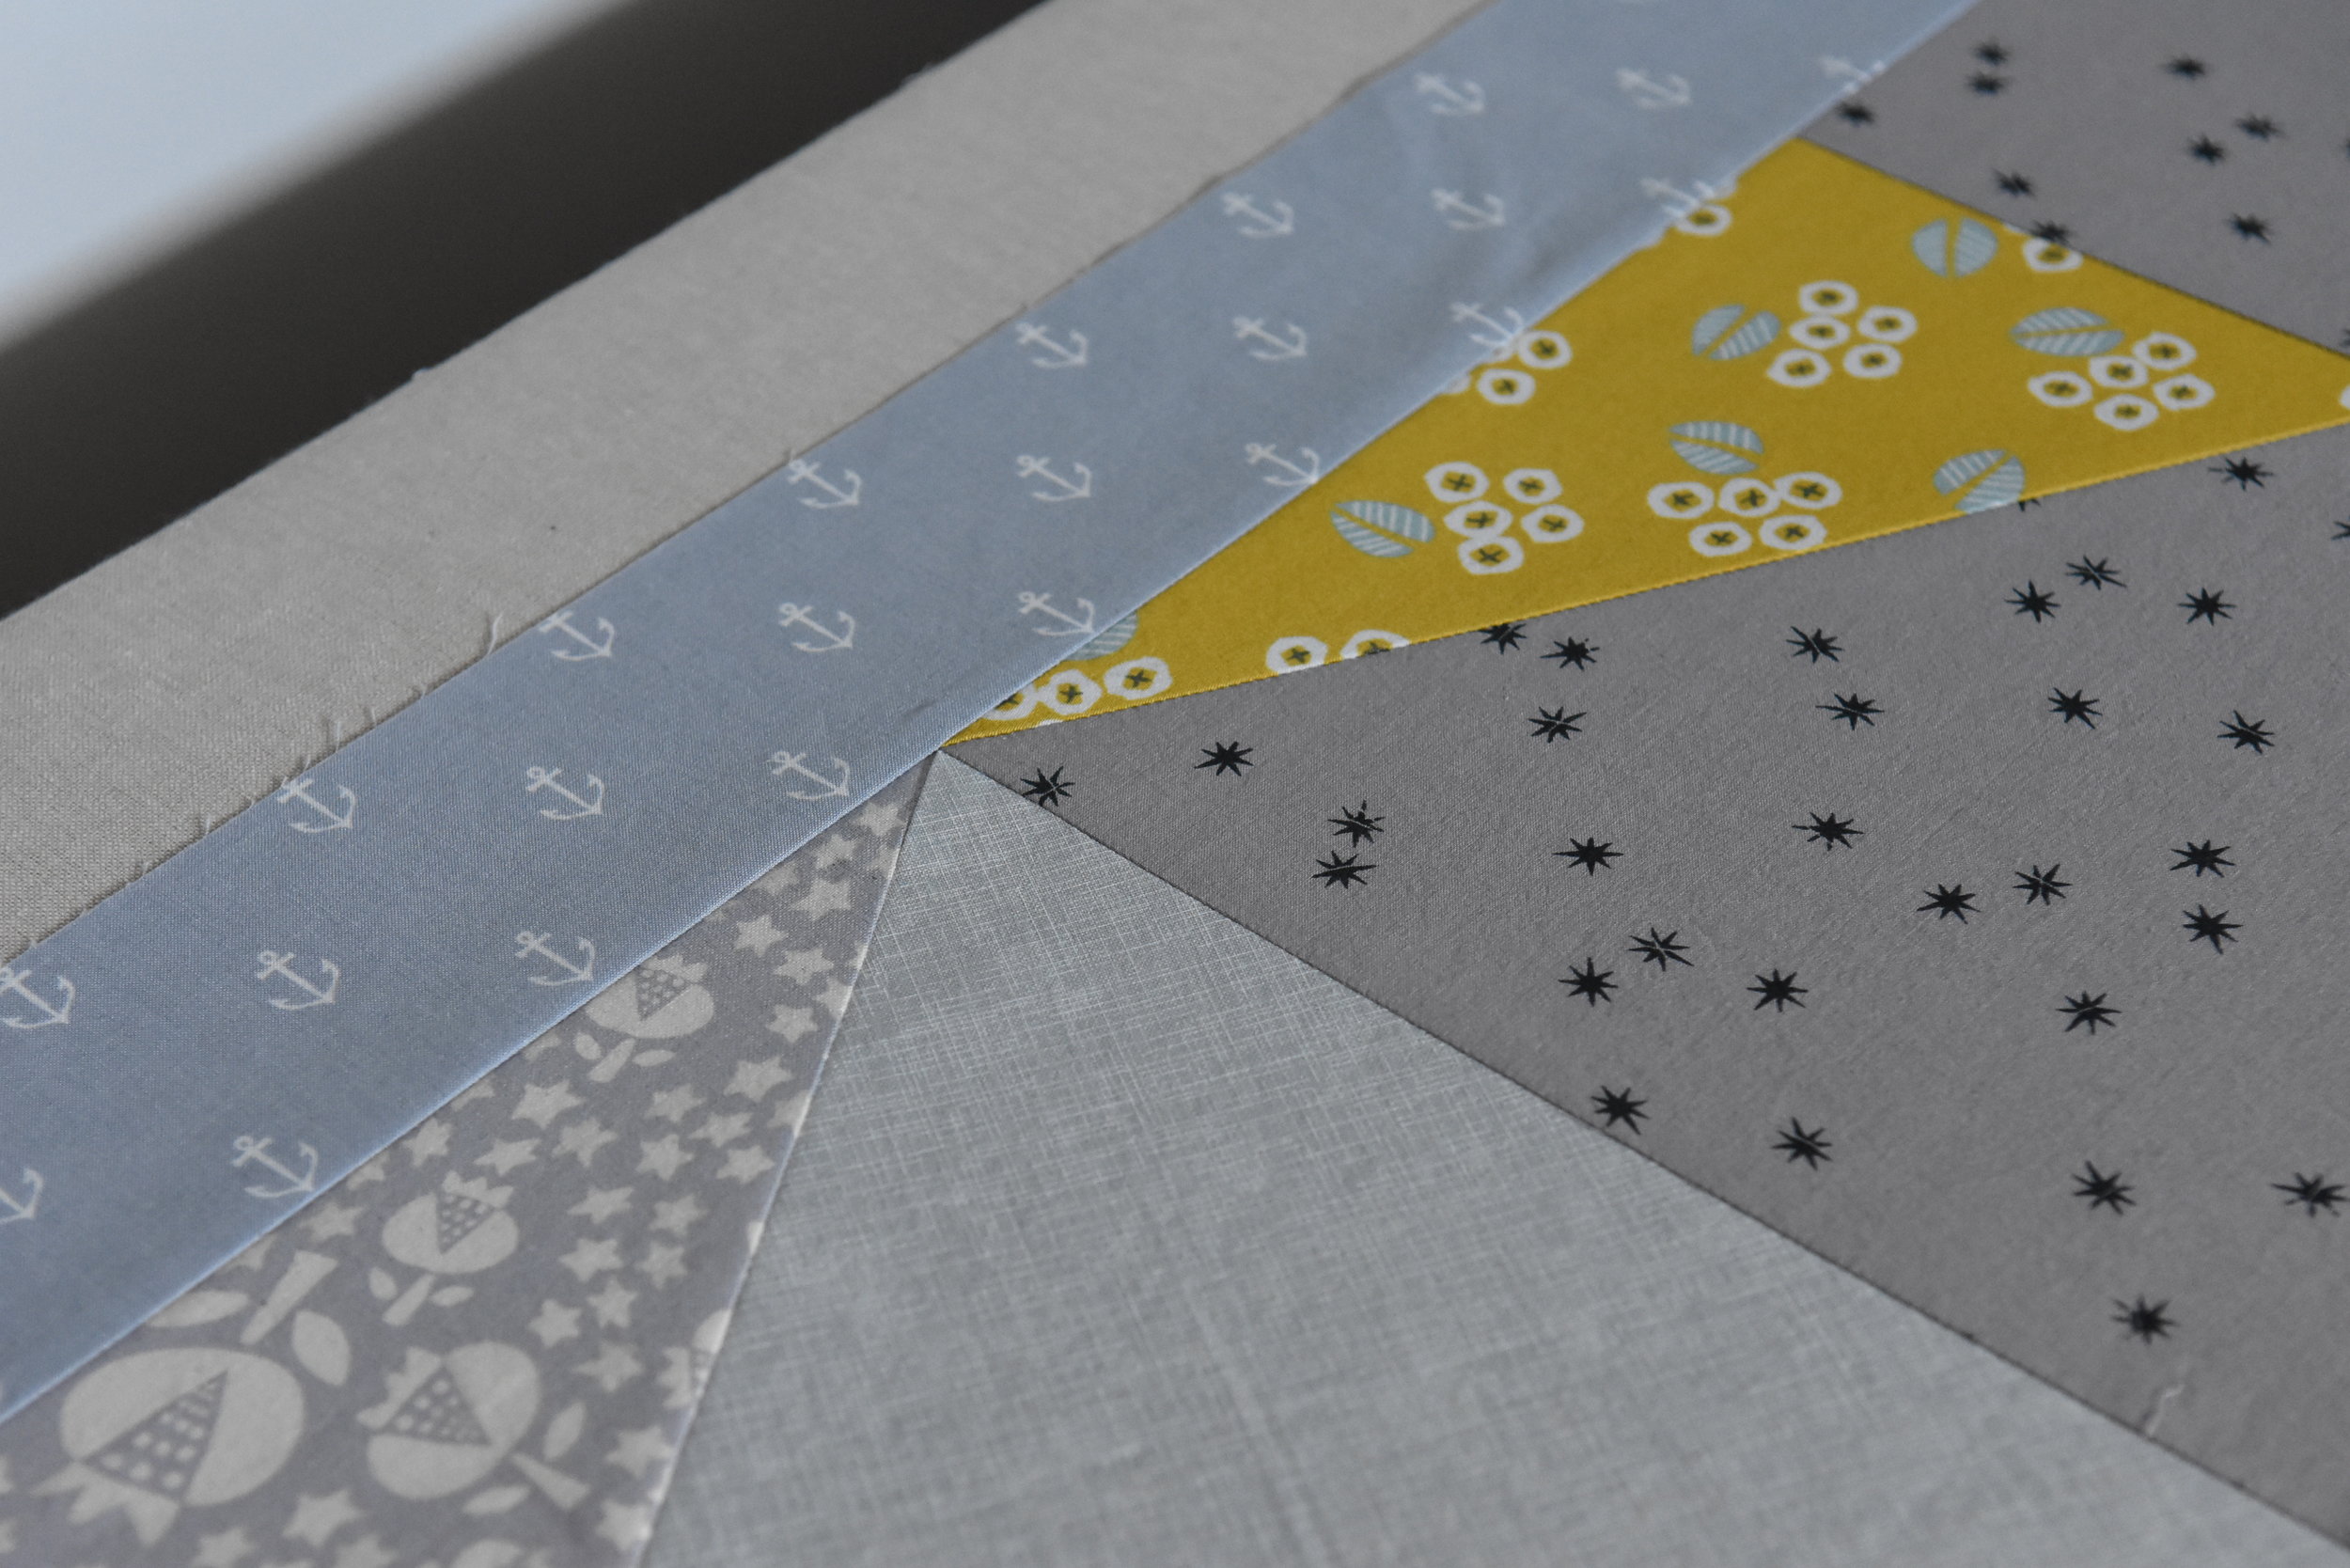
More precisely, this is an equilateral triangle block quilt, my first ever triangular quilting project, and my first experiment of steering away from my comfort zone of traditional, scrappy and cheerful color palettes to taste something more austere and restrained. 

A lot of the pieces were cut from Atelier Brunette collections that I bought in Paris last October, so the quilt actually carries quite a bit of sentimental value. However, those fabrics are very thin cotton lawns that I must wash and use the quilt carefully. The advantage of using cotton lawns is that the finished quilt is very soft and delicate, a totally different look than the regular broadcloth quilting cottons.  

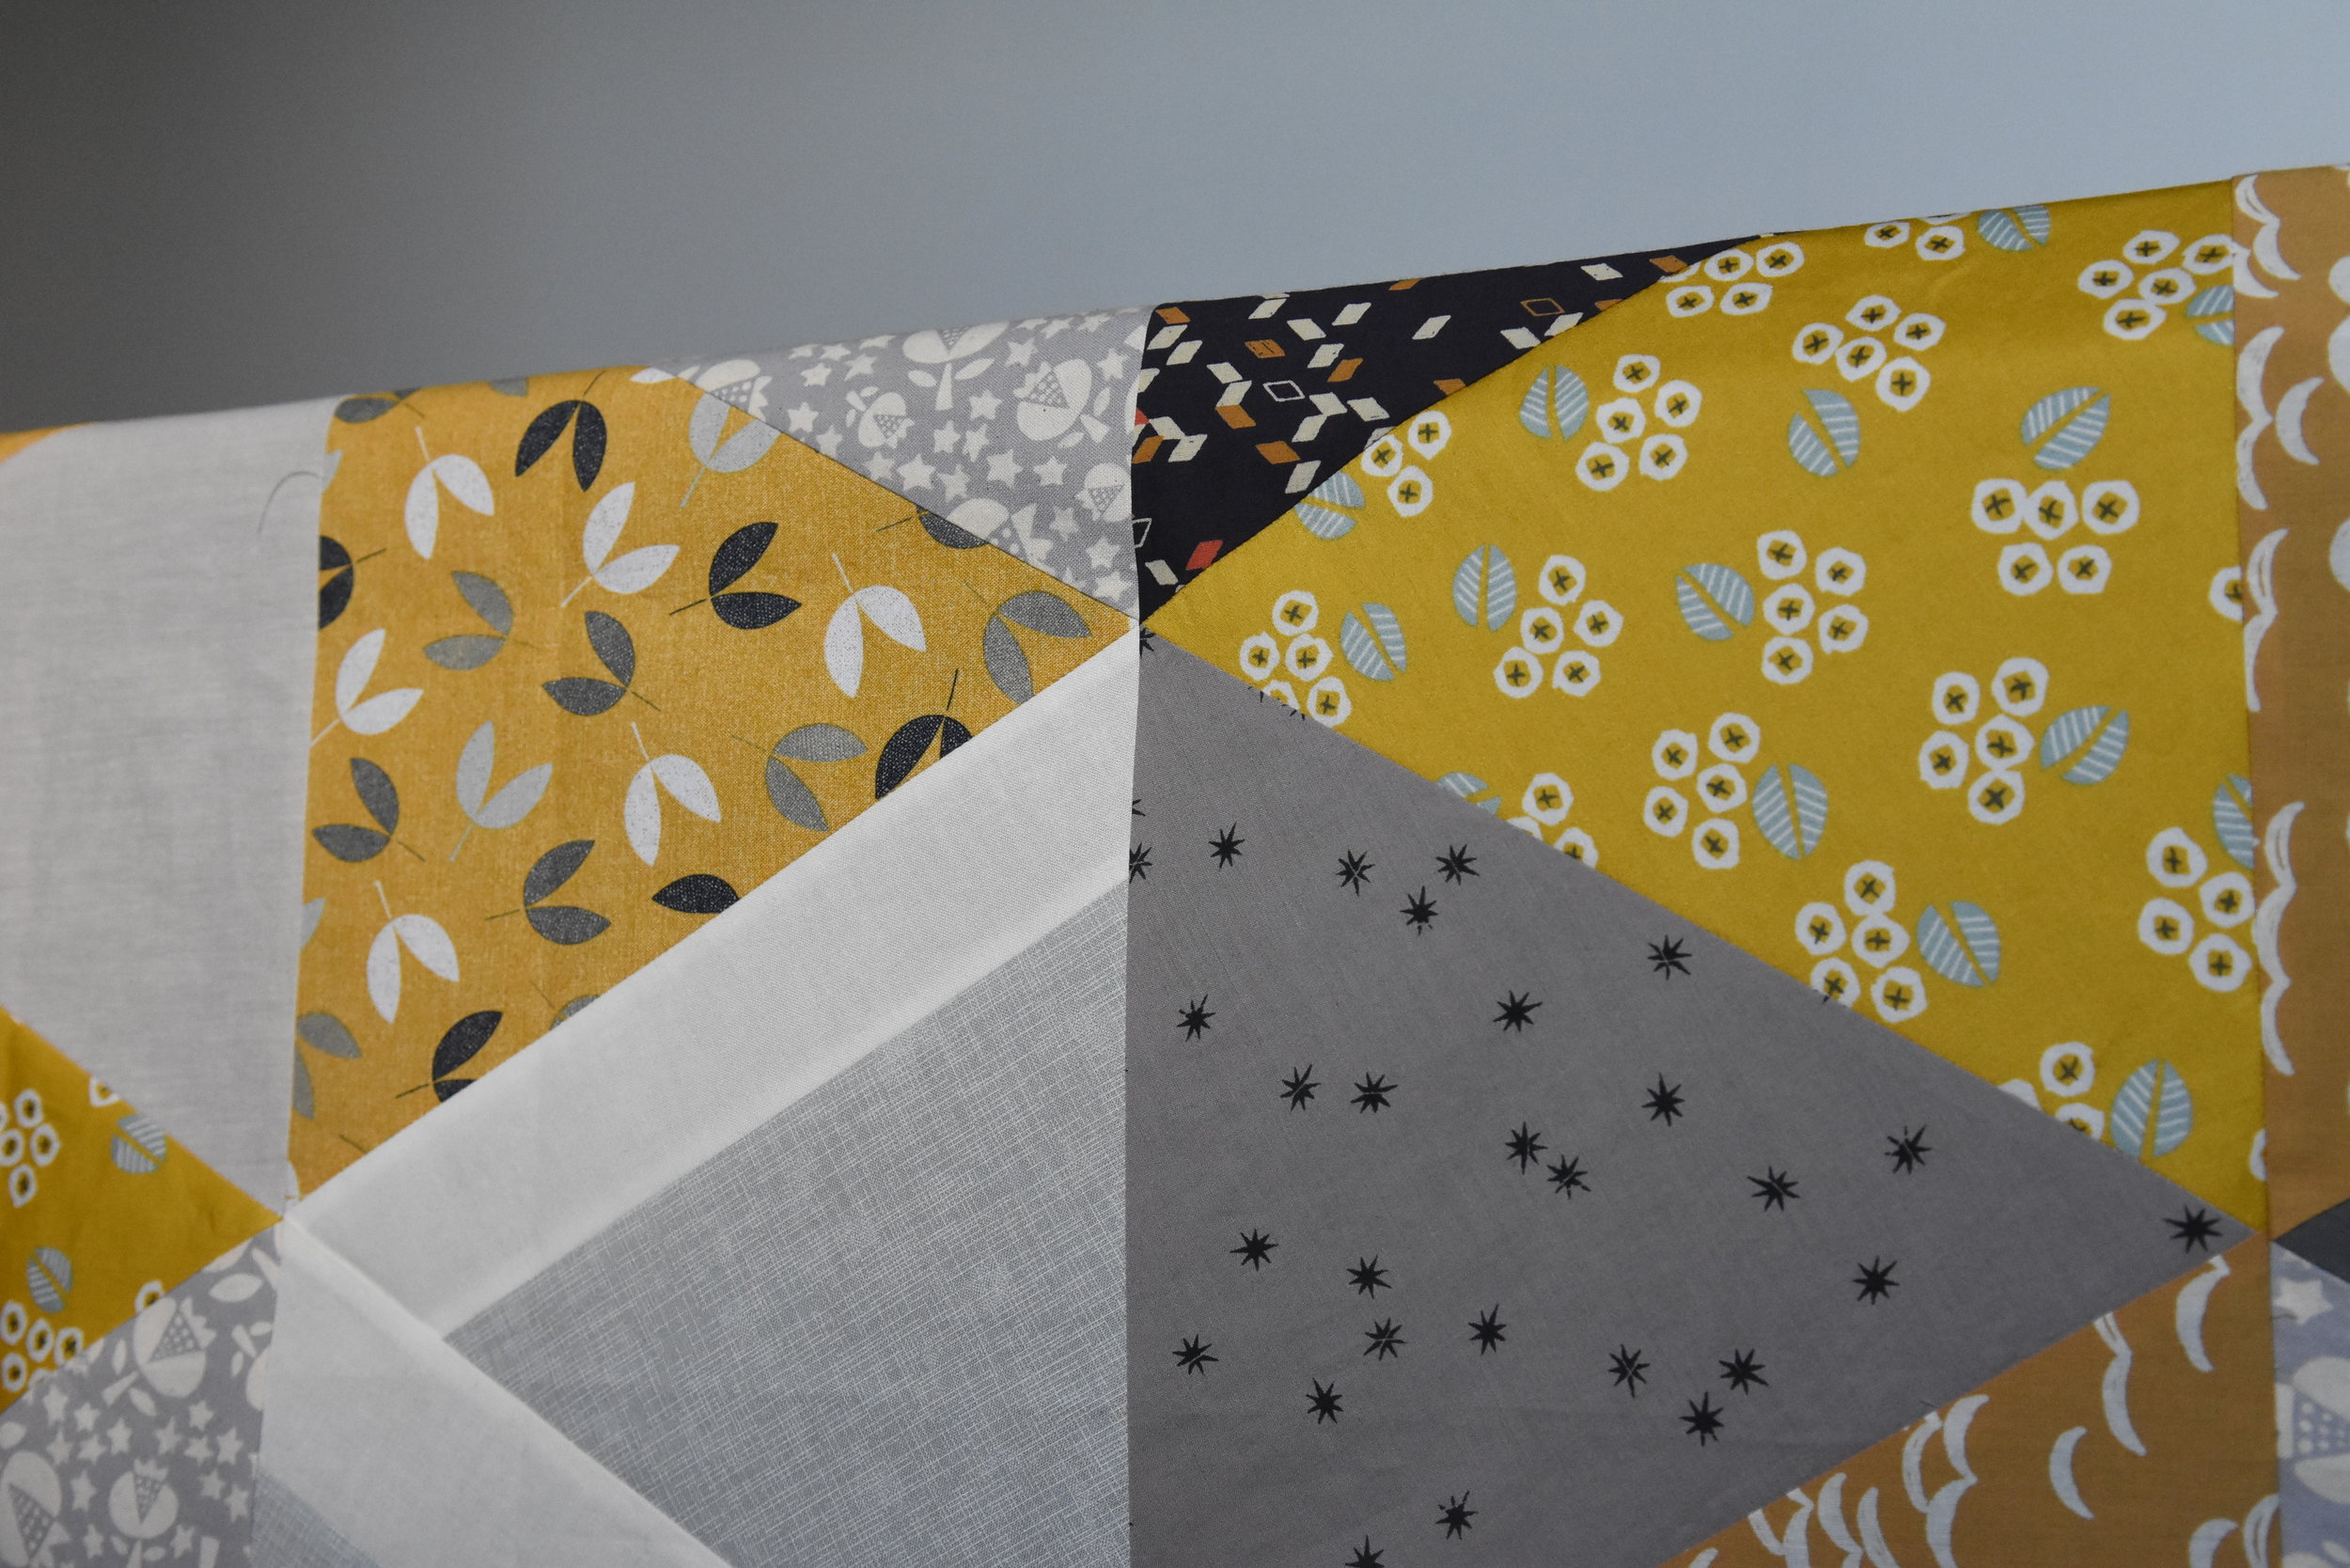
The quilt was made from stripes of 8" tall triangle blocks. The finished quilt top is large (about 70"x84"). I intended to use it as an accentuate piece for my mid-century style couch. 

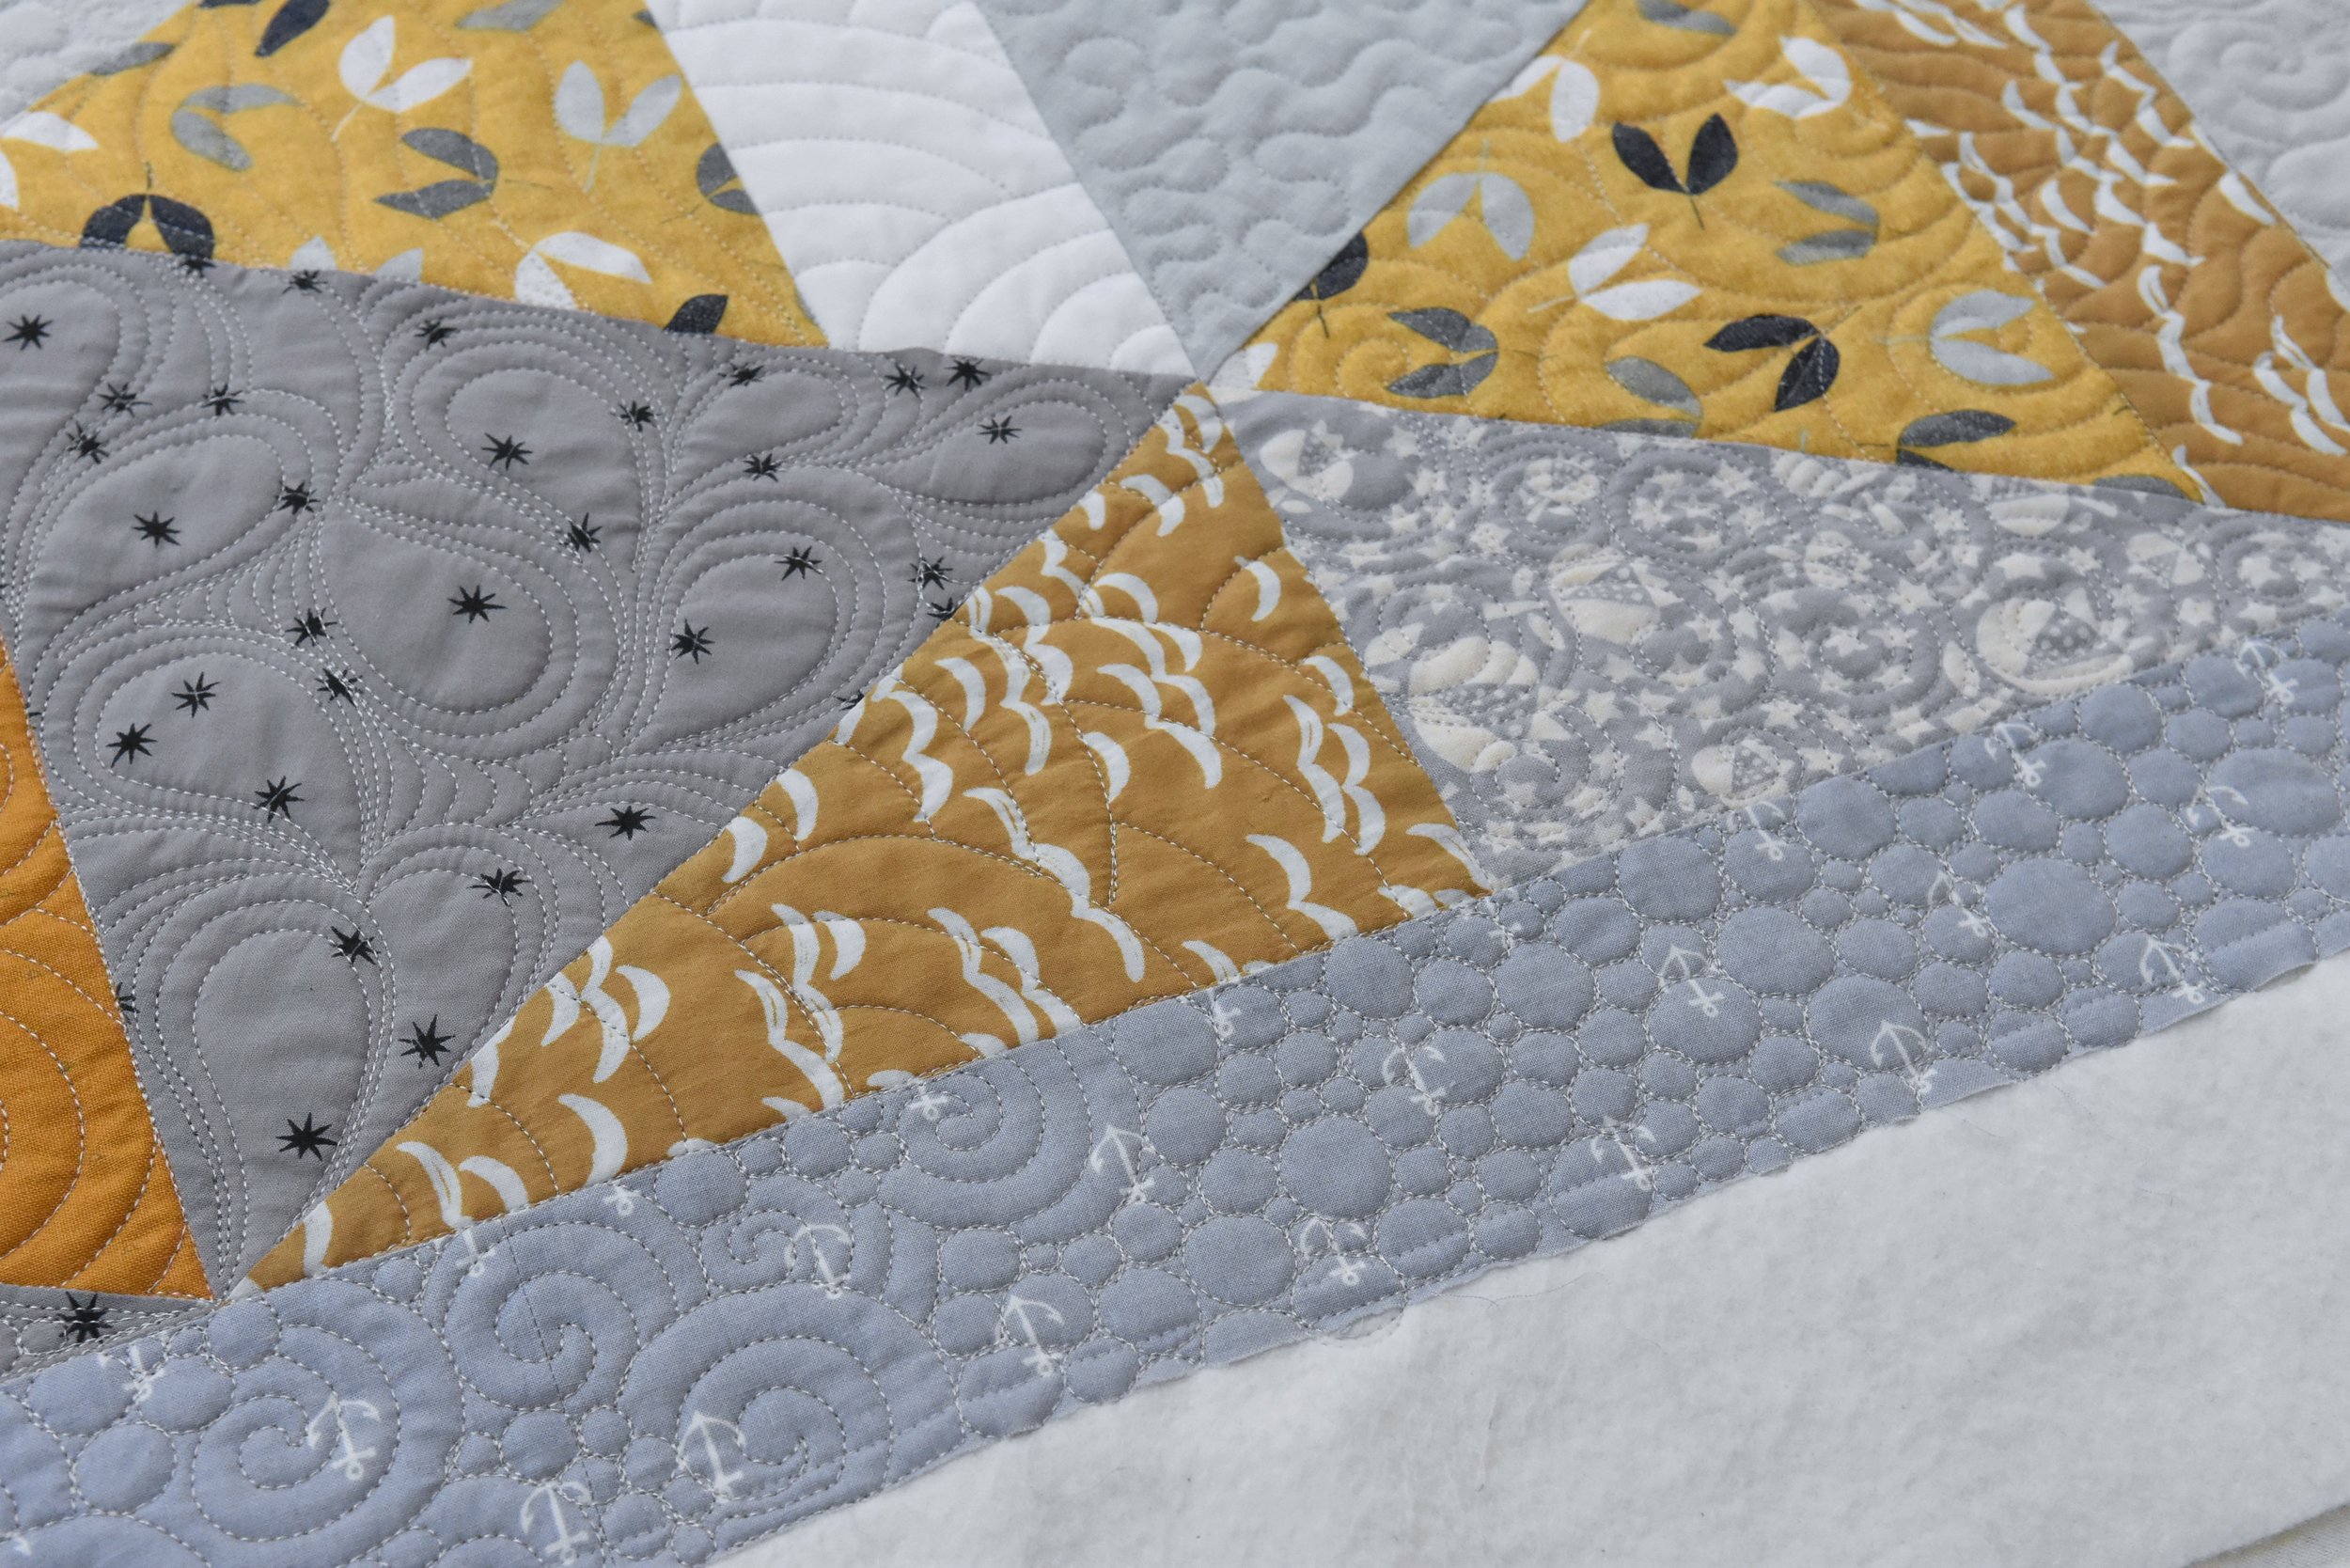
I treated the quilt top like a canvas and I "drew" on top of it with millions of stitches! I really enjoyed the free motion time spent on this quilt. I harvested more ideas about quilting my future quilts. Sulky viscose thread was used throughout. I love its shine and sleekness, but I found I couldn't wind full bobbins with this thread on my Bernina Q20. The bottom thread would get caught by the bobbin cover very easily because the thread unwinds by itself!! Like my couch quilt, Quilter's Dream Cotton Select batting was used. I love it's softness but next time I would love to try the Supreme line because I love thick and heavy quilts... although it would be difficult to maneuver on the machine. 

For all my quilts completed thus far I never had a very specific plan of color arrangement to begin with, and I always wanted the finished quilt top to surprise myself. Sometime it worked but not always. Ben was not a big fan of this quilt. He said the colors are too dark and I had the same feeling. The quilt was finished in June, but I could't find a good location to shoot, to obtain the correct color tones and to capture the delicate details. Finally the 2nd floor hallway of my parent's home won my heart. The grey-ish white wall is a perfect match with my quilt, and it has plenty of natural lights from a skylight and a huge window. 

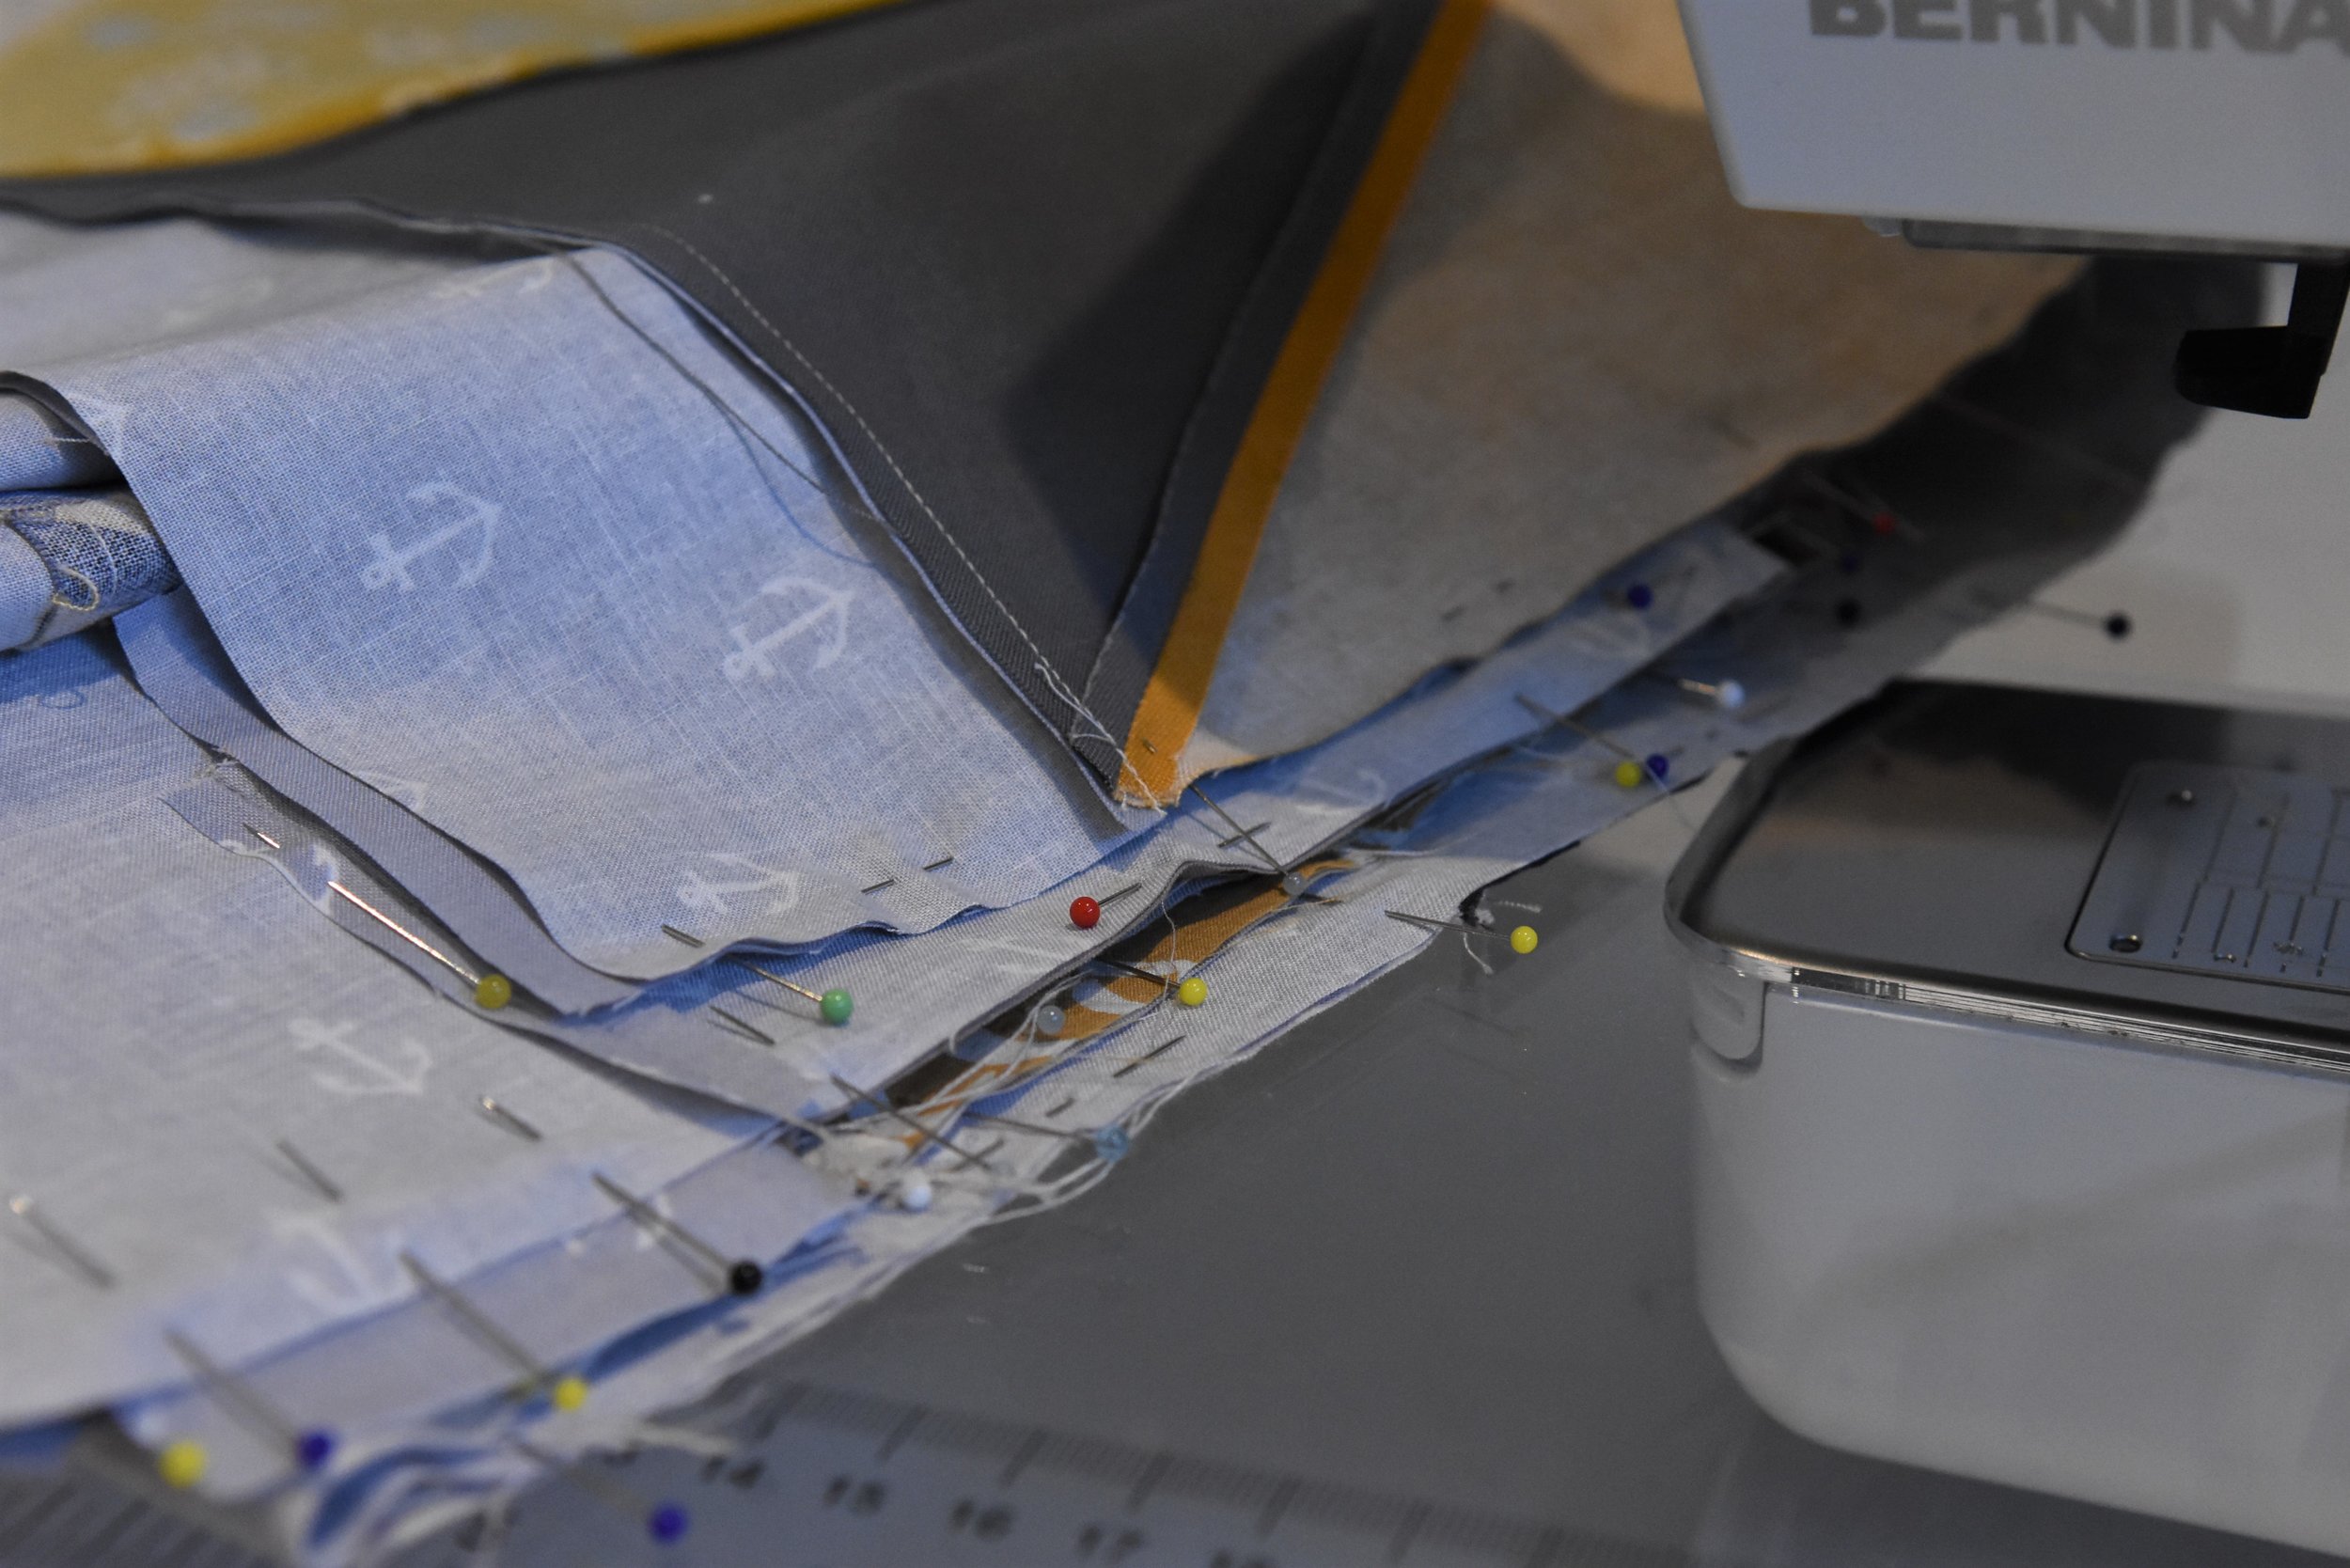
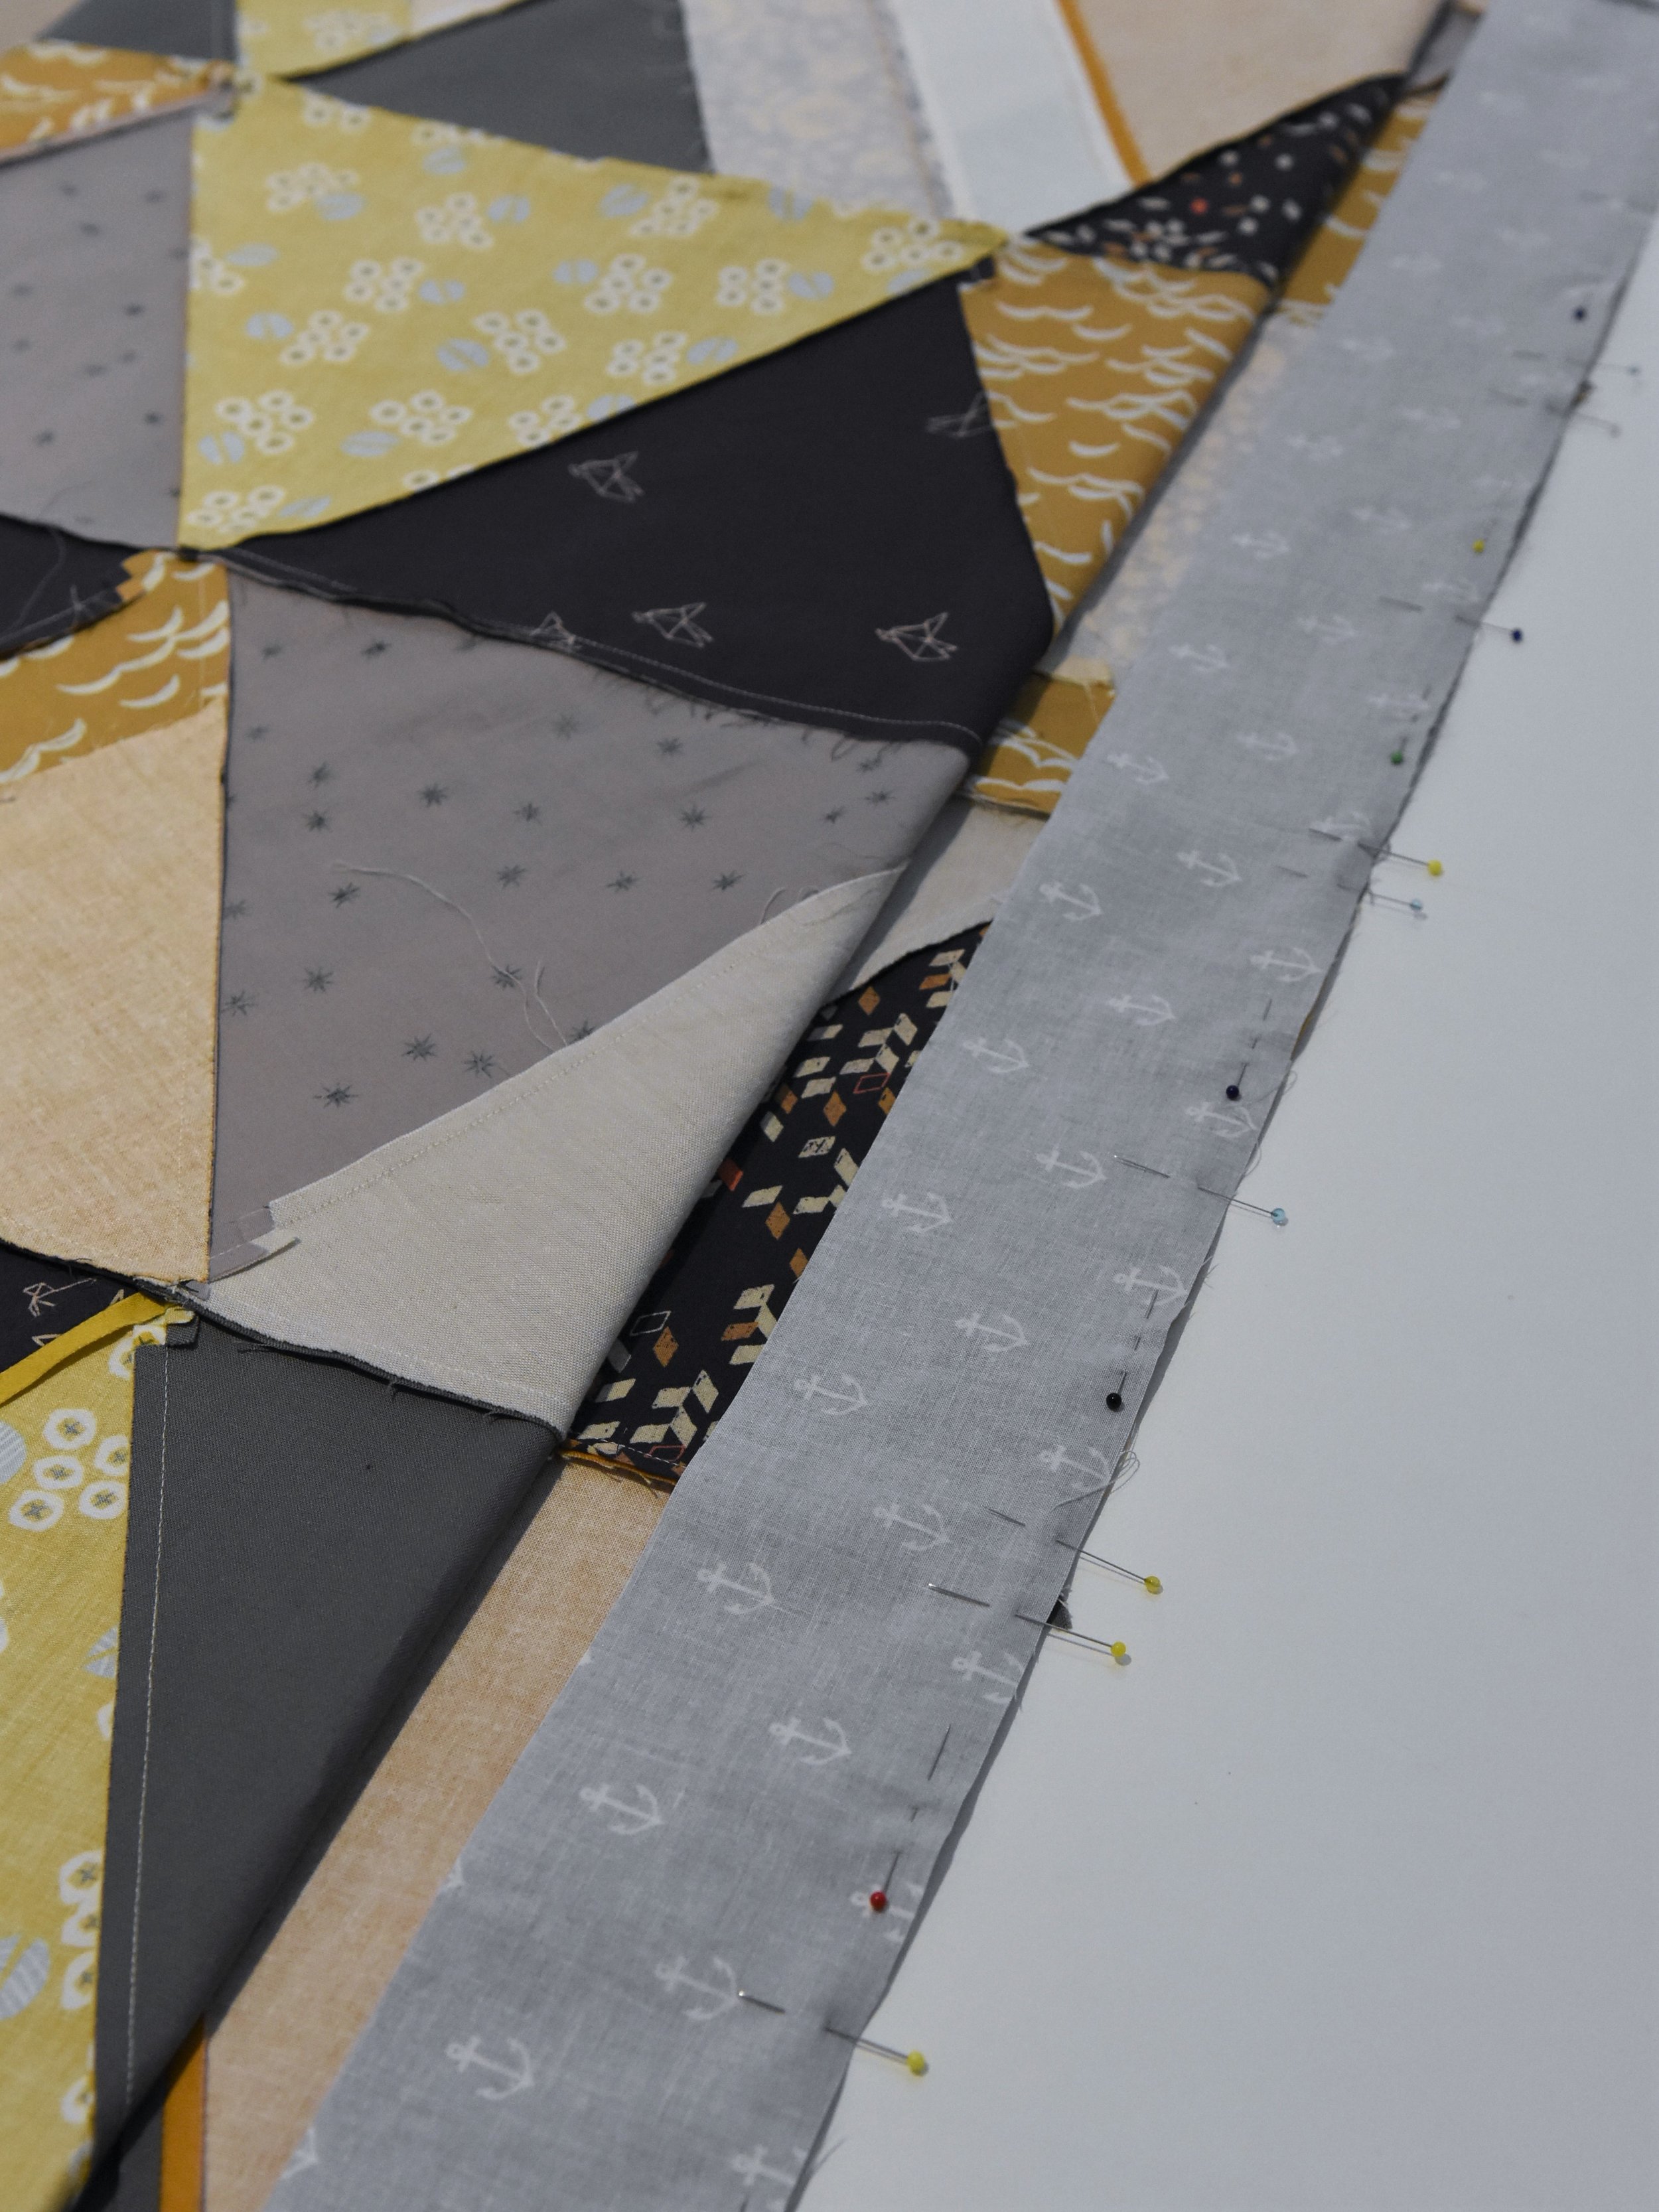
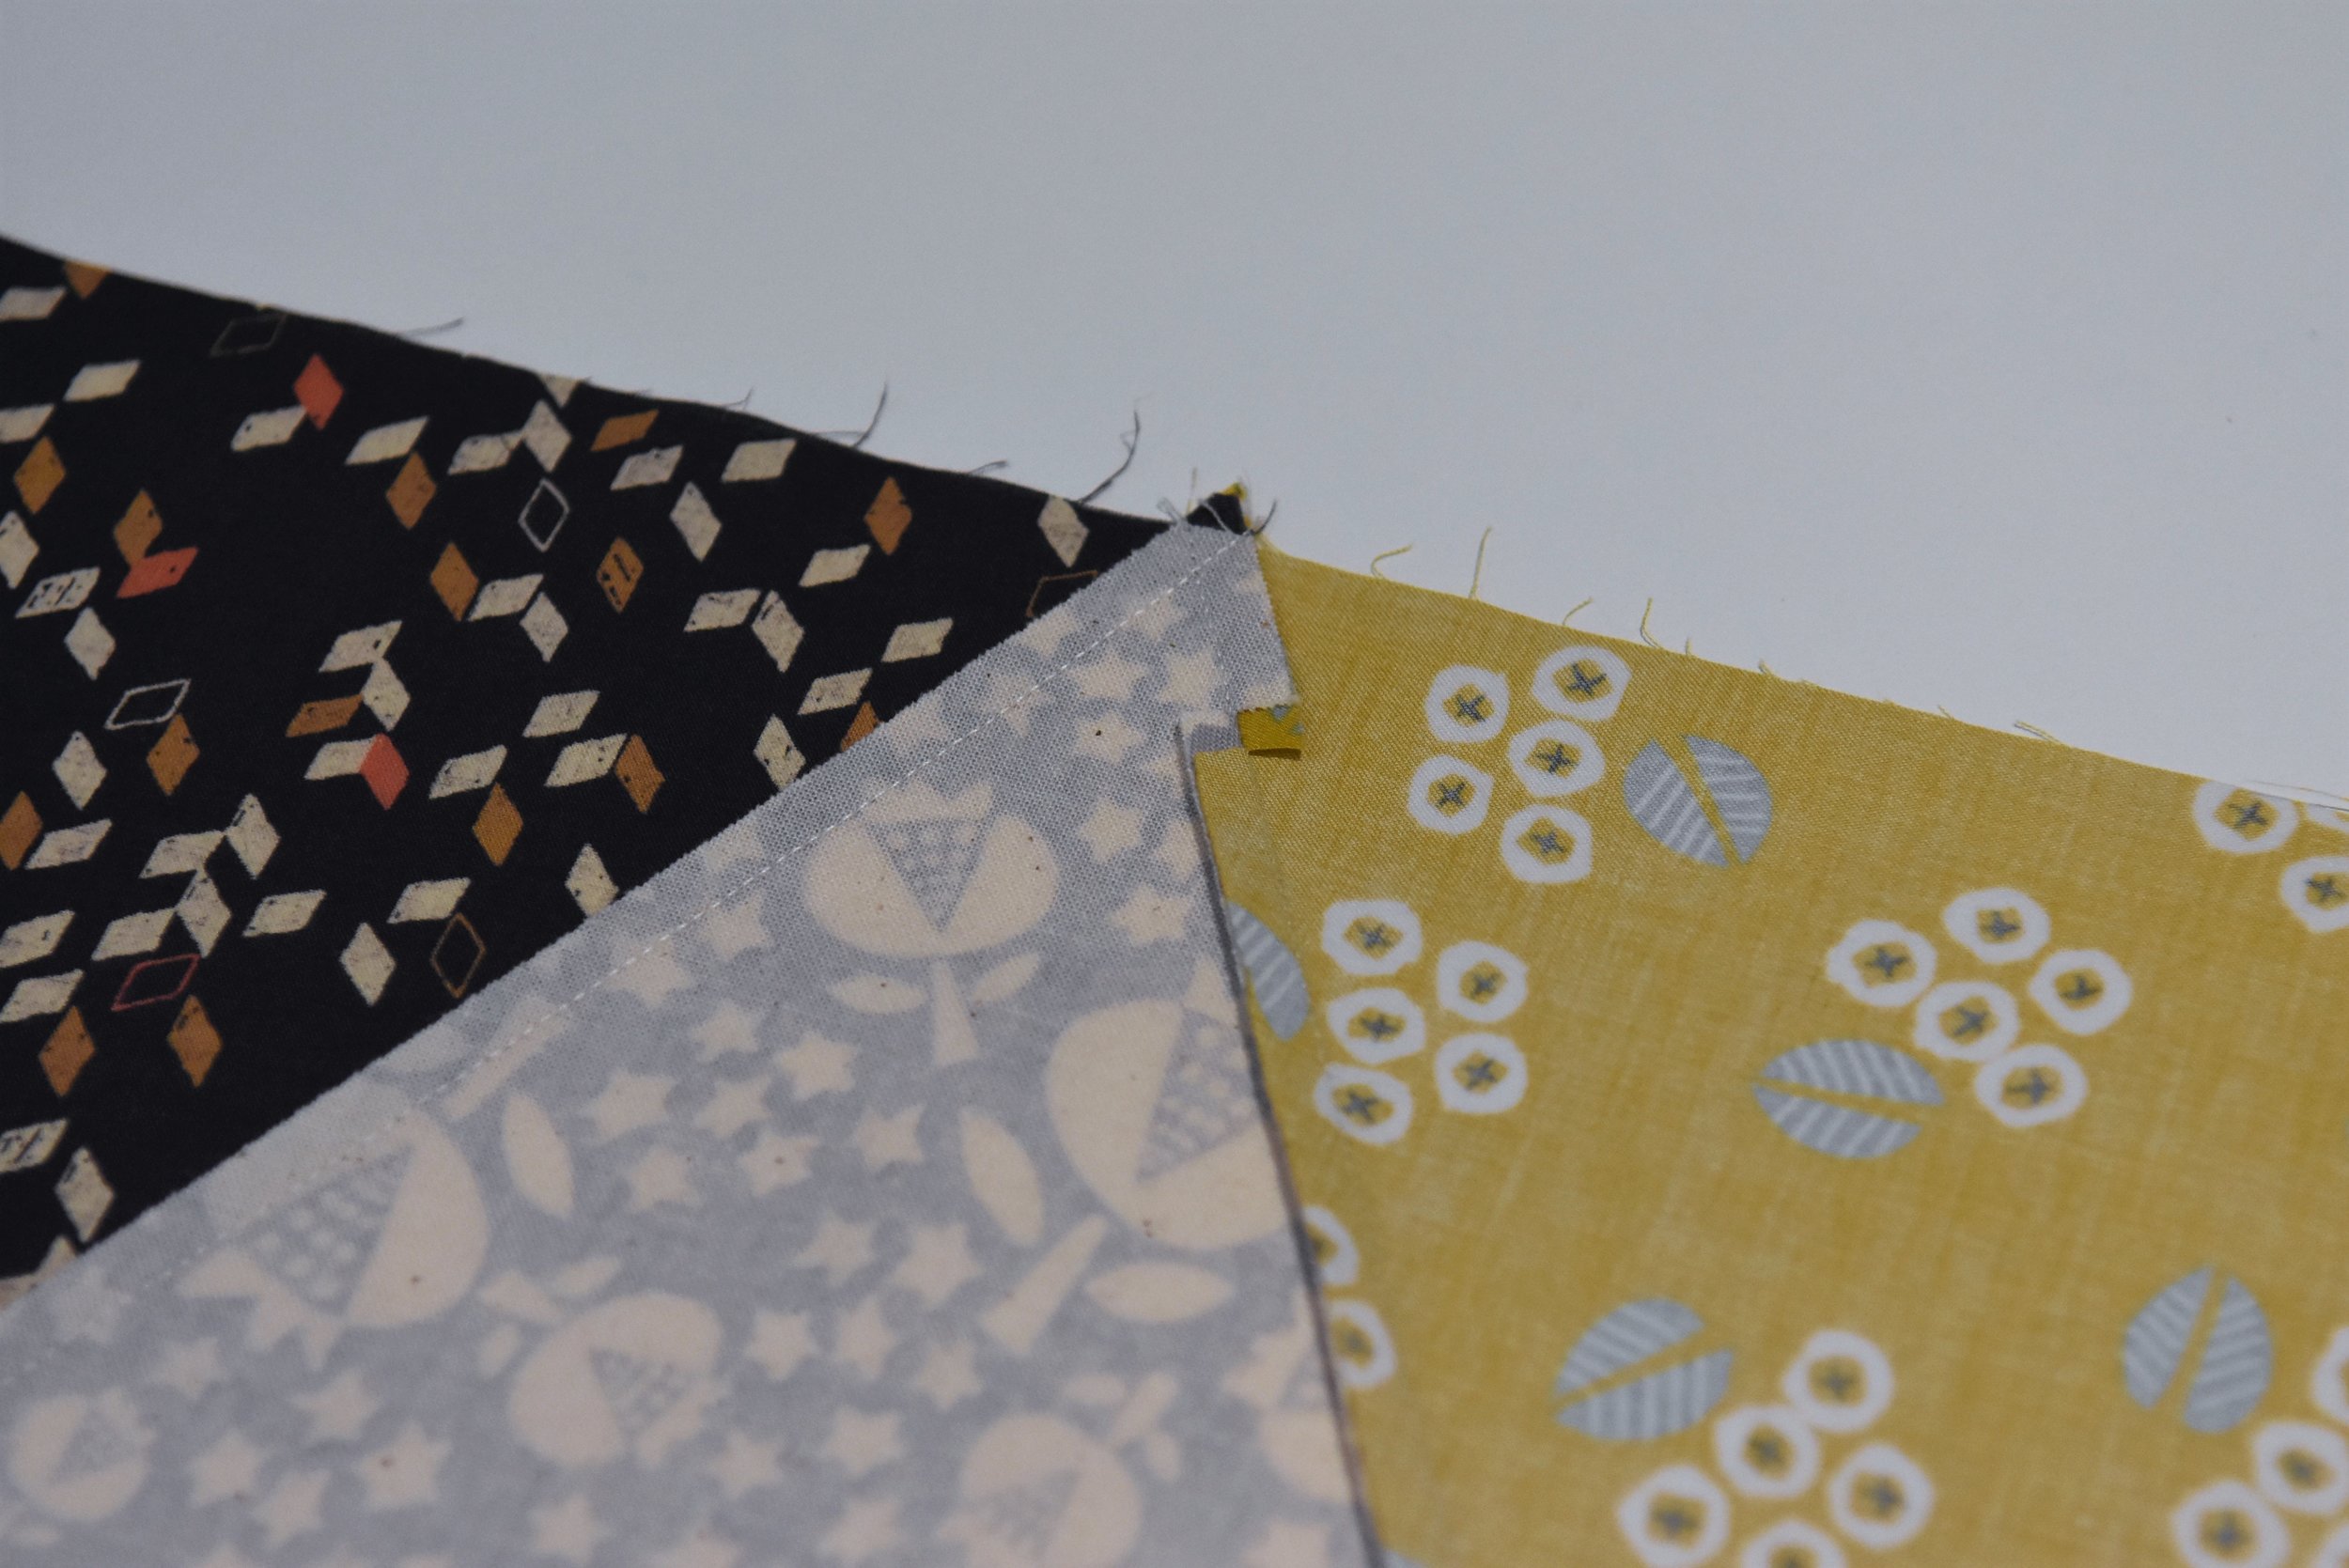
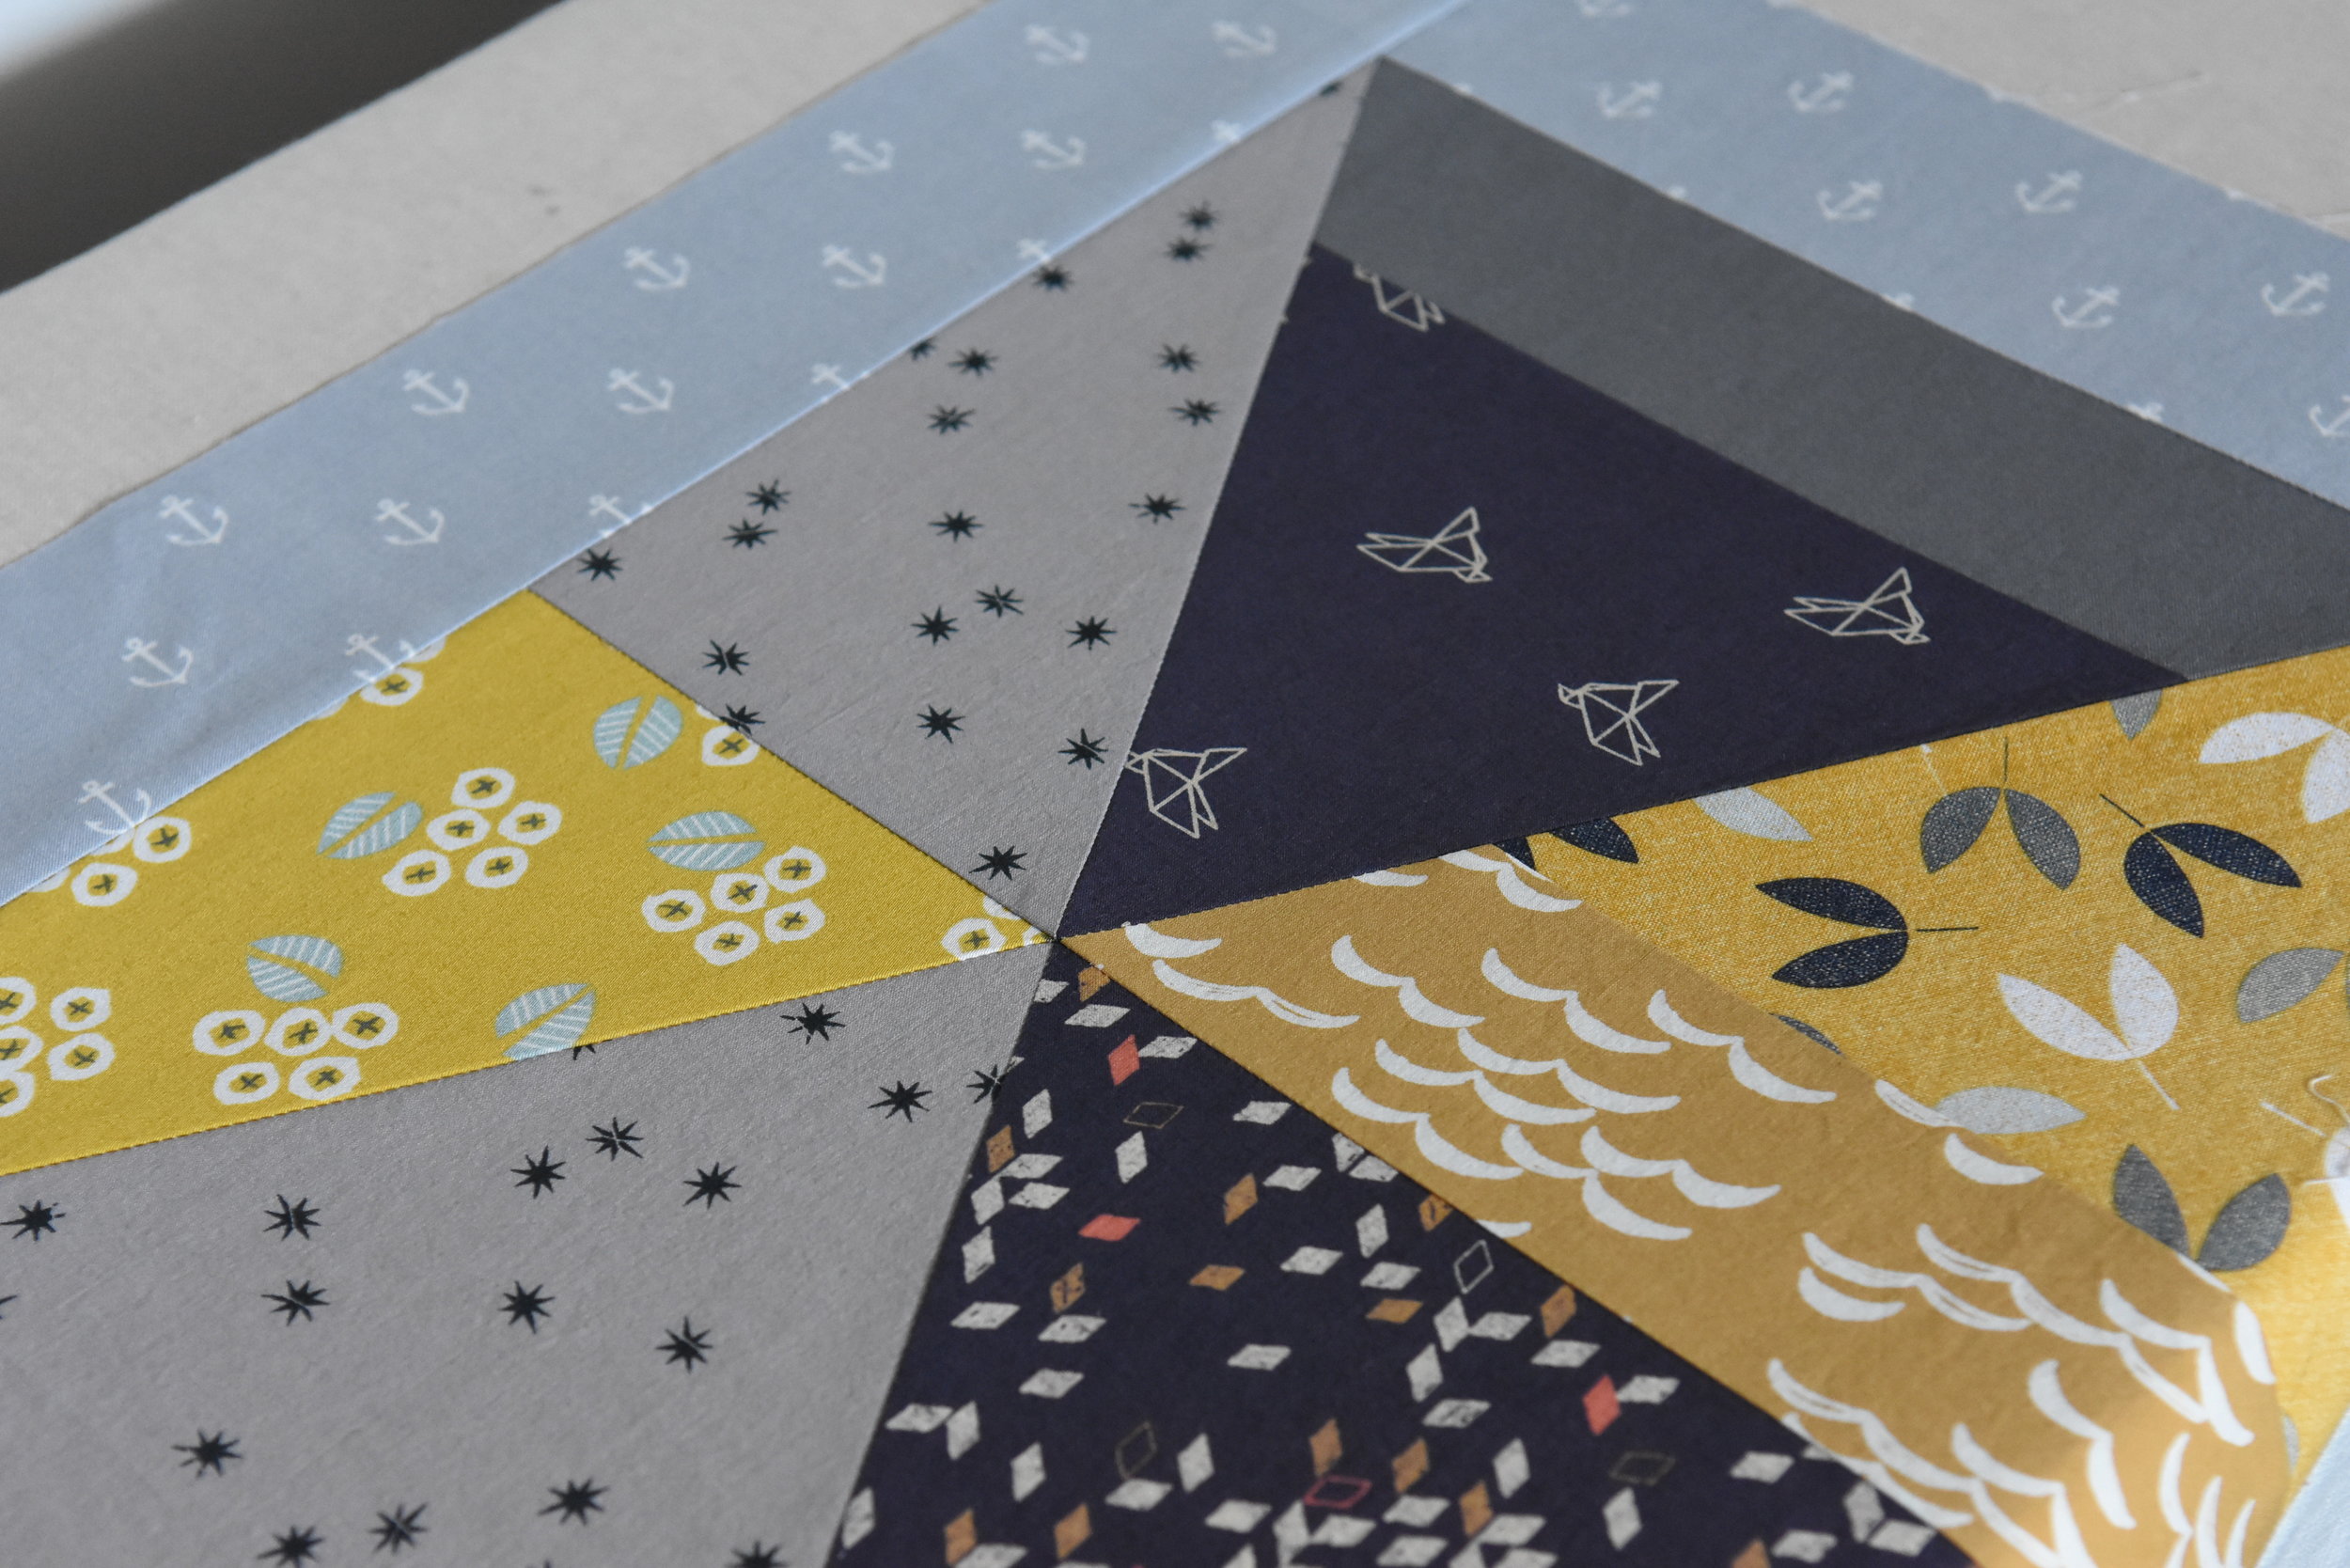
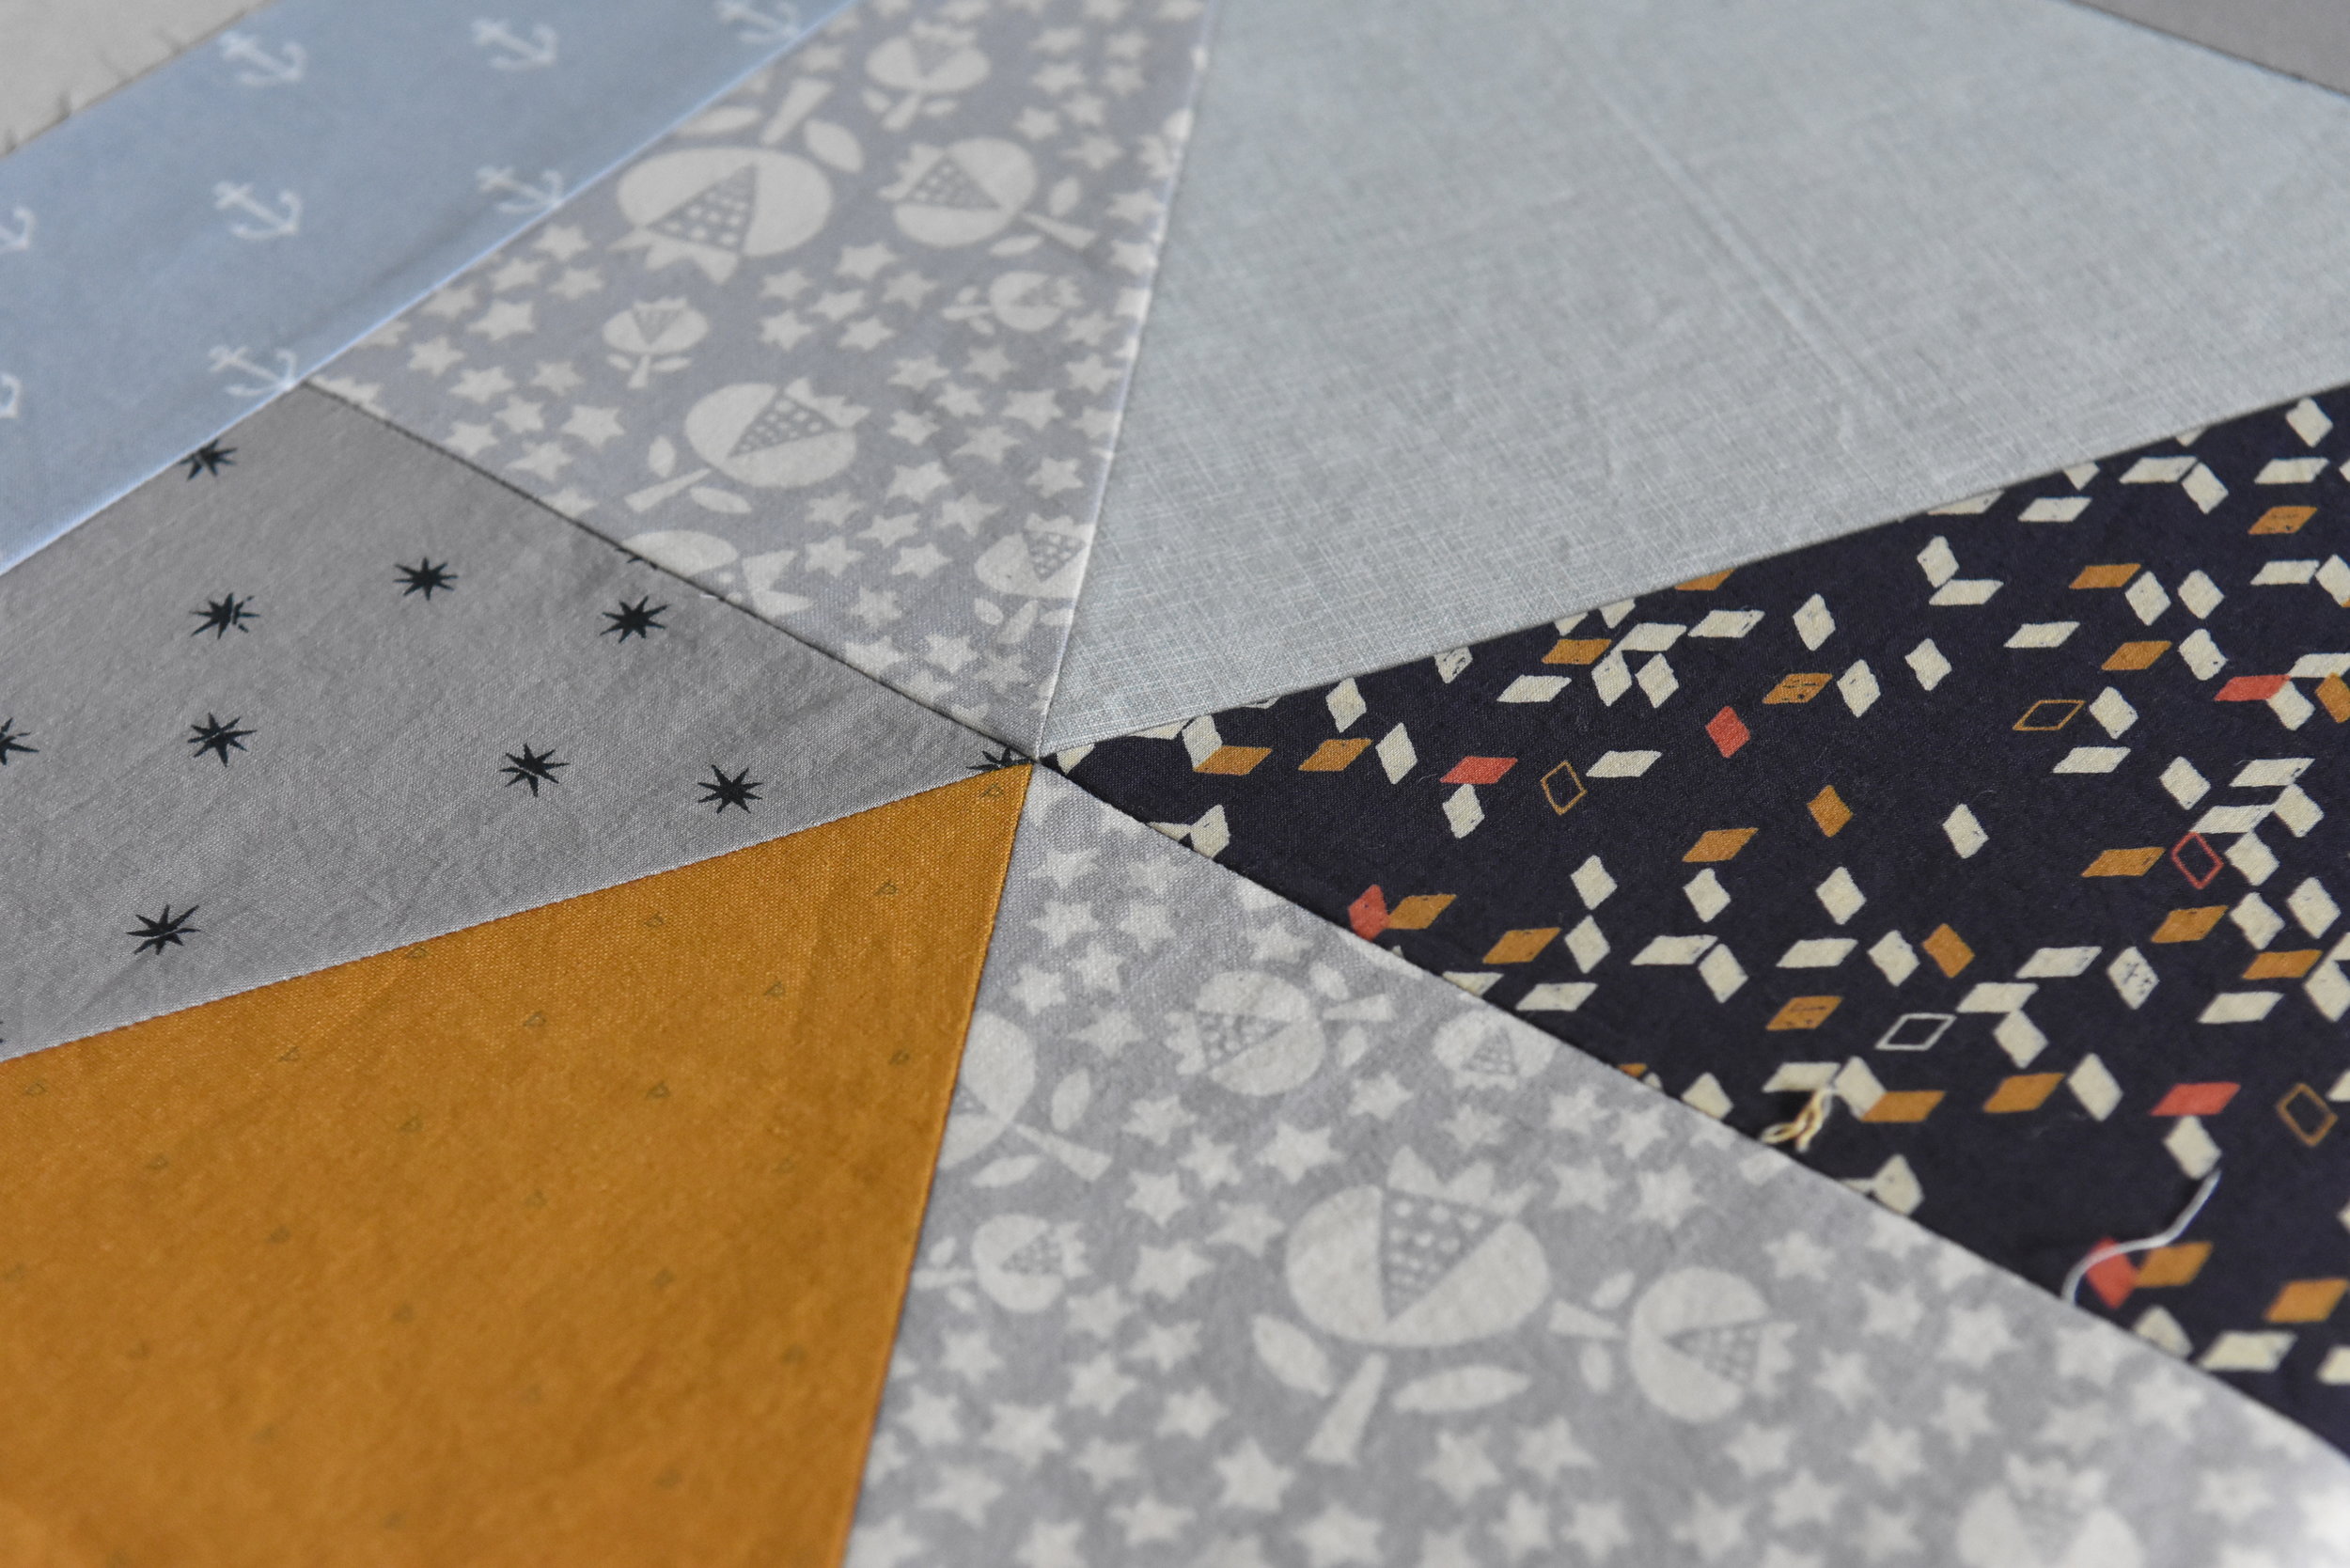
For this quilt I prewashed all fabrics prior to cutting. In the end I didn't see a noticeable difference, so maybe I would not do it again... But I did like the softness of washed fabrics, and I simply steam ironed flat the fabrics. No Best Press, no starching. To avoid stretching, I pinned a lot and I pinned both vertically and horizontally. It worked well. Most blocks met on point. To avoid bulkiness some seams were cut and flipped near the seam intersections.

No quilt is ugly. All finished quilts are lovely =P A quilt is a functional piece of art. 

The Little Floral Hexie Quilt

This is literally my first finished quilt of 2018! I started the project last November, and the inspiration was from a set of saucer and teacup china by Miranda Kerr that I received from my friend Jamie for our house warming. My collection of floral fabrics was very limited, so I opted for a crib quilt size piece that I would use as a lap quilt to keep myself warm on a typical Canadian winter day while sitting in front of our fireplace and enjoying a cup of English Earl Grey! The quilt was finished in February, but formal shoots were taken just a few days ago. Yes procastination is my enermy!

This is my first hexie quilt! I cut the pieces (2.5" finished side length) using the Multiple Size Hexagon Rule by Marti Michell. This is not my favorite ruler. It is too slippery even after remedied with True Grip non-slip adhesive rings. A lot of the hexies were not cut accurately due to slippage, as well as my inexperience of using the ruler. 

I started with machine-sewing the pieces together into Grandma's Flower Garden blocks. It was wayyyyy tooooo time-consuming than I imaged! And I gave up after about 10 blocks. I wanted to try a hybrid of machine- and hand-sewing instead, just to avoid the starts and stops of Y seams. I began by sewing the hexies into strips by machine, then I joined the strips together by hand-stitching. It was more relaxing and not as time-consuming as I imaged! I even spent extra time to iron flat the fanned seams and I loved the effect! Also, since 4 of the 6 edges are cut on the bias, stretching and easing the edges a bit and offsetting the seam allowances a bit during hand-piecing actually helped to even out the inaccuracy of the pieces! In other words I forced the pieces to set on point. What a bonus!

Batting is Warm and White (the pre-packaged crib size). I found the batting more on the stiffer side, to compensate I quilted the piece with sparsely spaced free-form lines and curls. It took me just one evening to complete and I love the result! The quilt softened up after washing, indeed. The quilting stitches are not too overwhelming or prominent, which is want I wanted. The quilt was finished with a narrow white border, a strip of floral+polka dot print and pink binding, which work together like a framing for the hexies. 

This little piece turned out to be quite adorable and I got a lot of complements from my friends already. No one can resist from the sweet prints of floral, stripe and polka dot fabrics.  

Travel Makeup Bags

What a shame that I am now blogging for projects that I completed 3 months ago! But these bags are so much fun to make and I sewed four of them in last December! They are totally worth a blog entry.

They are inspired by the Sew-Together-Bag. I saw many cute ones on Instagram and fell in love. Without the pattern at hand, I simply made up a size that is large enough for stuffing in facial care products and makeups for travel.

The first one is a 9 inch wide one that I made for my sister. She was having a 3-week Japan-Hong Kong-Australia trip last December, and she loved the bag.

Her complements encouraged me to make more.

DSC_3773 (2).JPG

For the next two bags, I made them 10 inches wide, simply because I wanted to utilize the 40” wide quilting cotton without any waste. The bag lining and inner pockets need exactly 4 strips of 10” wide fabrics.

DSC_3479 (2).JPG

I tucked in the zipper ends in a different way.   Instead of concealing the zipper ends with tabs and later sew to the bag under side, I finished the zippers with raw edges but later tuck each end inside the bag binding. Love this finish.

Then, for the last bag, I found a simpler way of sewing the inner pockets: they can be made individually instead of sewing in the continuous manner (those who have sewn the Sew Together Bag know what I am talking about). Sometimes, sewing without a pattern is a great way to encourage creative construction!

For all four bags I used By Annie’s Soft and Stable for the outer shell interfacing, and fused light weight interfacing on the inner pocket lining fabrics. The result is fantastic! The bags are light weight but have just the right amount of structure to hold their shape. By the way, the 30" zippers from By Annie's are perfect for closure. 

These bags are perfect for using up my half-yard prints. Will definitely sew more in the future!

Christmas Stocking - Free Pattern!

After I made three quilted stockings and hung them on my family room fireplace, I wanted a smaller and quicker-to-make version. To save time, fusible batting/fleece was used this time. Also, I had some small amount of faux fur trims from Mokuba for several years already, and finally they found their purpose! The trims really bring some wintry and Christmassy accents to the stockings! Lovely! Nordic themed Christmas fabrics were used for the body. The red piece is Folk Art Holiday by Gina martin and the green piece is North Woods by Kate Spain. 

To celebrate Christmas, I made these stockings a free pattern! Enjoy!

Merry Christmas and Happy New Year! I wish you a prosperous and cheerful 2018. I will keep my hands and sewing machines busy, de-stashing my fabrics and fibers as much as possible!

Barcelona – Paris Trip: the Dior Exhibition and Fabric Shopping

Ben and I were married in October, 2012 and we did not had a honeymoon at that time as I was still finishing up my graduate studies and he just started working.Then in 2013 we had our ceremony in China, which was a bustle hustle one month trip (our families are 1500km apart) that spared us no time for a real honeymoon. We always wanted a makeup honeymoon and finally we did it!

We had an evening flight from Toronto to Barcelona on September 29 and spent 4 days there (just in time for the Catalonia Independence strike!!). Then we took the high speed train to Paris on October 4, and spent another 4 days there. It was a short trip but we had great time (though Ben complained too much walking and museums but not enough time for relaxing and chill lol… gotta improve our itinerary next time!). 

DSC_2688.JPG
DSC_2668.JPG

Highlight of the trip includes visiting of the Christian Dior: Couturier du Reve retrospective show at the Museum of Decorative Arts in Paris. It’s just a wonderful experience to be able to immerse in the masterpieces of the masters in Haute Couture. The exhibition is dreamy, dramatic and simply unforgettable. I had seen the Yves Saint Laurent exhibition at the Montreal Museum of Fine Arts in 2008, the Alexander McQueen exhibition at the Metropolitan Museum of Art in 2010 and the Issey Miyake exhibition at the National Art Center of Tokyo in 2016. The Dior exhibition is the best of the best. There is a retrospective Dior exhibition at ROM now and it’s a must-see this Christmas for me!

We visited two fabric shops in Barcelona: Ribes & Casals and Nunoya.

Ribes & Casals is huge! I am quite impressed with their high ceiling and lofty space, with vast selection of home-dec and fashion fabrics. They have nice tweeds and silks. Unfortunately making a suit or an evening dress is still beyond my skills level and hence I left the shop without any purchase.  

DSC_2163 (2).JPG

Nunoya is not far away from Ribes & Casals. This is THE PLACE for sumptuous Japanese fabrics! Here you will find Echino, Nani Iro, Kokka and lots of other cute Japanese prints. They also have lots of beautiful quilting cotton weight prints from the US and Europe. My only complaint is the price! It’s too hard to decide what to get when every bolt of fabric is so nice but also so expensive (plus a hefty addition of tax). In the end, I brought 3 meters of fabrics back home - the Echino fabrics that I used to make some of the cushions.

Before the trip I envisioned spending at least an afternoon for fabric shopping in Paris. But that did not come true. We spent too much time in the museums and walking along the Seine River. In the end, we went to only one of the many places in my list: Anna Ka Bazaar, a little cozy fabric and needlework shop in the 11th arr and not far away from where we stayed, the CitizenM hotel near Paris Gare de Lyon. The shop owner designs the beautiful Atelier Brunette fabrics. I picked about 5 assorted meters of their cotton lawn as souvenirs for myself.  

Since I still have many destinations in Paris that I want to visit and revisit. It’s a great excuse to plan another trip here...maybe for our 10th anniversary.

Stockings, Socks and Baby Booties

Stockings for Christmas. Tried not so Christmas-y fabrics, not bad. But I think I can make them better. 

Socks for me. My favorite Wendy's basic toe-up pattern. 

Baby booties for a friend's newborn. Based on a Debbie Bliss pattern but used finer yarn (hence more stitches and rows). 

Holidays are coming, and I will keep my hands busy for more home decors, gifts and to keep myself warm!