Tutorial

Tutorial – Clean Steeks

Back in 2011 when I finished my first Fair Isle vest, I briefly mentioned how I cut steeks the super clean and tidy way. Today I finally have the time to explain and demonstrate how I usually prepare and cut steeks. I have tried different ways, but I think machine-sewn steek is my favourite and most preferred. I don't like the bulkiness of crochet steeks, I am afraid of unravelling of unreinforced steels, and I would not want to do hand-sewing because it's too slow. 


Here is the sample that I will used for demonstrations. It's knitted with leftovers of my Jamiesons of Shetland Spindrift 2ply stash on 3mm circulars.

I usually reserve 10 stitches for steeks. Of the 10 stitches, and 1st and 10th stitches are selvedge stitches, the seams are placed along the dotted line as shown in the chart on the right, and the steek stitches #3 to #8 will be cut away. Steek stitches #5 & #6 respectively represents the beginning and end of a round. It's where you would change colours. Usually I simply add in new colour and cut away the old one without any weaving or knots because I know yarn tails will eventually be trimmed away. 

When placing the seam between stitches #1 and #2, remember to smooth out and pull all yarn tails to the right, and vice versa for the seam between stitches #9 & #10. That way, you won't catch any of the yarn tails onto your seams. 

For machine steeking, I use very thin and almost invisible threads that I use for free-motion quilting. In this tutorial InvisaFil, a 100w 2ply soft polyester thread by WonderFil is sued for both top and bobbin threads. After all, I don't really want the stitches to be visible. Stitch length is set at 2 to 2.5mm, with upper tension set at 3.  It's not necessary to use a ball point needle. I tried a size 80 Sharp and it worked out fine. 

Look! The stitches are sunken and almost invisible on the right side. The wrong side is neat and now been strengthened by the tiny machine stitches. 

The key is you don't want your reinforcing stitches to be to close to the change of colour locations. Be generous and reserve at least a total of 8 steek stitches to keep away from the mess of angel hairs. 

Finally, make the cuts with a pair of sharp scissors. The mess is gone; all you left is a clean piece of art that you can do whatever finishing you want. I call this technique clean steels because the edges are already very tidy that you don't really need any finishing at all. 

Tutorial – Quick Geese without a Specialty Ruler

As quilters we all want a flock of orderly and uniform flying-geese on any of our quilts, right? Then you definitely need to try this technique. It’s so quick, so accurate and so magic! And, indeed, you don’t need a specialty ruler to cut geese from the master blocks. Ready to follow me?

We all want orderly flying-geese!

We all want orderly flying-geese!

Anatomy: A Flying-Goose unit is made up with a center triangle and 2 side triangles. This method, through the assembly of 2 master blocks, yields 4 Flying-Geese units at a time.

IMG_0453.JPG

1.       Prepare a 7” square for the center triangle, and a 5½” square for the side triangles. These sizes will give you 4-2”x4” Flying-Geese units.

2.       Draw corner-to-corner diagonals lines on the right side of the 7” square, and on the wrong side of the 5 ½” square.

3.       Using the diagonal lines as a reference, center the squares with right sides together. Pin baste.

4.       Stitch on each side along one diagonal line with a ¼” seam.

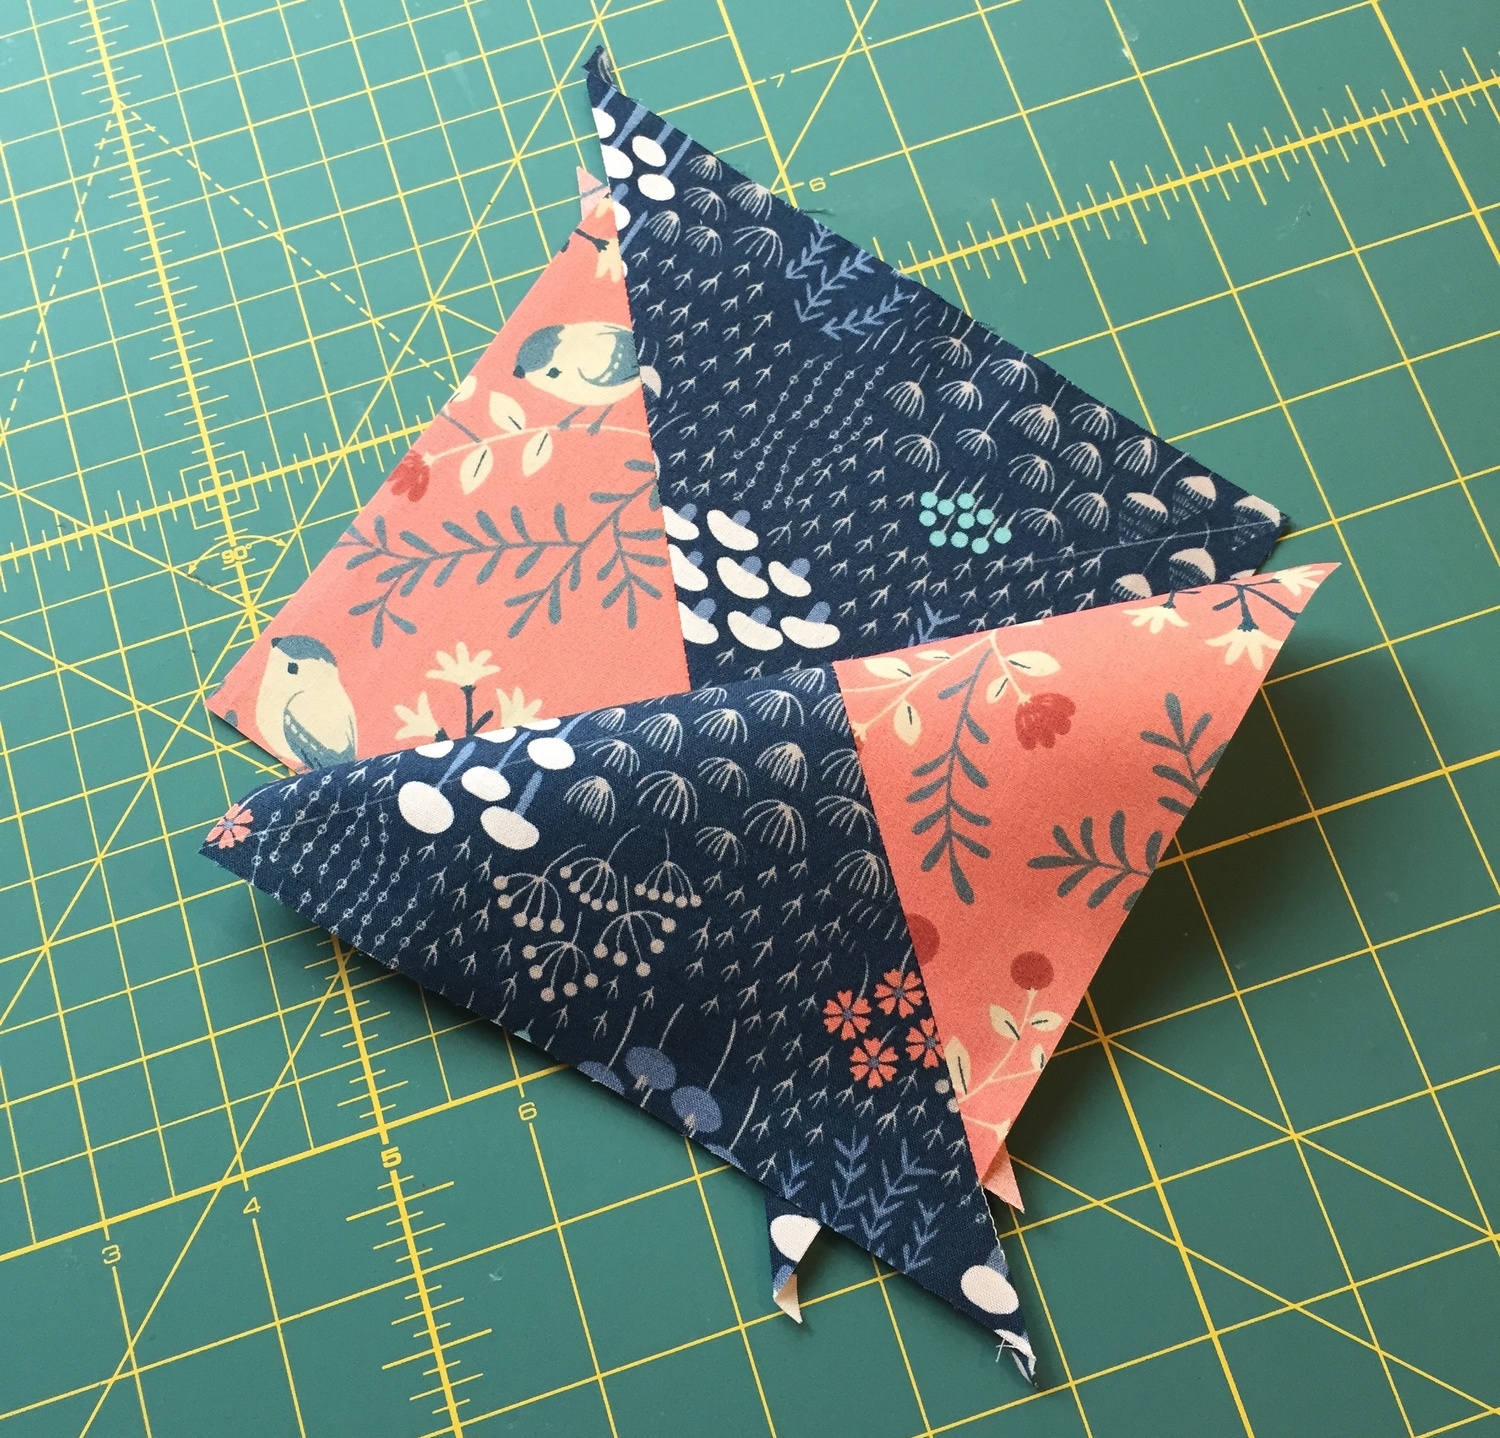
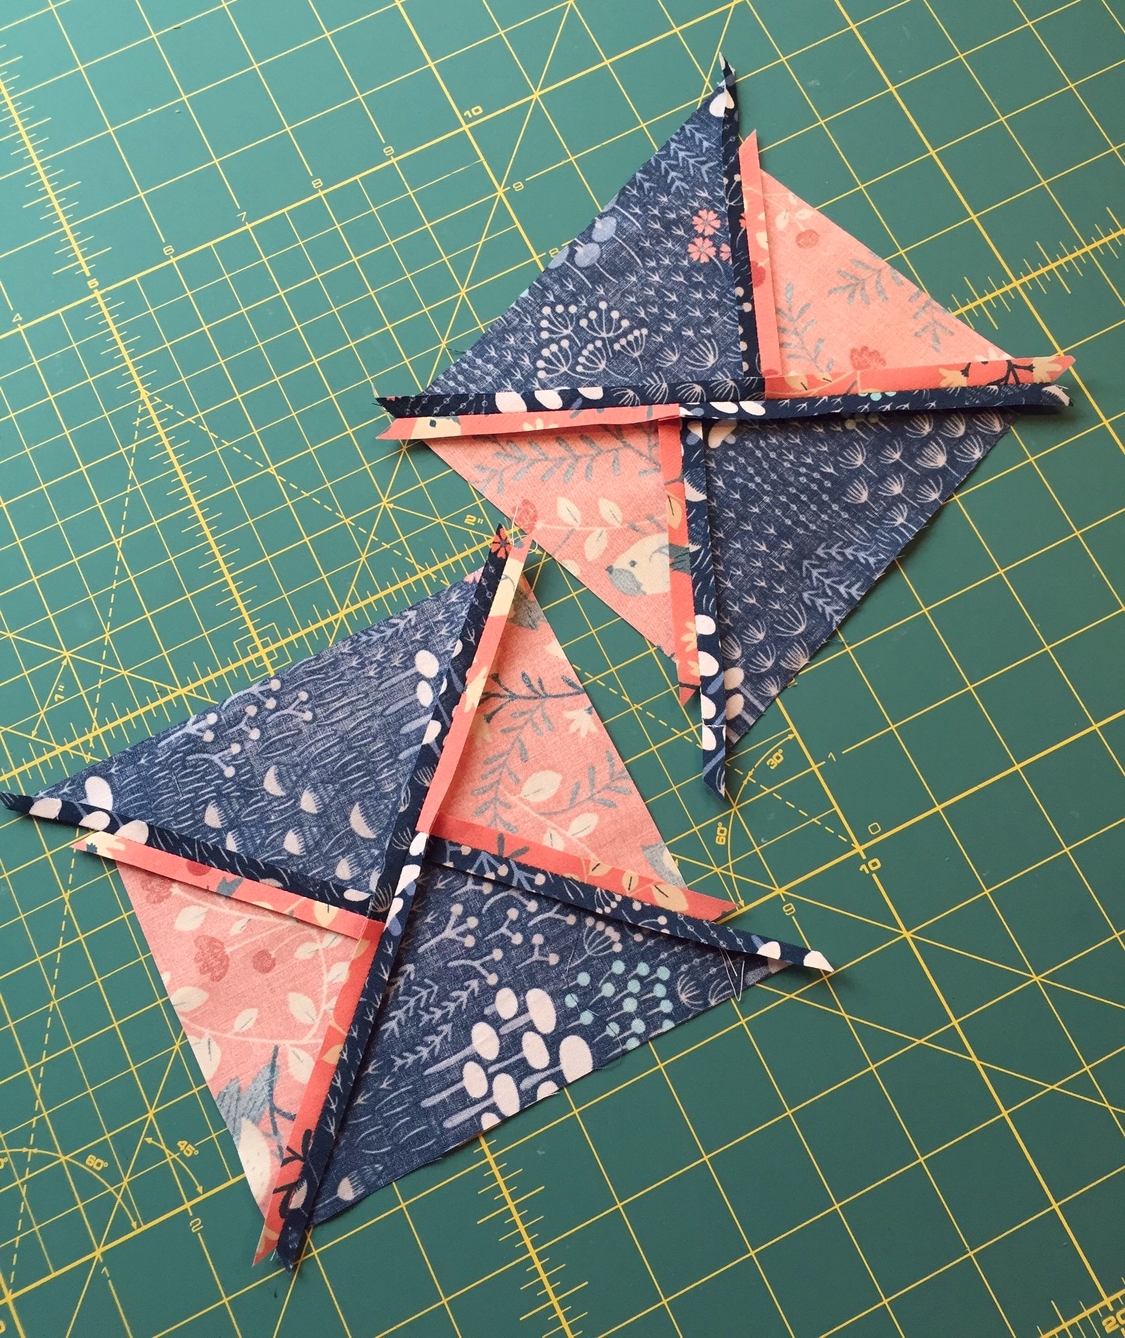
5.       Cut on the diagonal line with seams to yield two uneven half triangle squares.

6.       Press each block open. (Note: I prefer to press seam allowances open for Flying-Geese units to reduce bulkiness).

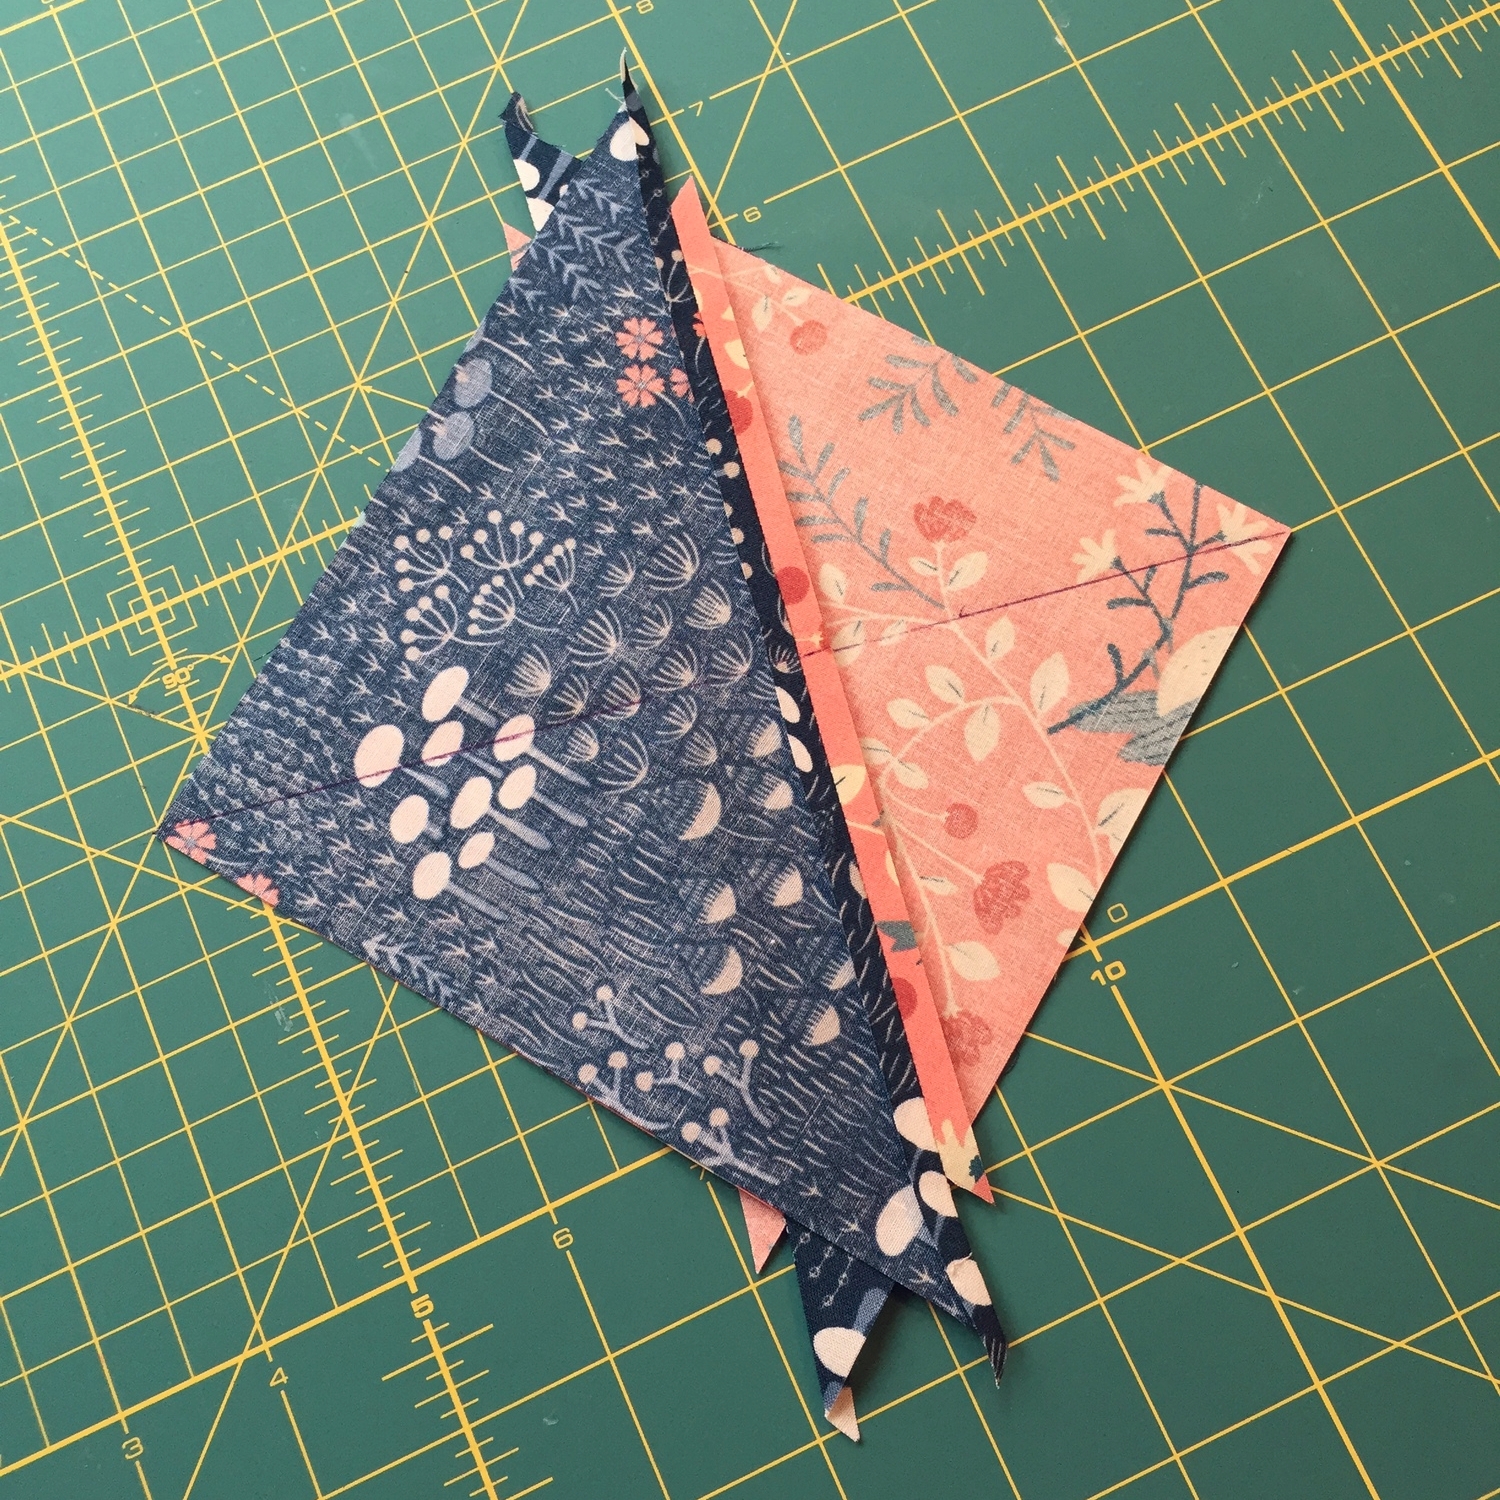
7.       Overlap the two blocks with right sides together and opposite prints facing each other.

8.       Finish marking the diagonal line on the top block (we didn’t draw any diagonal lines on the wrong side of the 7” square previously so now it’s time to do it).

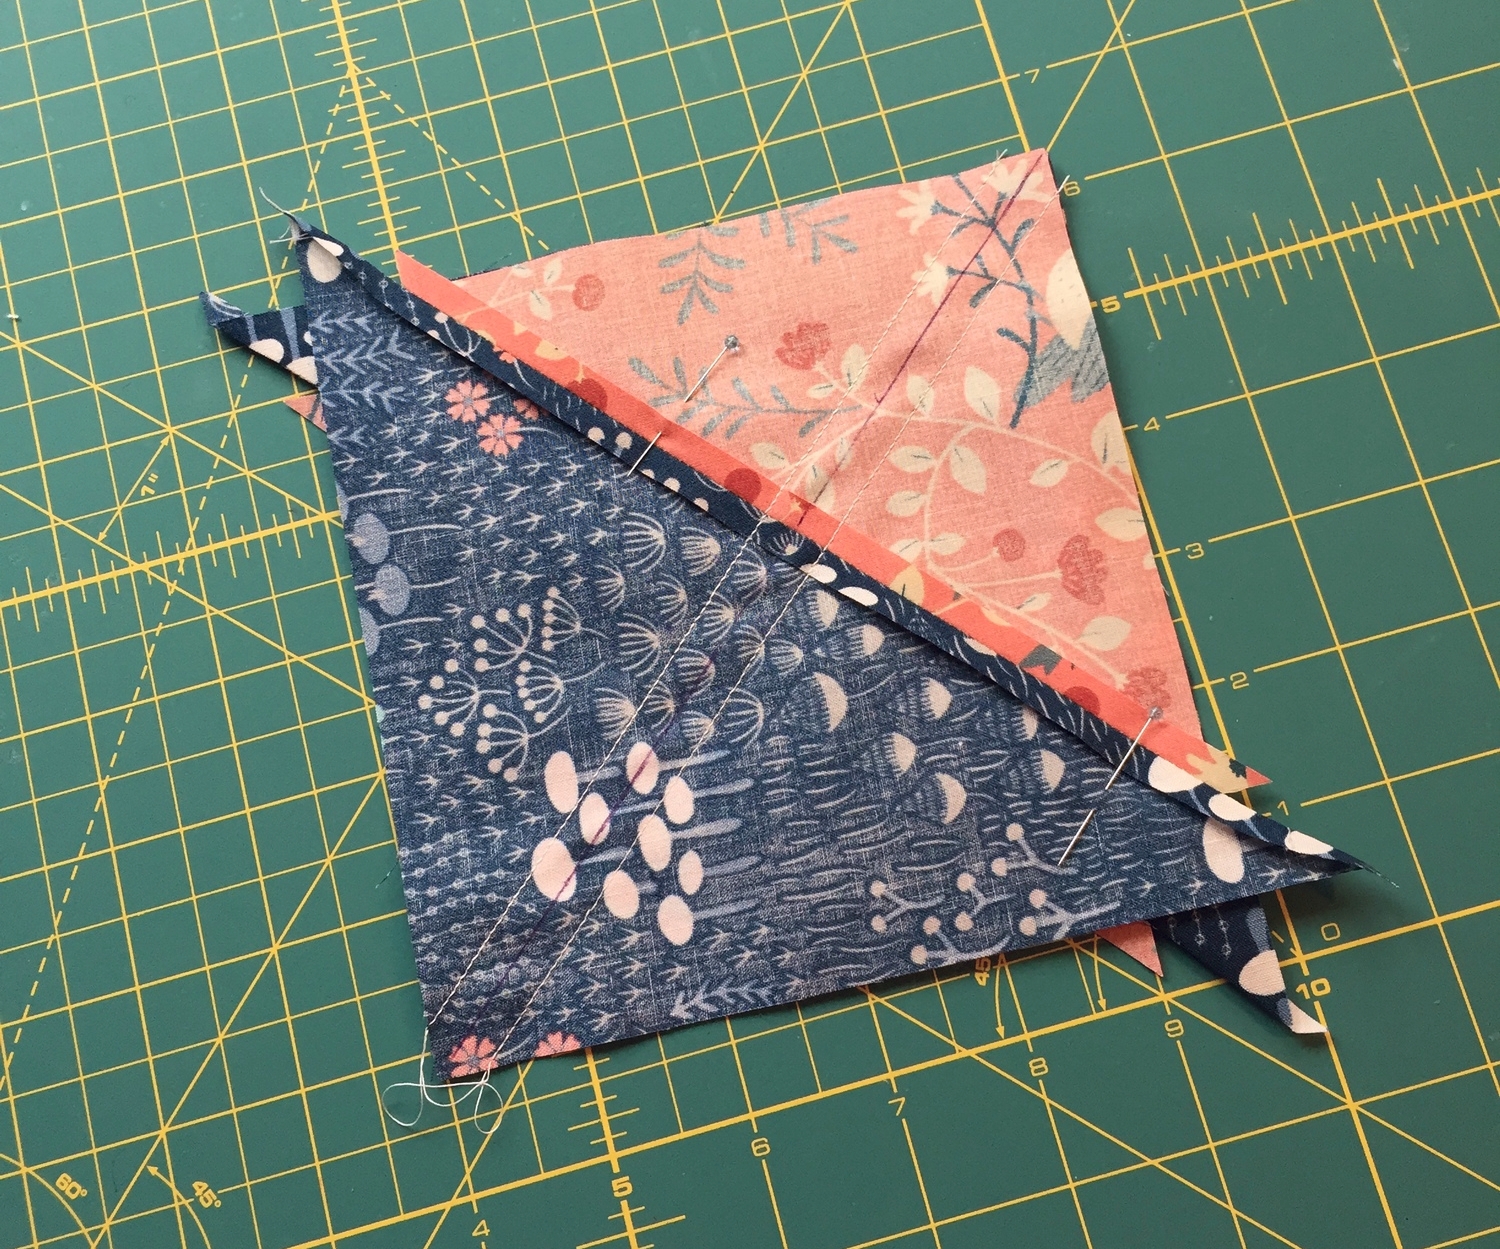
9.       Stitch on each side of the diagonal line you just marked with ¼” a seam.

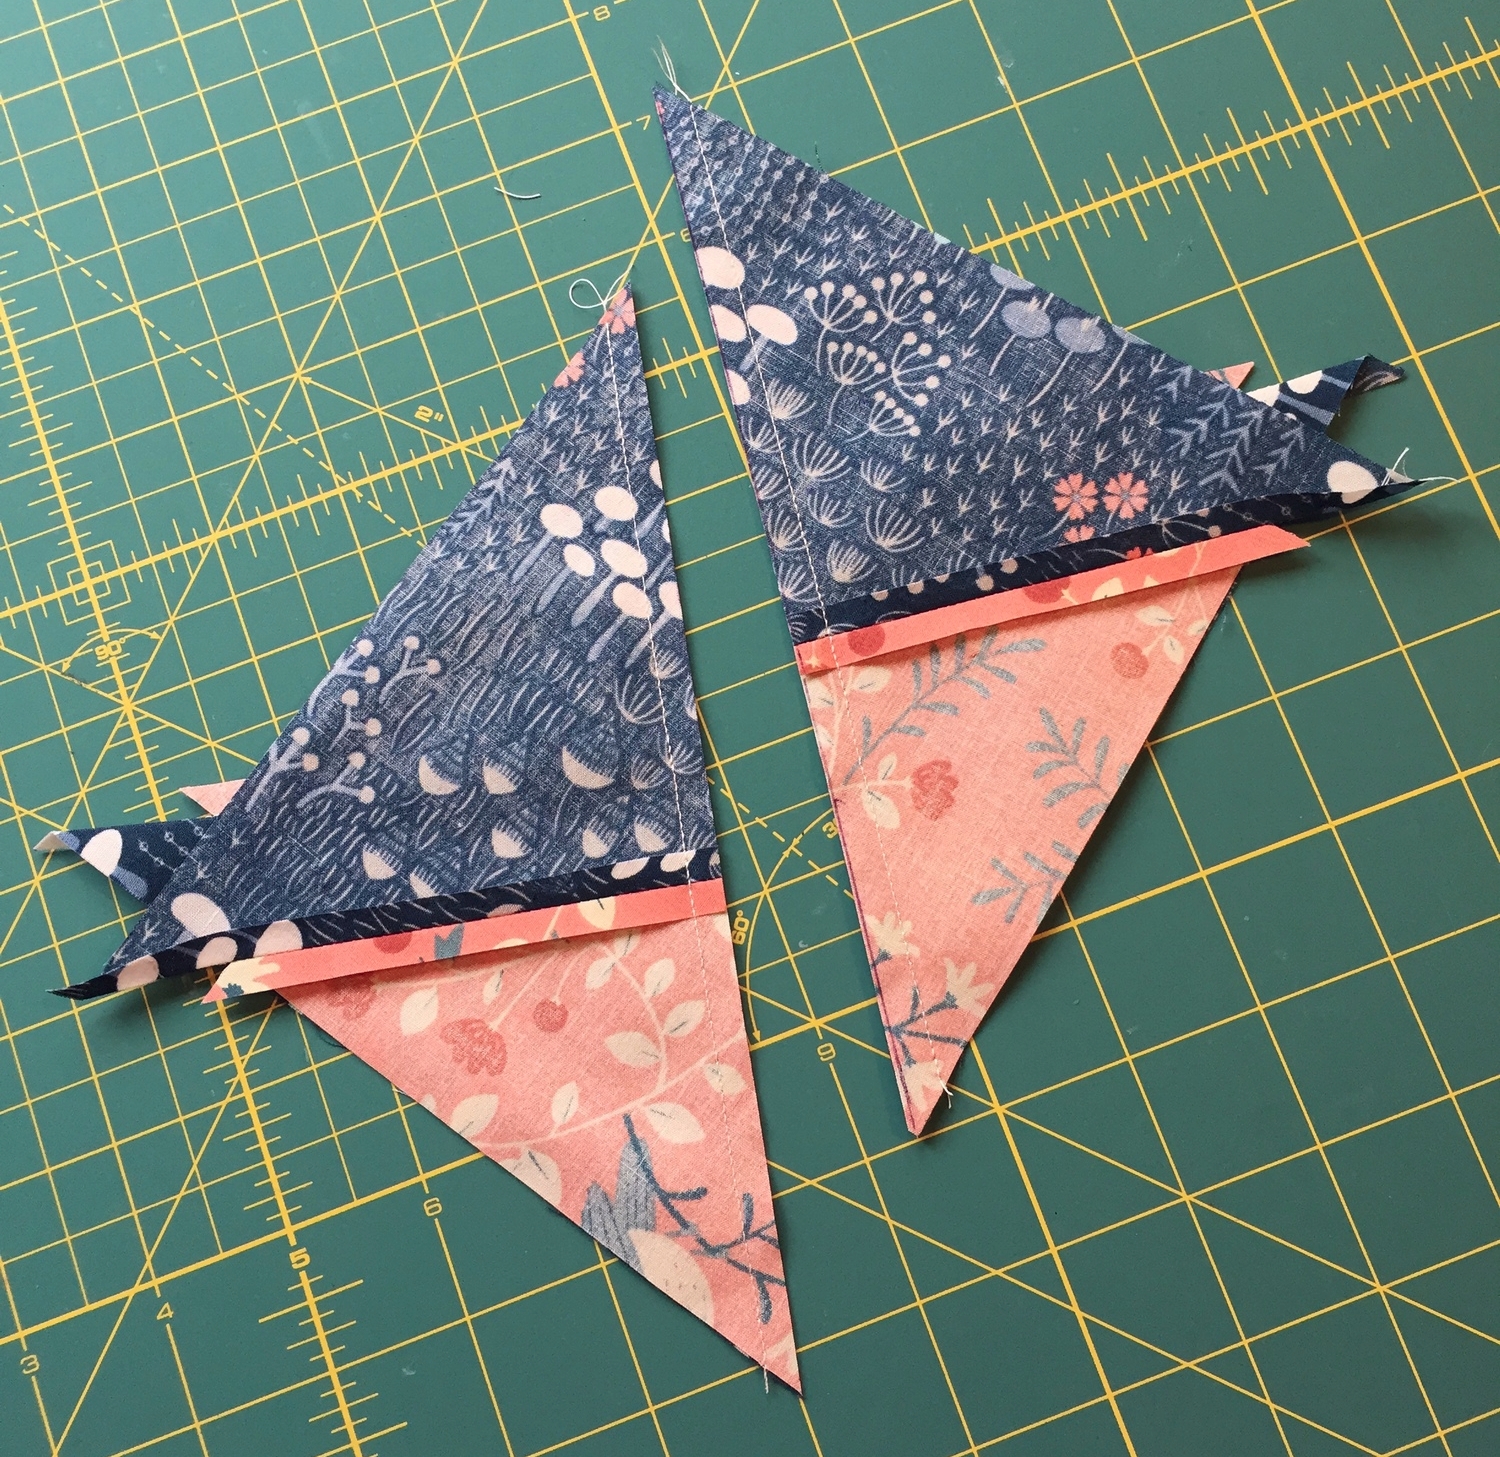
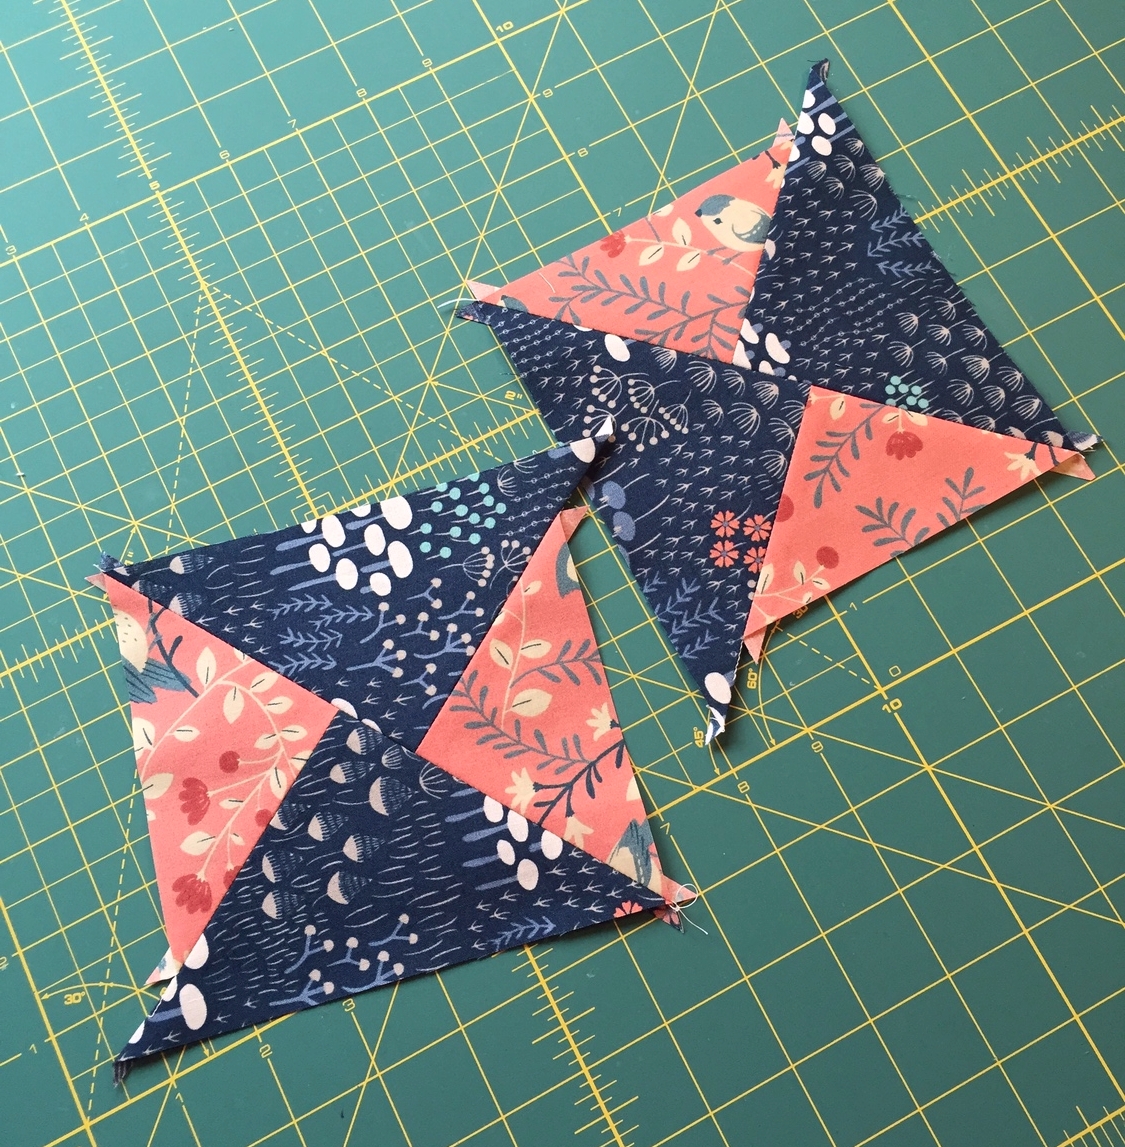
10.   Cut on diagonal line to yield 2 uneven quarter triangle squares.

11.   Press each unit open. Now you have two master blocks. What we need to do next is to obtain two Flying-Geese units from each master block. Each unit should measure 4½”x2½” (including seam allowances).

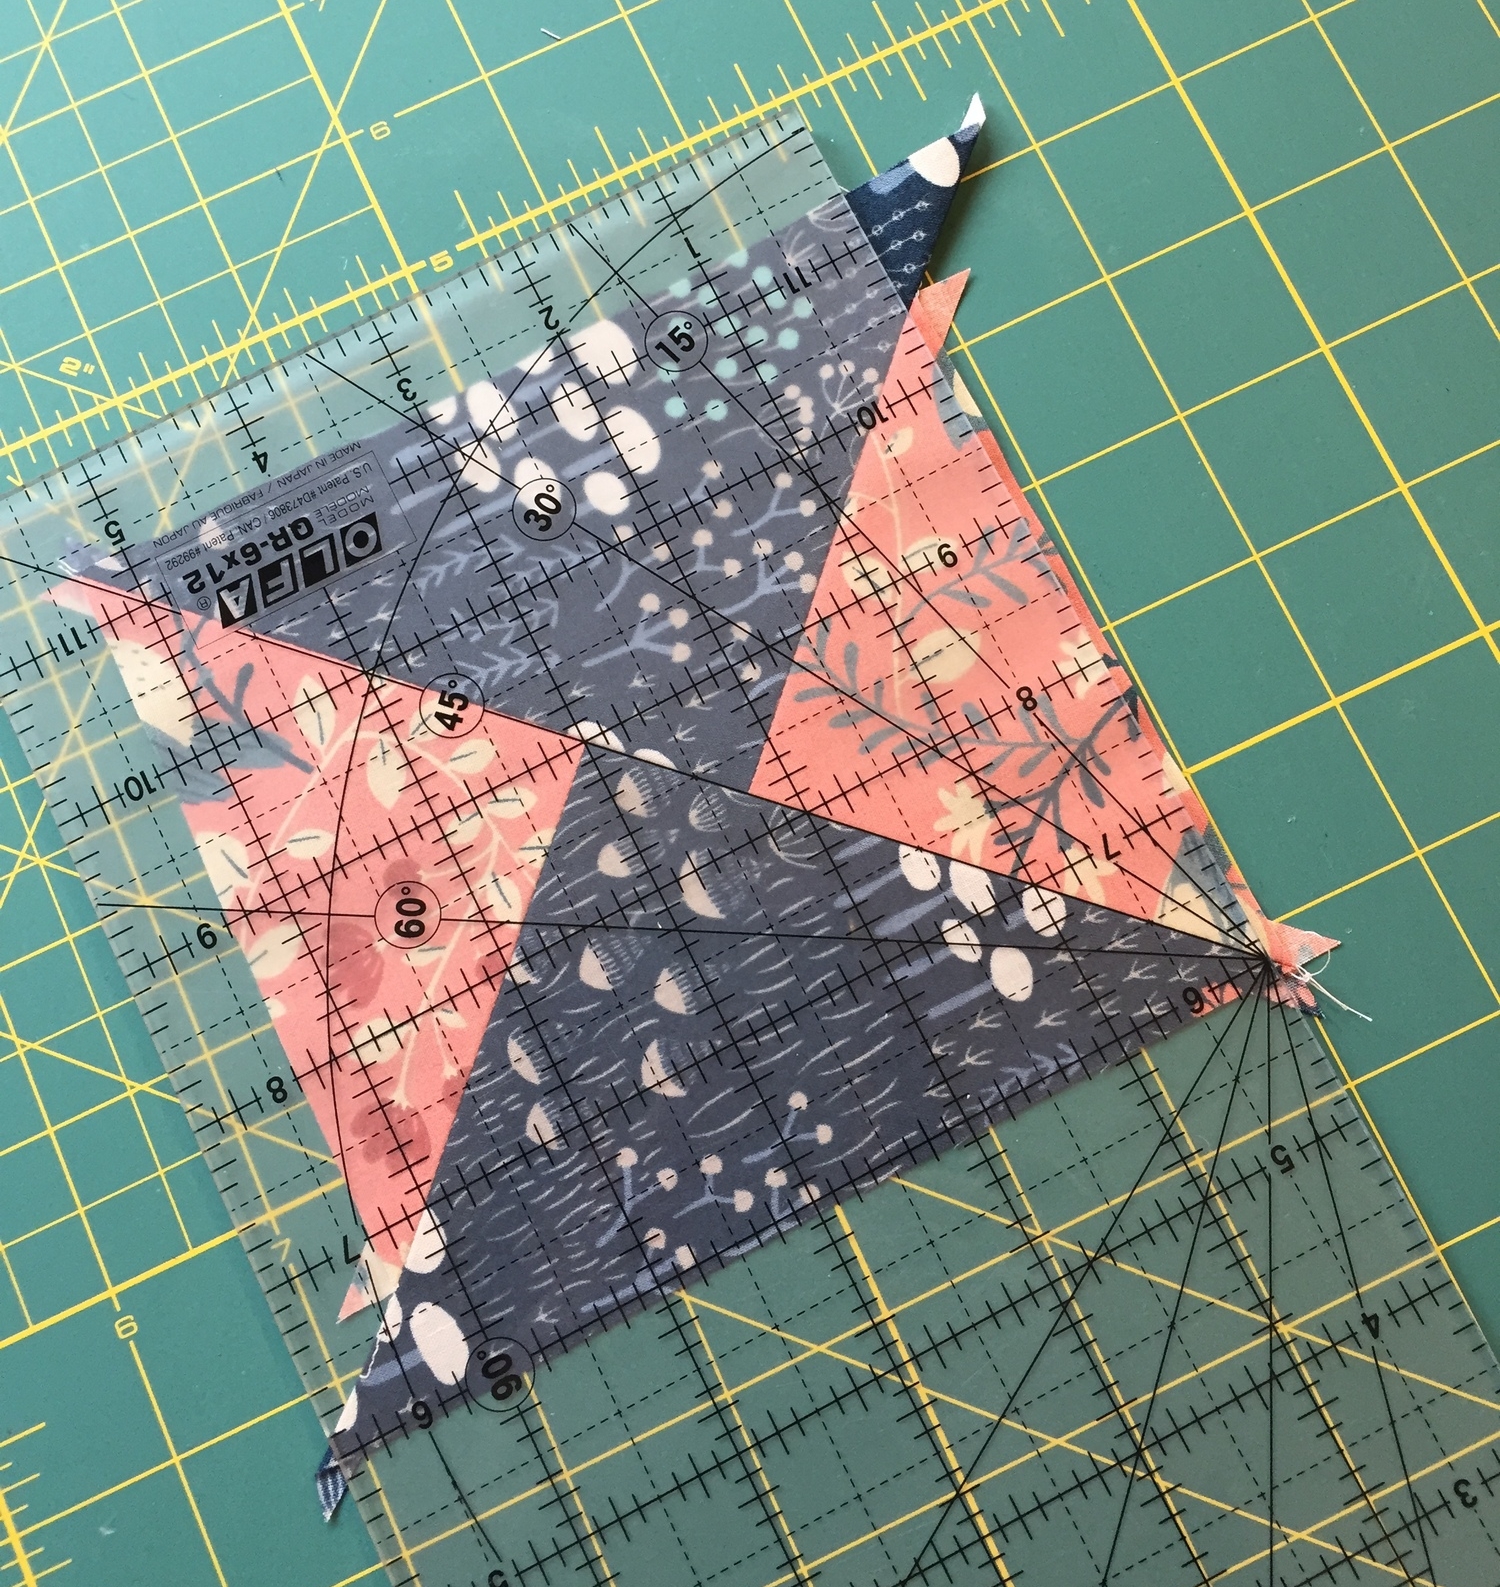
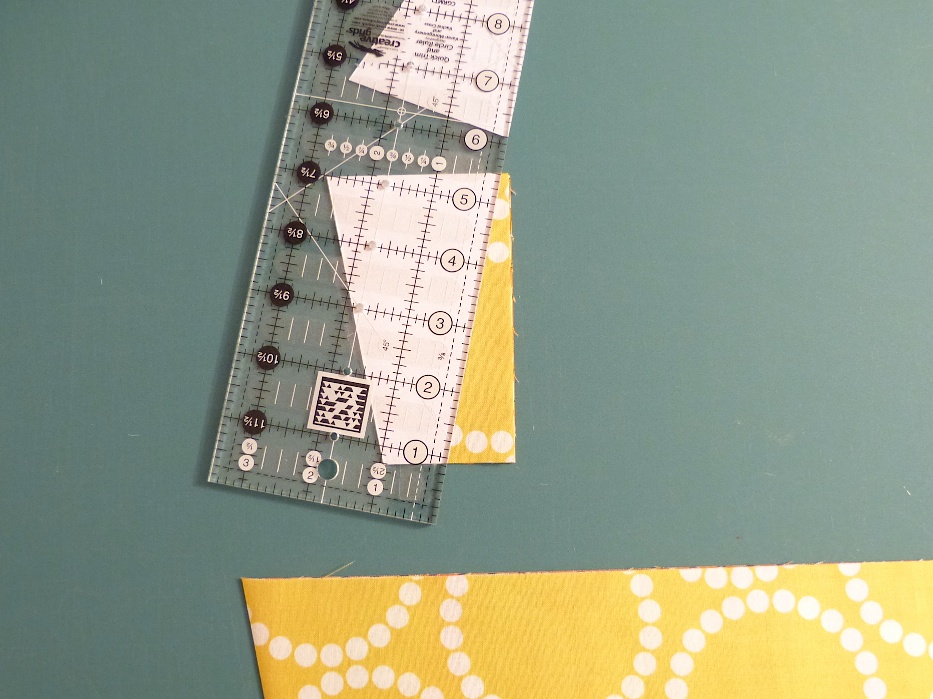
12.   Grab a rectangular rotary cutting ruler that has 45° markings. Position ruler as shown. Note how I align a 45° marking to a diagonal seam of the master block.

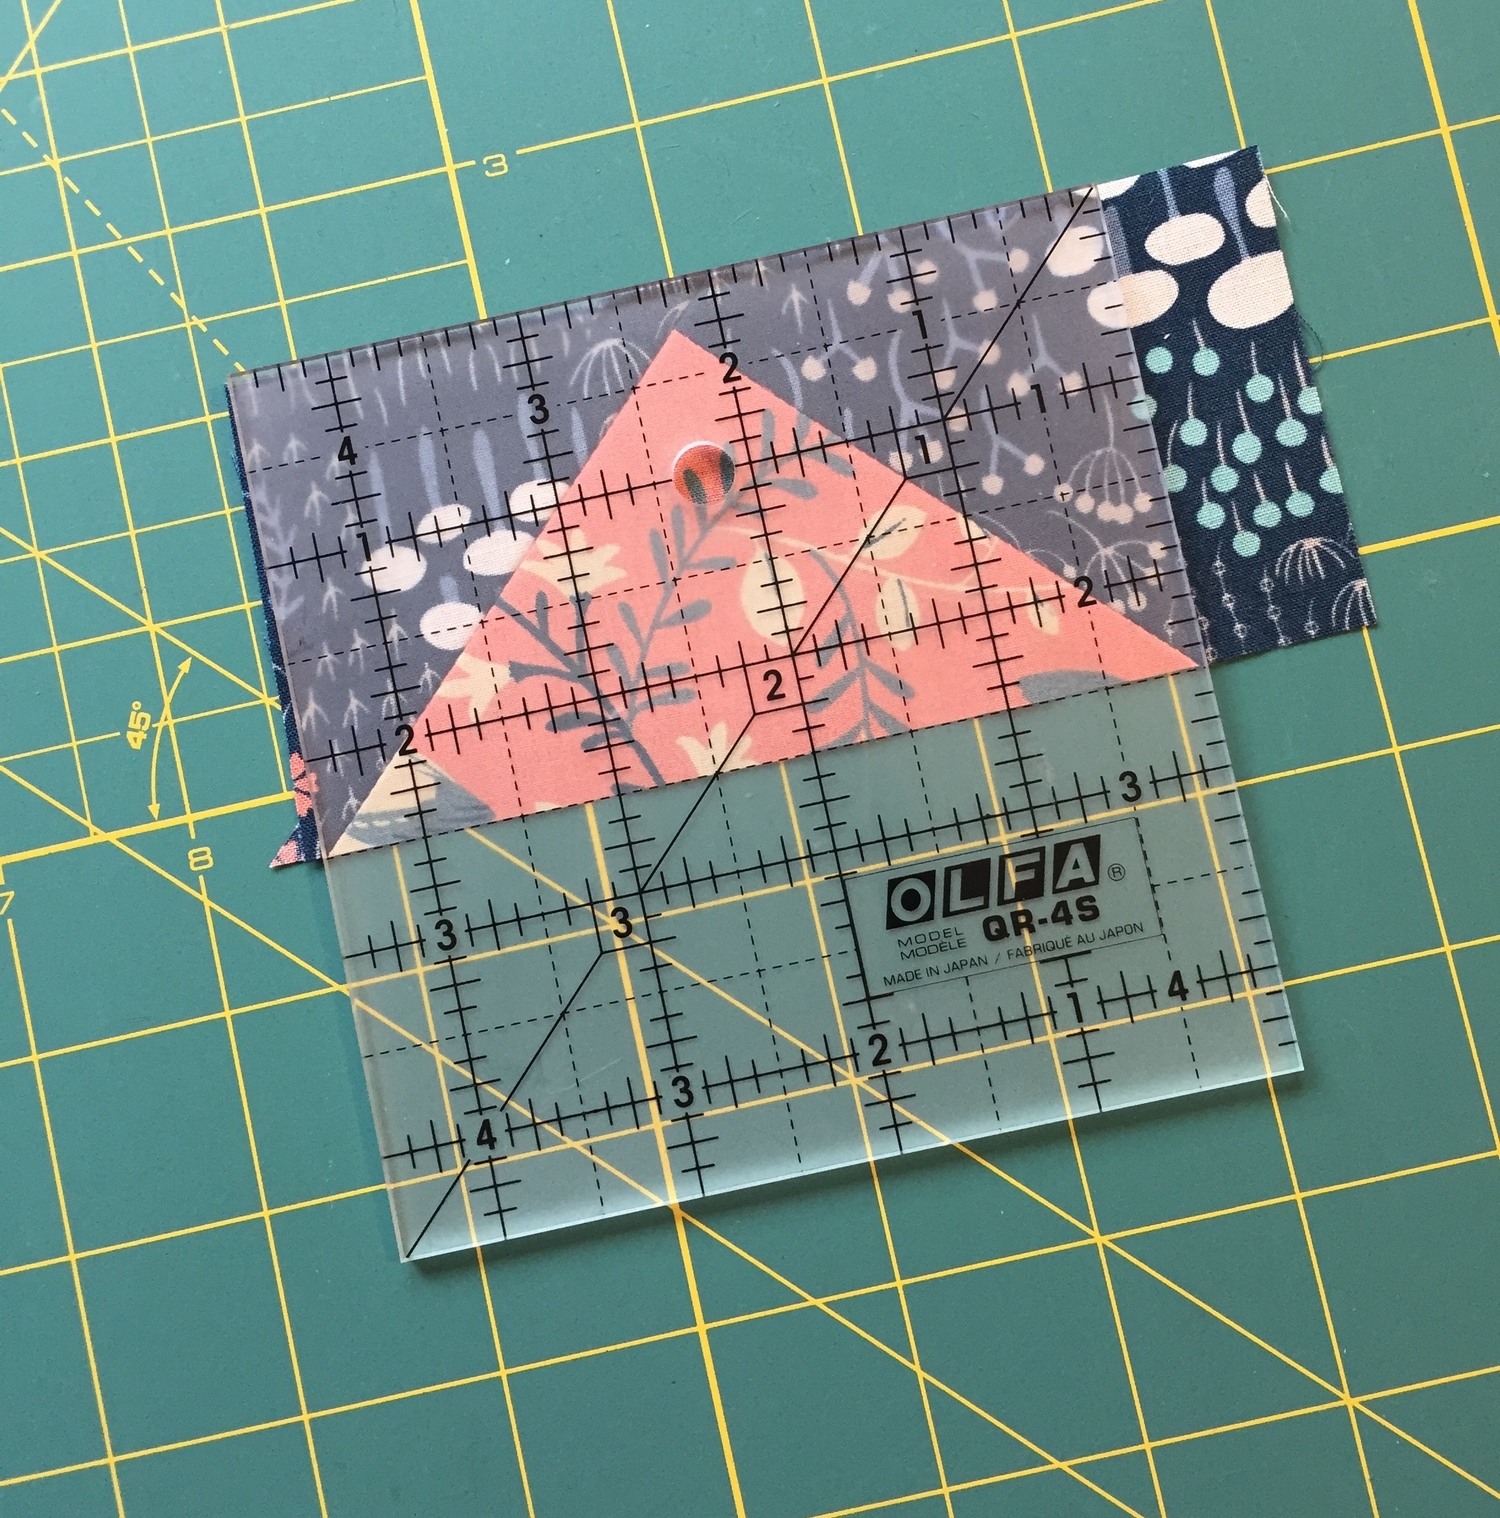
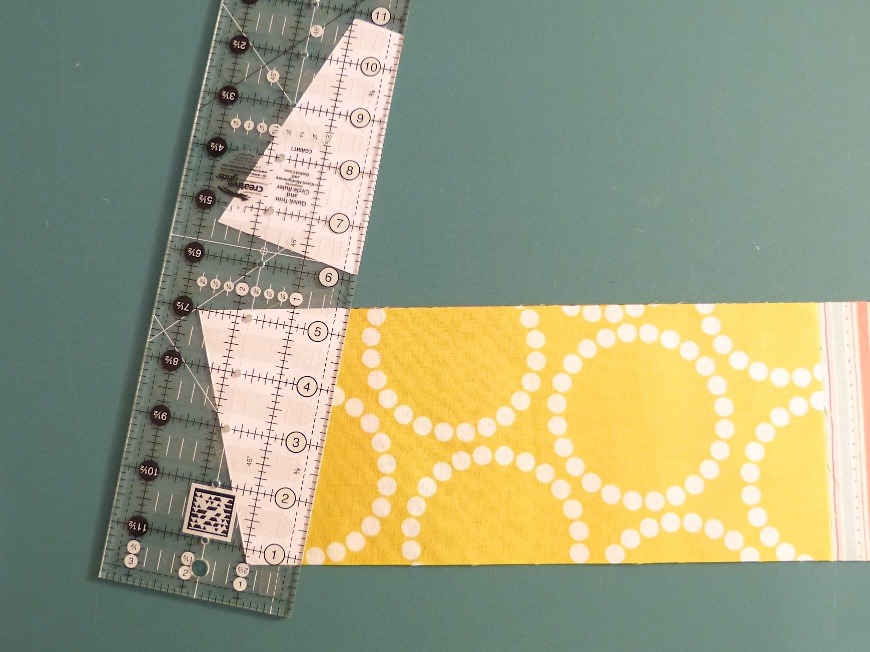
13.   Slightly adjust the position of the ruler so that you can get an exact 4½” edge for the base of the center triangle of a Frying-Goose unit. In the photo, I have one end of the base positioned at the 6” tick and the other end at the 10½” tick. 10½” – 6” = 4½”, all right? Once you get the position of the ruler right, trim to get the first clean edge.

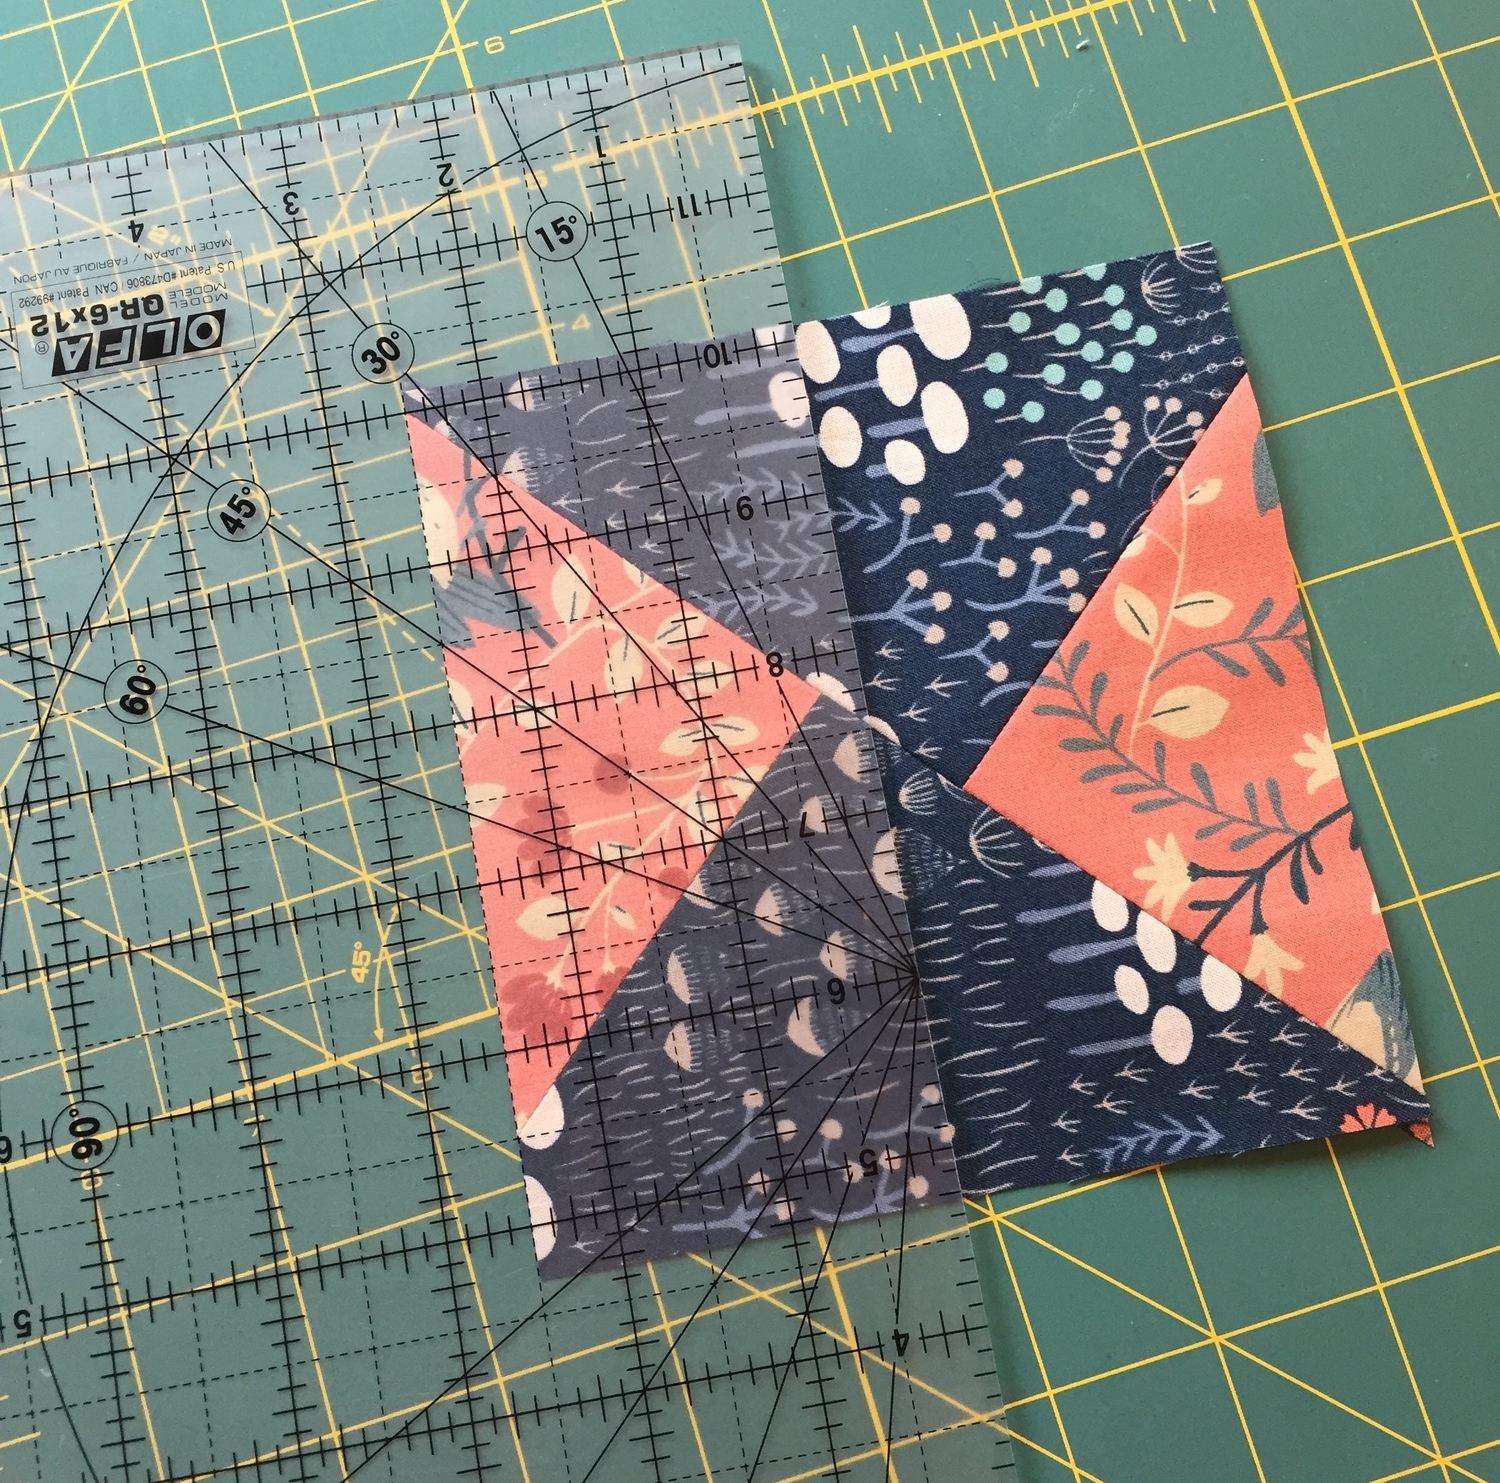
14.   Repeat step 13 to clean up the raw edge on the opposite side.

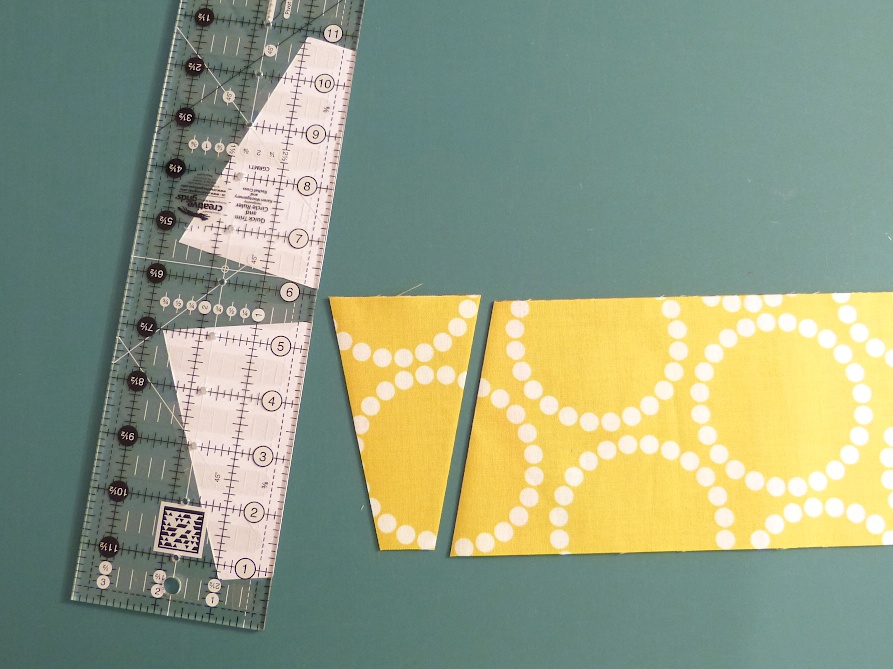
15.   Measure 2½” from a cleaned edge, cut.

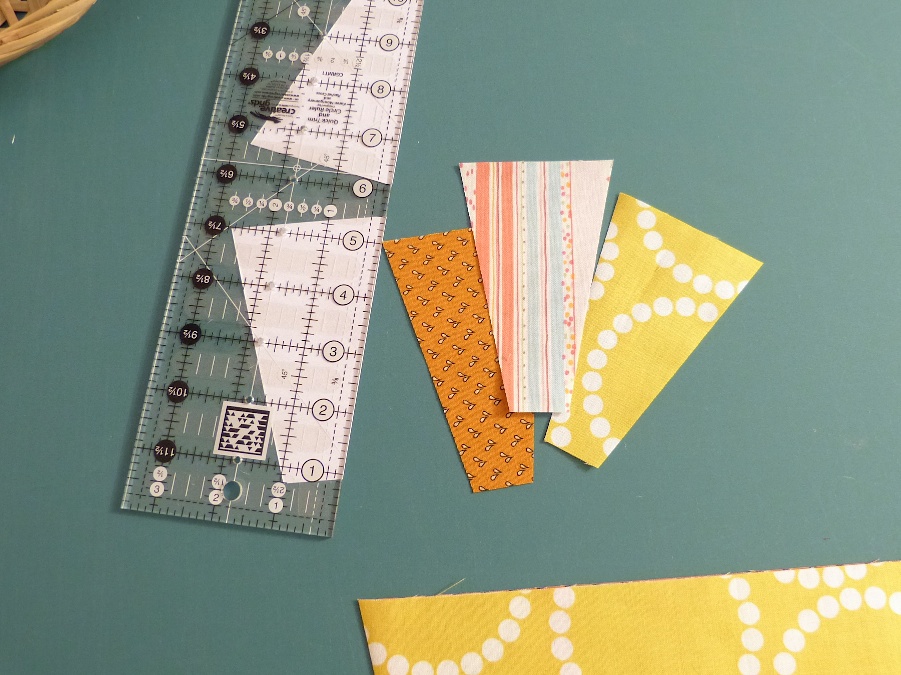
16.   Measure 2½” from the other cleaned edge, cut. Now you should have two almost done Flying-Geese units that measure exactly 2½” wide. Next we need to clean up the short edges.

17.   It’s much easier to clean the short edges. Simply align the base line of the center triangle to one of the horizontal markings on your ruler, have the edge of the ruler intersecting the lower right corner of the center triangle, and cut.

18.   Repeat step 17 for the other short edge.

19.   Do the same thing for the other master block to get a total of four extremely accurate Flying-Geese units.

Wonder how to determine the size of squares to cut? Here is the bonus. Instead of giving you a table, I will give you the formulas that work for any size. Let's say you want a Flying-Geese unit of x inches long and y inches wide (without seam allowances), then:

  • For the center triangle, you need to cut an (x+1.5") square.
  • For the side triangles, you need to cut a (2y+3") square.

In this tutorial, I wanted my Flying-Geese units measured 4" long by 2" wide. So I cut a 4"+1.5" = 5.5" square for the center triangle, and a 2x2"+3" = 7" square for the side triangles. Easy math, right?

Here is how I used the Flying-Geese units just made for my next project!

Here is how I used the Flying-Geese units just made for my next project!

Tutorial – Dresden Plates without a Specialty Ruler

Well, I do have a specialty ruler by EZ Quilting for cutting Dresden blades. But it is a 18 degree ruler so in order to make a full circle I have to cut 20 blades and sew 20 side seams, 20 top seams and press 20 side seams and 20 top seams. That’s tedious work. So in order to be less onerous I decided to reduce the number of blades and still make it look like a Dresden plate block. Mathematically it also needs to be easily divisible by 360 (to form a circle) and 4 (to be divisible in to halves and quarters so it can be easily centred to the background fabric and can be easily converted to a border design or fan patterns). The magic number happens to be 16. Since 16/20 = 0.8, it will take me 20% less time to assemble a block. Also, 360/16 = 22.5, it can be easily drafted, especially when I have access to AutoCAD. 

So, are you interested in Dresden along? Feel free to download and print the free Dresden templates (also supplied in the Patterns page) for this tutorial. The first page contains a set of two identical cutting templates for rotary cutting fabric blades, and the second page contains a pressing template for making a cardboard blade to press the pieced fabric blades centered. The finished Dresden Plate has a 10.5" diameter. 
This tutorial not only gives instructions on using the paper templates but also general guidelines on assembling a well-executed Dresden block. For all the efforts involved, it is worthwhile to do the job the right and accurate way. Without much more blahs, let's get started!

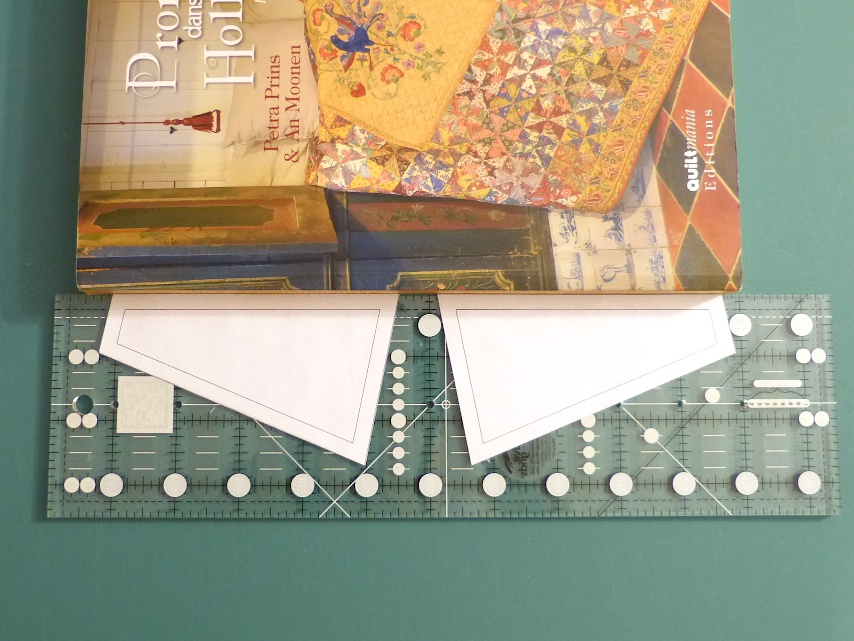
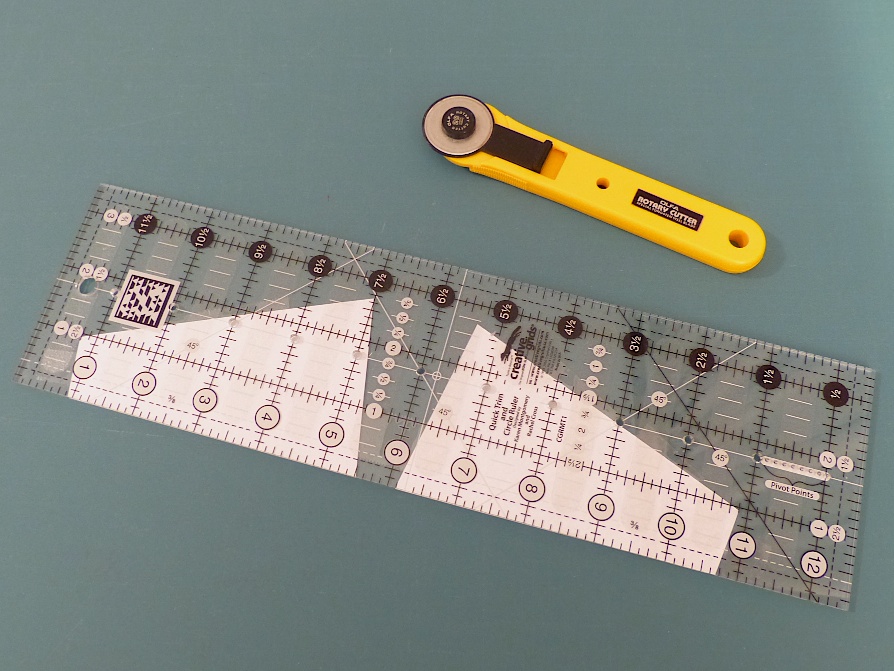
1. Print and cut the cutting templates. Please print with letter size paper and DO NOT SCALE the printing. Align and adhere the templates to one long edge of a rotary cutting ruler with invisible tape. Lightly pushing the ruler and templates against a book before taping helps to align the templates precisely. 

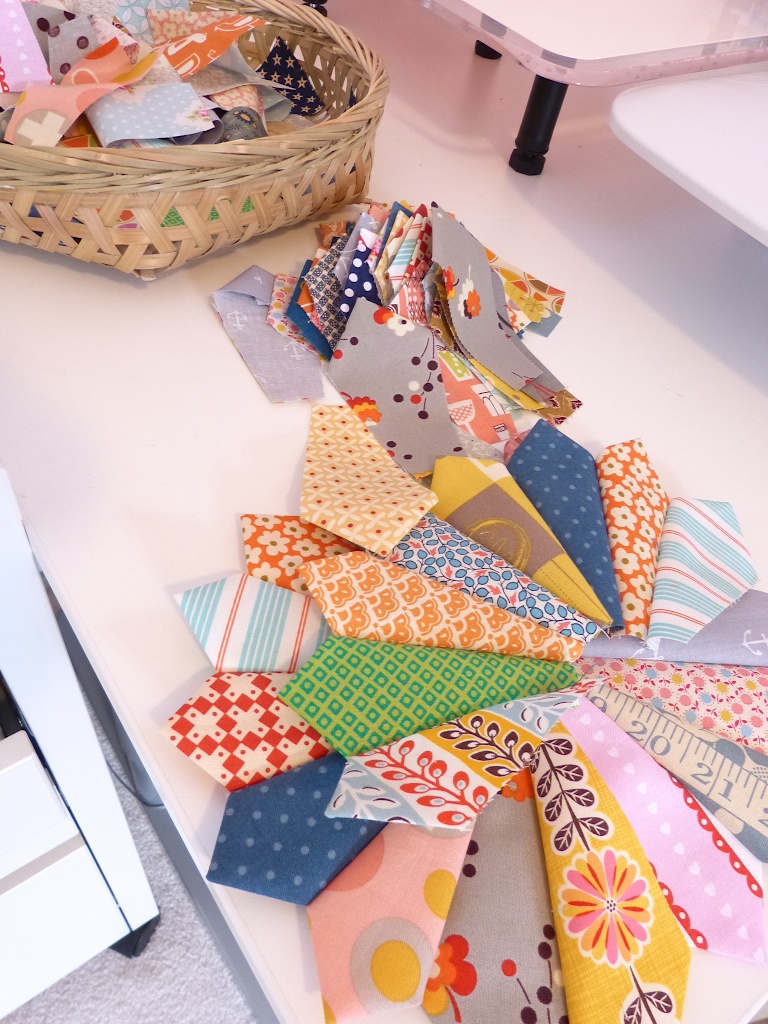
2. Prepare 4.5" wide fabric strips. Feel free to mix and match all sorts of prints and utilize the scrap pieces. Stack three to four strips together for speedy rotary cutting. In this tutorial I stacked three strips together. 

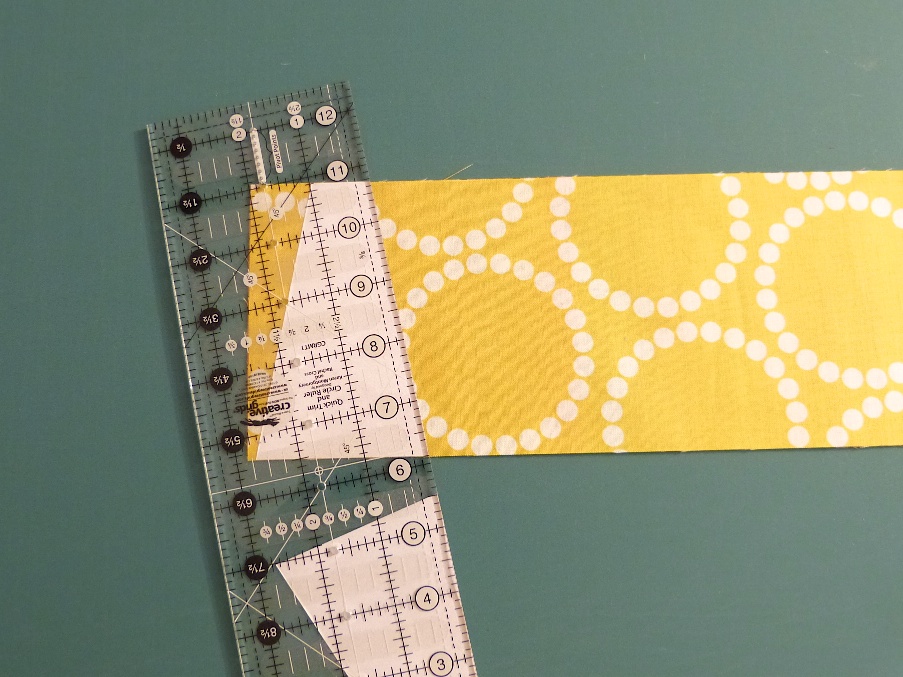
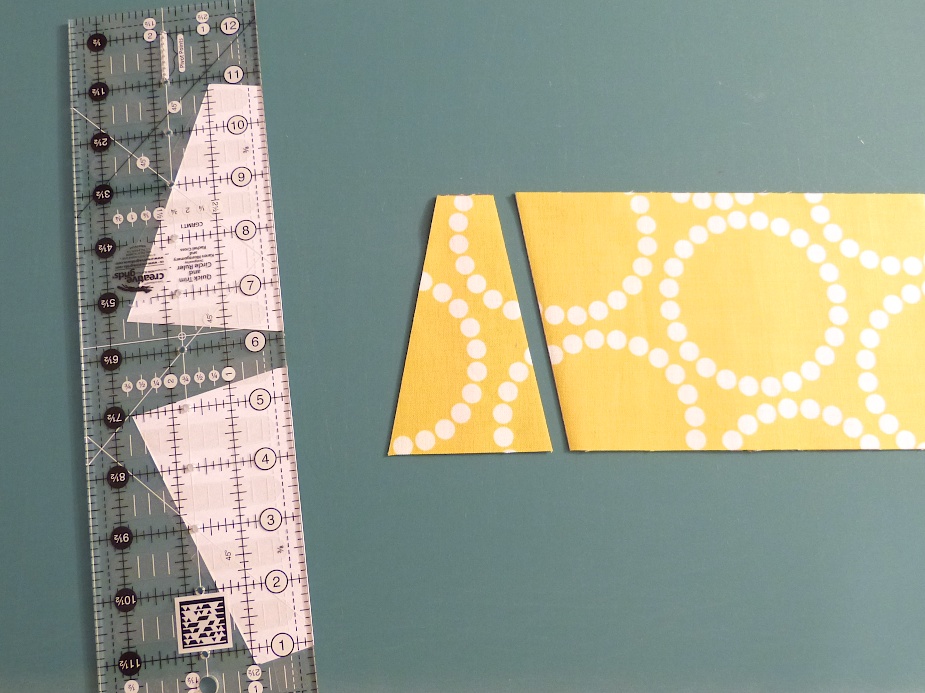
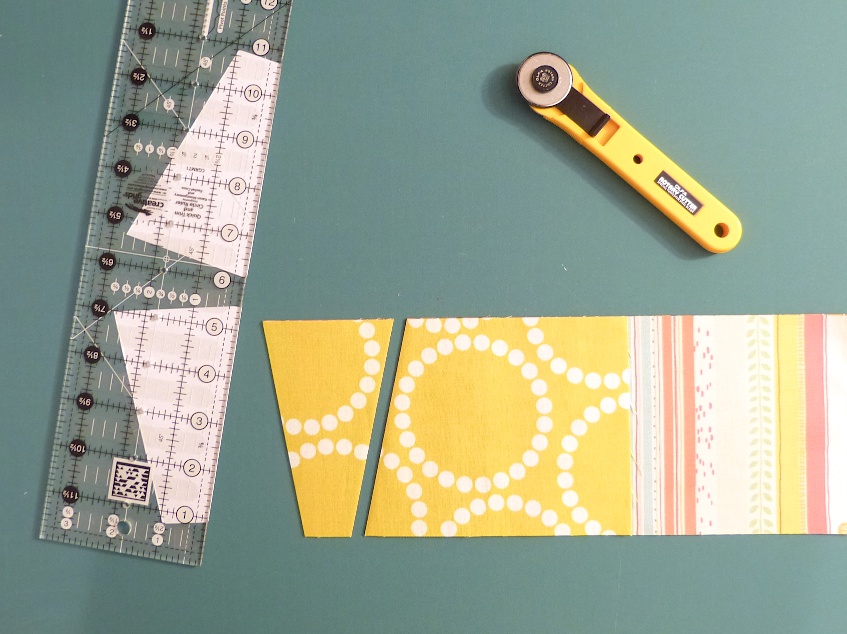
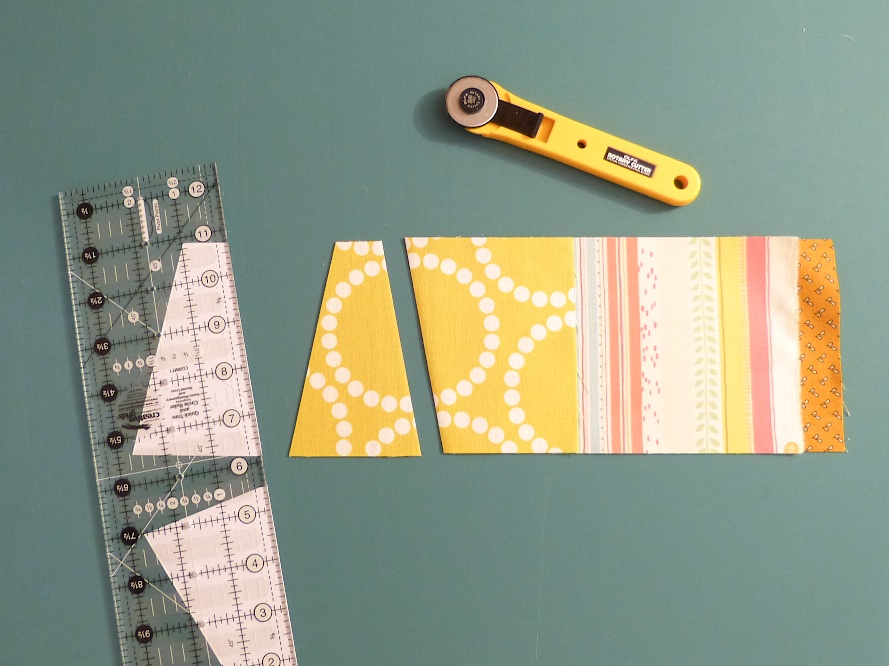
3. Position the ruler as shown, cut the first set of blades with the upper template. After the first cut, take the blade set out (but do not separate or distort the pieces), turn them up side down and cut the other side with the lower template. By now you may have realized why we need two templates: One for cutting the left edge and the other for the right edge!

4. For the subsequent cuts, simply move the ruler up and down, alternate between the upper and lower templates and cut as many blades as you need. Reminder: 16 blades = 1 Dresden plate. 

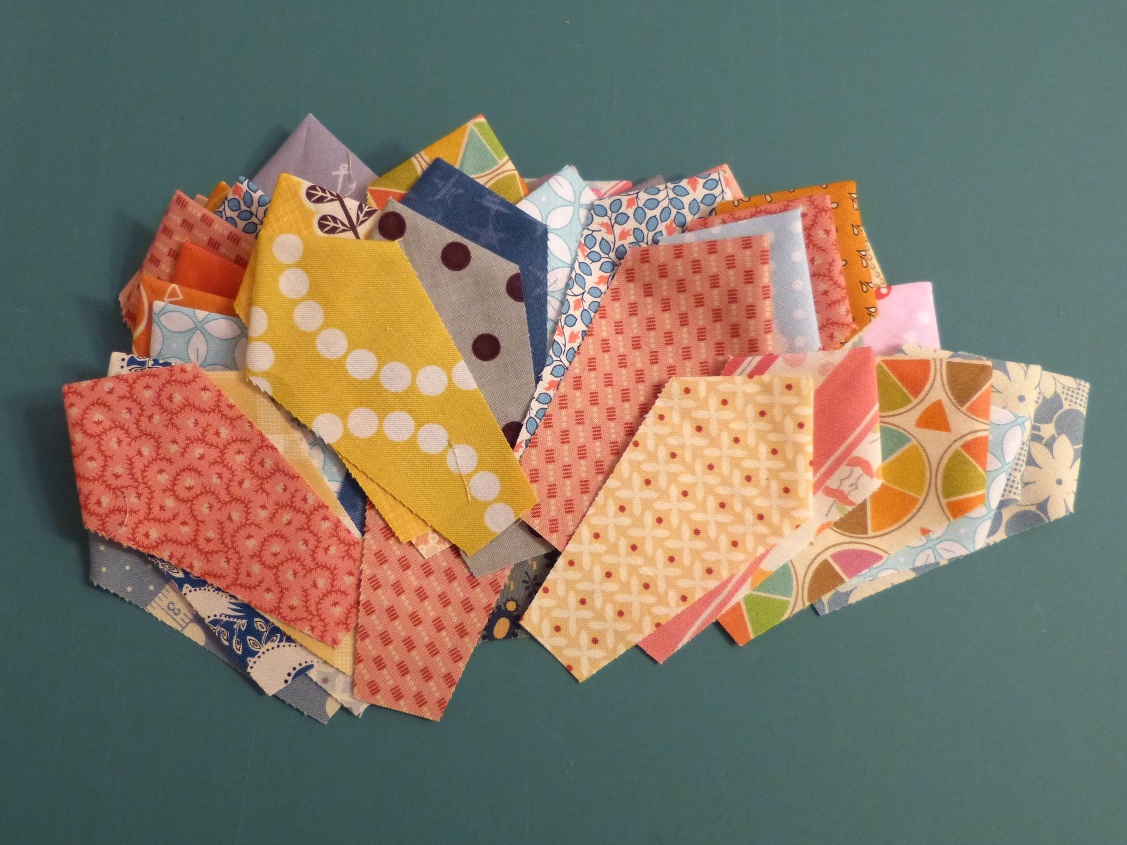
Beautiful, eh? Now, the cutting part is done. Let's proceed to the sewing part. 

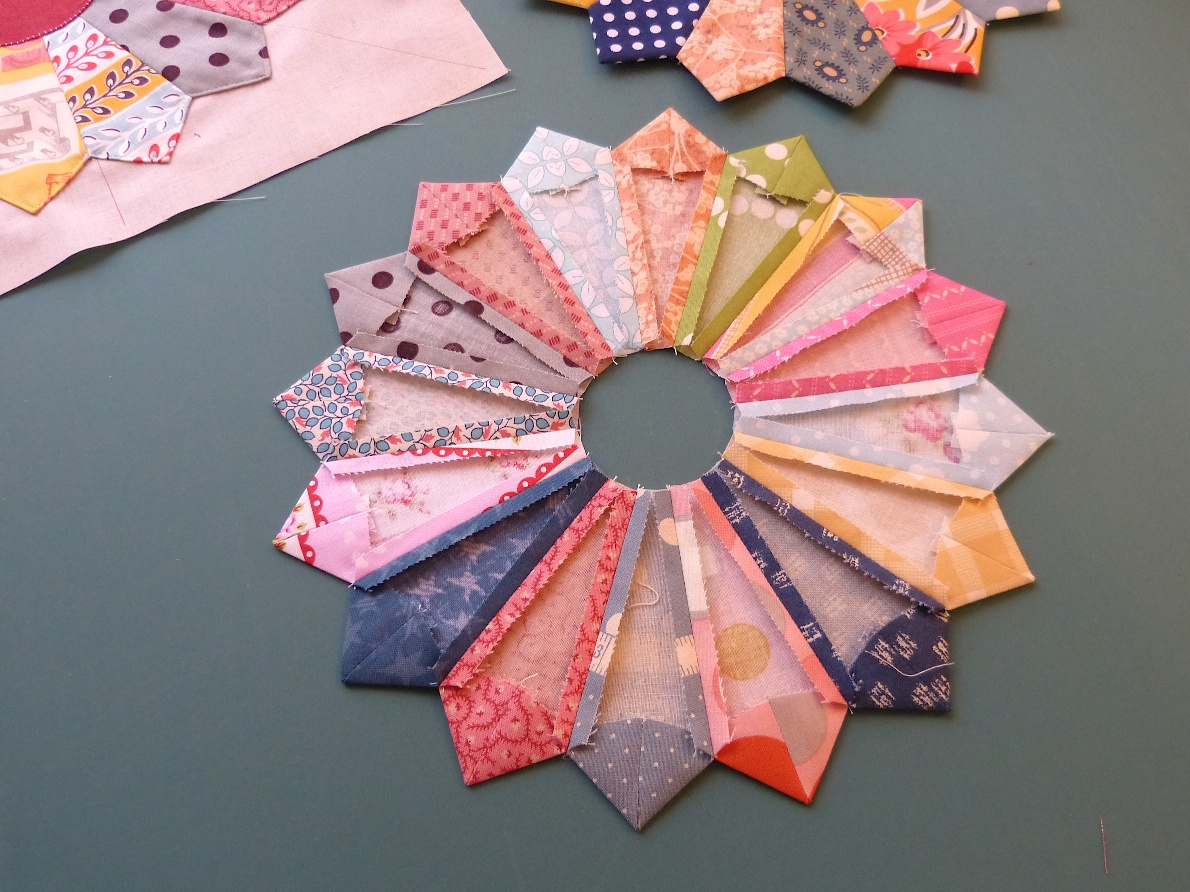
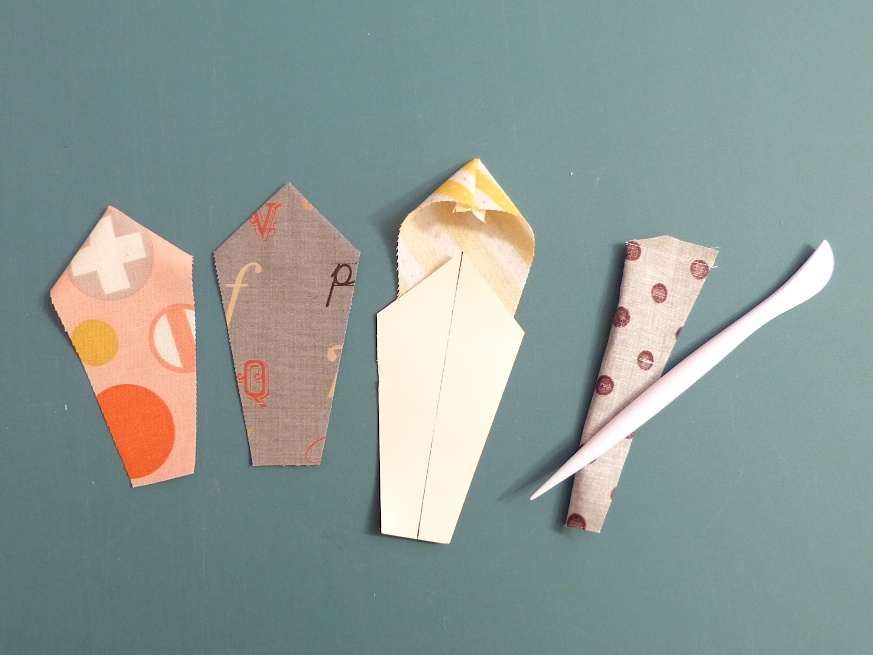
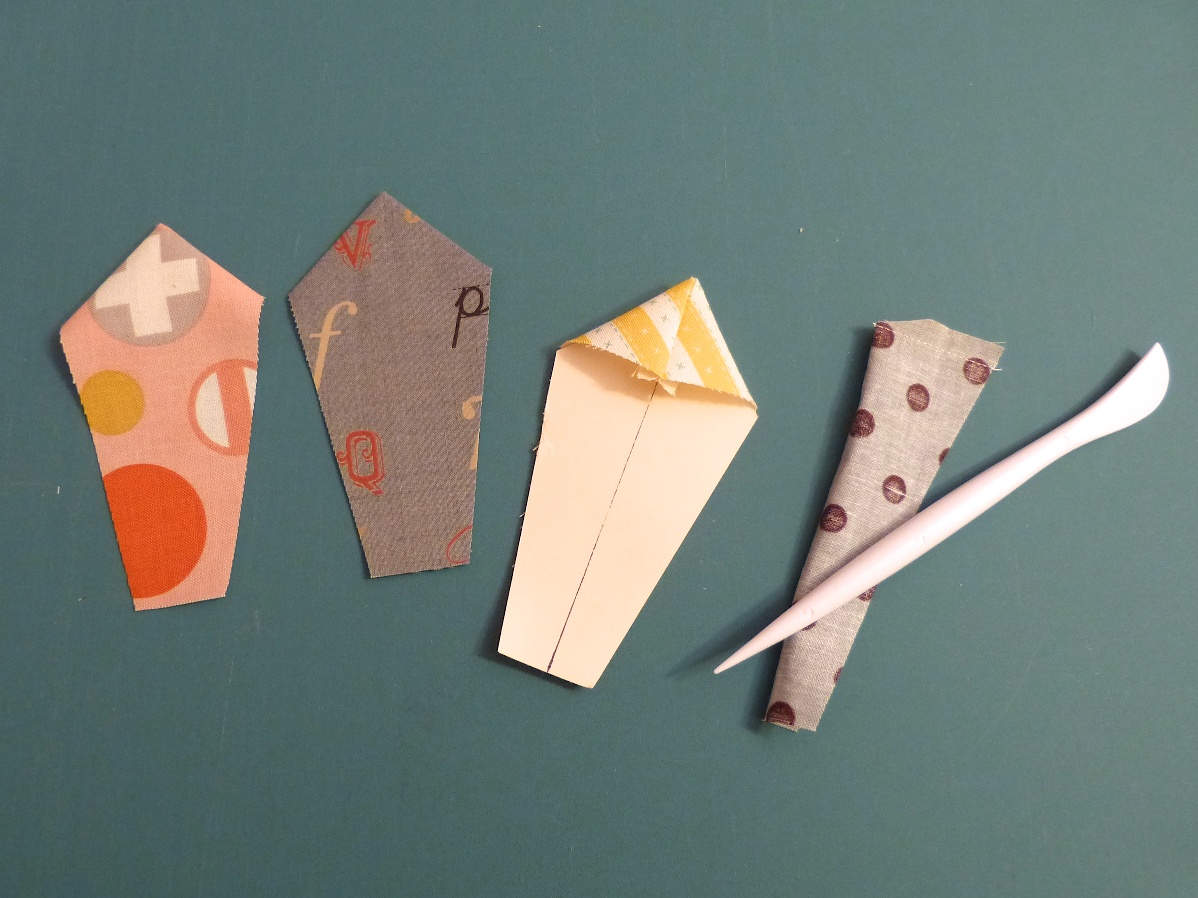
5. Fold each blade in half lengthwise, right sides together. With stitch length set at about 1.5-2 mm, sew across the top edge. Chain-piece all blades. When finish sewing, trim the corner at the fold, turn blade right side out and finger-press seam allowance open,  A stiletto or fabric turner helps to make the peak pointy. 

6. Now, print the pressing template (it does not contain the quarter inch seam allowance on the top edge) and use it to make a pressing block with medium to heavy weight cardboard (think of cereal boxes). Mark the center line on the cardboard block. Before you press a blade, insert the cardboard block into the blade, align the seam with the marked center line. Press seam allowances open (you need to finger-press first so that the seam allowances would be less wayward under the iron). 

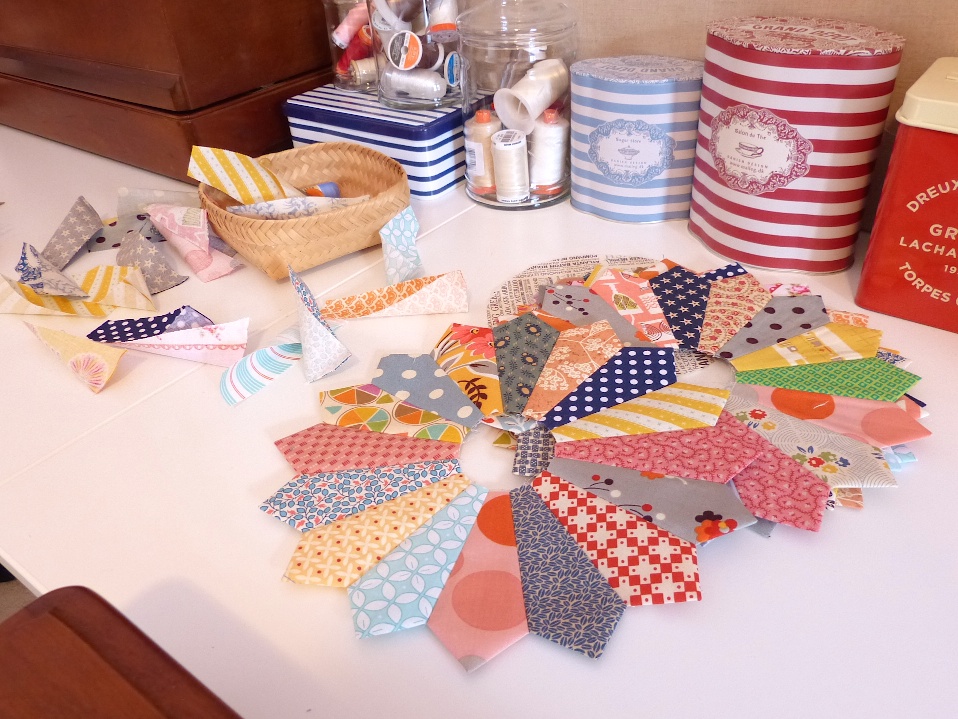
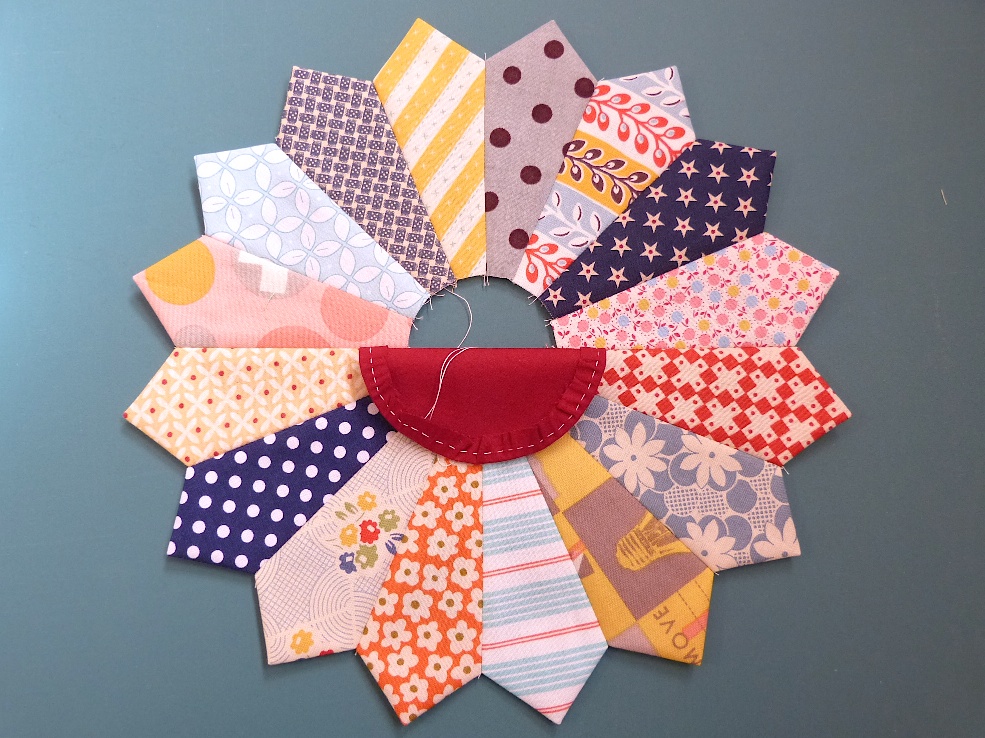
7. Back to the sewing machine. Piece 16 pressed blades together to form a "Dresden donut". Press seam allowances open (again I prefer all seam allowances opened to reduce bulkiness). 

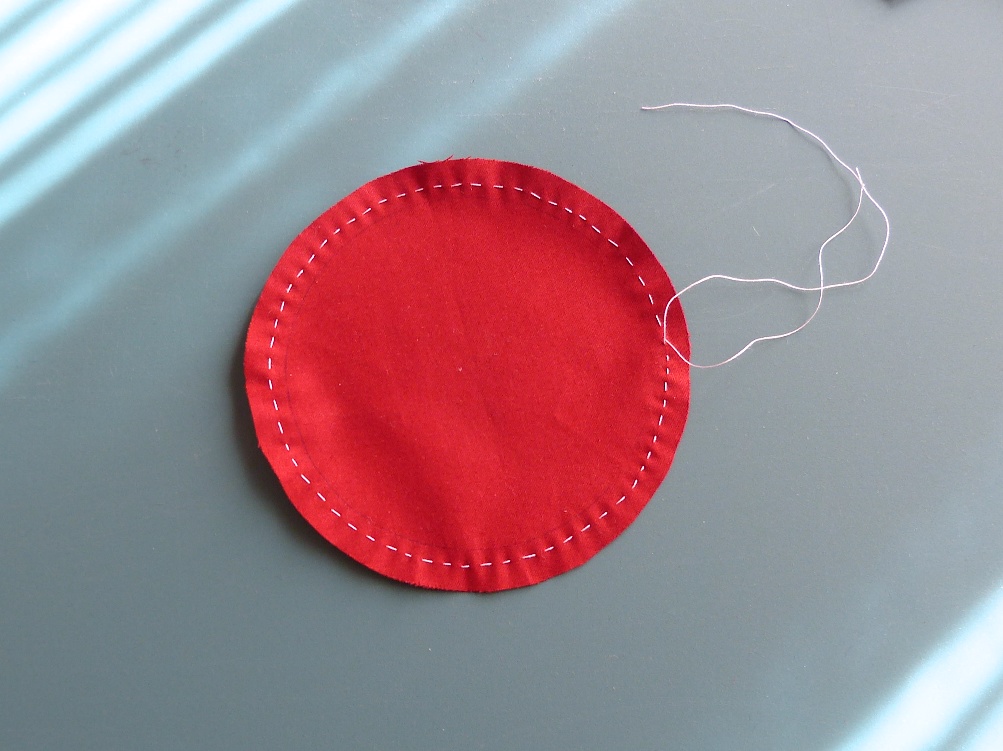
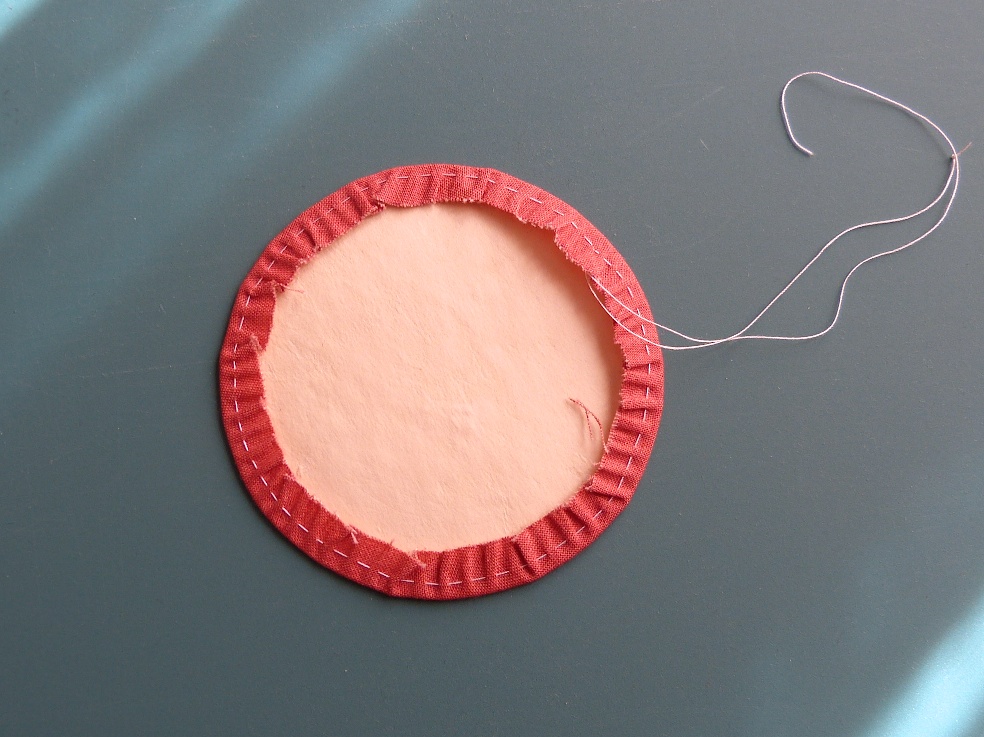
8. Cut 4.25" (roughly) diameter circles in fabric of your choice. Make a 3.5" diameter circular cardboard template (or other sizes/shapes your prefer). Prepare the centre piece as shown. Alternatively, you can use fusible appliqué methods to prepare the centre piece. 

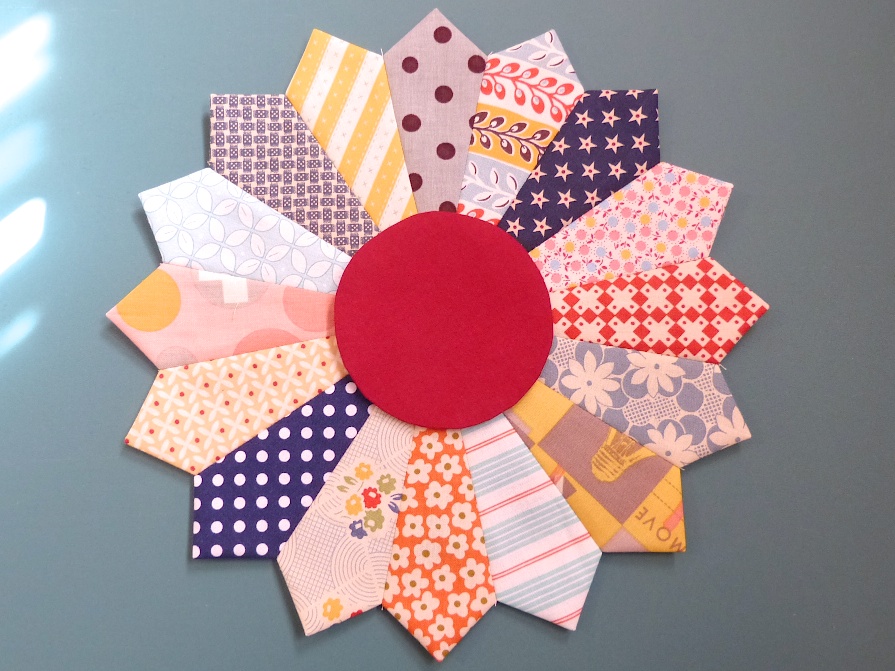
9. Pin the centre piece on top of the donut, machine or hand stitch them together. I machine stitched with a blanket stitch pattern. 

10. Finally, prepare a 12.5" x 12.5" background square, center the Dresden plate on top. The most efficient way to center the block is to simply draw an "X", corner to corner, on the background square. Finally, I did straight edge stitching along the periphery of the Dresden plate to stitch them together. 

I must admit it's a lengthy process but lots of fun! Feel free to jump back and forth within the assembly line and make the work less tedious! I am sure you will be 100% pleased with the final results!

Tutorial - Star Transformations

So you don't like Y-seams but love those stunning eight-point stars blocks? Here is a solution for you. The trick is very simple - all you need to do is to modify the LeMoyne Star based blocks to Sawtooth Star (a.k.a. Variable Star) based blocks. Since blocks of the latter category can be pieced with half-square triangles, flying-geese, square-in-a-square and such likes, many people considered them easier to draft and make. 

Do you notice the difference? Diamonds of the LeMoyne Star have edges in equal length, whereas "diamonds" of the Sawtooth Star are made up of two triangles and hence the edges are not equal in length. Also, notice that diamonds of the Sawtooth Star have diagonals meet at one line with their adjacent diamonds and formed four half-square triangles and four flying-geese. That's not the case for the LeMoyne Star block. Interesting, eh? But, keep in mind that though you can eliminate Y-seams, more patches are required to produce the same visual effect. Similar transformation can be applied to more intricate blocks...

The list can go on and on. The only limitation is your imagination.

Star of Magi and Y-Seams made easy

A couple months ago I made the Swoon block and fell in love. But it is really a mock version of the Star of Magi block, which is based on an eight-point star grid system, and requires several Y-seams to joint the patches together.

It is a lovely block, but I found no detailed instructions on making it, and I had to figure it out all by myself. It was a fun but challenging process since I had never done Y-seams previously. Now, I have pieced tens of Star of Magi successfully, and I would love to share with you how I make them easily without any marking or difficult measuring/cutting involved . 

Credits: 

My method was inspired and derived from Sharyn Craig and Harriet Hargrave. In their books The Art of Classic Quiltmaking and Quilter's Academy Vol. 4 - Senior Year, very detailed instructions are given on how to construct the LeMoyne Star in the no marking way. I personally dislike marking dots to indicate beginning/ending of 1/4" seam line because it slows down the piecing procedure, and introduces another source of error/imprecision. 

Prep: 

A basic sewing machine that can produce perfect 1/4" seam allowance.
Seam ripper.
Some fine pins.
A fast-fade or water-soluble pen (Note: not for making dots...).
Thread nipper or scissors.
Dry hot iron. 

A Quarter Triangle Ruler and a straight ruler with 45 degree makings would make the cutting fast and easy.

Finish Measurements:

14.5" is just the perfect finish size for Star of Magi.  It makes the cutting of all patches within the 1/8" realm. No 1/16" or 1/32" at all! Indeed, the finish measurements of the half-prisms are 3" wide, the diamonds are 2" wide, and the quar…

14.5" is just the perfect finish size for Star of Magi.  It makes the cutting of all patches within the 1/8" realm. No 1/16" or 1/32" at all! Indeed, the finish measurements of the half-prisms are 3" wide, the diamonds are 2" wide, and the quarter-triangles are 1.5" by 3" - all approachable numbers!

Cutting Instructions:

With white tone fabrics, use the triangle ruler to cut 2" wide strips, and sub-cut to yield 24 quarter-square triangles (8 for inner round and 16 for outer round).

With blue tone fabrics, use the straight ruler to cut 2" wide strips, and sub-cut to yield 12 diamonds (4 for inner round and 8 for outer round).

With yellow tone fabrics, use the straight ruler to cut 2" wide strips, and sub-cut to yield 4 diamonds.

With red tone fabrics, use the straight ruler to cut 3.5" wide strips, and sub-cut to yield 8 4-1/8" long rectangles. Then, use the triangle ruler to trim two corners to make the half-prism shape.

Piecing Procedure:

symbols.jpg

1. With A on top of B, stitch from edge to edge.

2. With A on top of C, stitch from edge and end with back-stitching or back-tacking right before Seam AB. Do not stitch beyond the stitching of Seam AB and do not sew over seam allowance. To see the seam line clearly, highlight the end portion of Seam AB with a fast-fade or water-soluble pen so when you see the needle approaching to the marking you will know that it's time to stop. 

3. In a similar manner, with C on top of B, joint BC. You may want to unpick the first two or three stitches of Seam AB with a seam ripper to let C lay smoothly on top of B. 

4. Press Unit 1a as shown. I recommend  press with a hot, dry iron. Steams may distort the unit as some patches are cut on the bias. 

Hint: Chain-piece to speed up!

 Follow the instructions given for Unit 1a, make four Unit 2a. 

When Unit 1a and Unit 2a are done, you will have the following:  

 When Unit 3a are all done, you will have the following:

When Unit 4 are all done, you will have the following: 

Now you are done: 

Look at how the seam allowances spinning and fanned at the centre. It is flat and crisp!